With ModSecurity reaching its end of life in July 2024, many organizations are looking for a modern alternative to secure their web applications and APIs. Open-appsec is stepping up as a leading open-source solution, offering a comprehensive, fully automated Web Application and API Security from Checkpoint, making it an ideal choice for those looking to transition from ModSecurity.
 openappsec
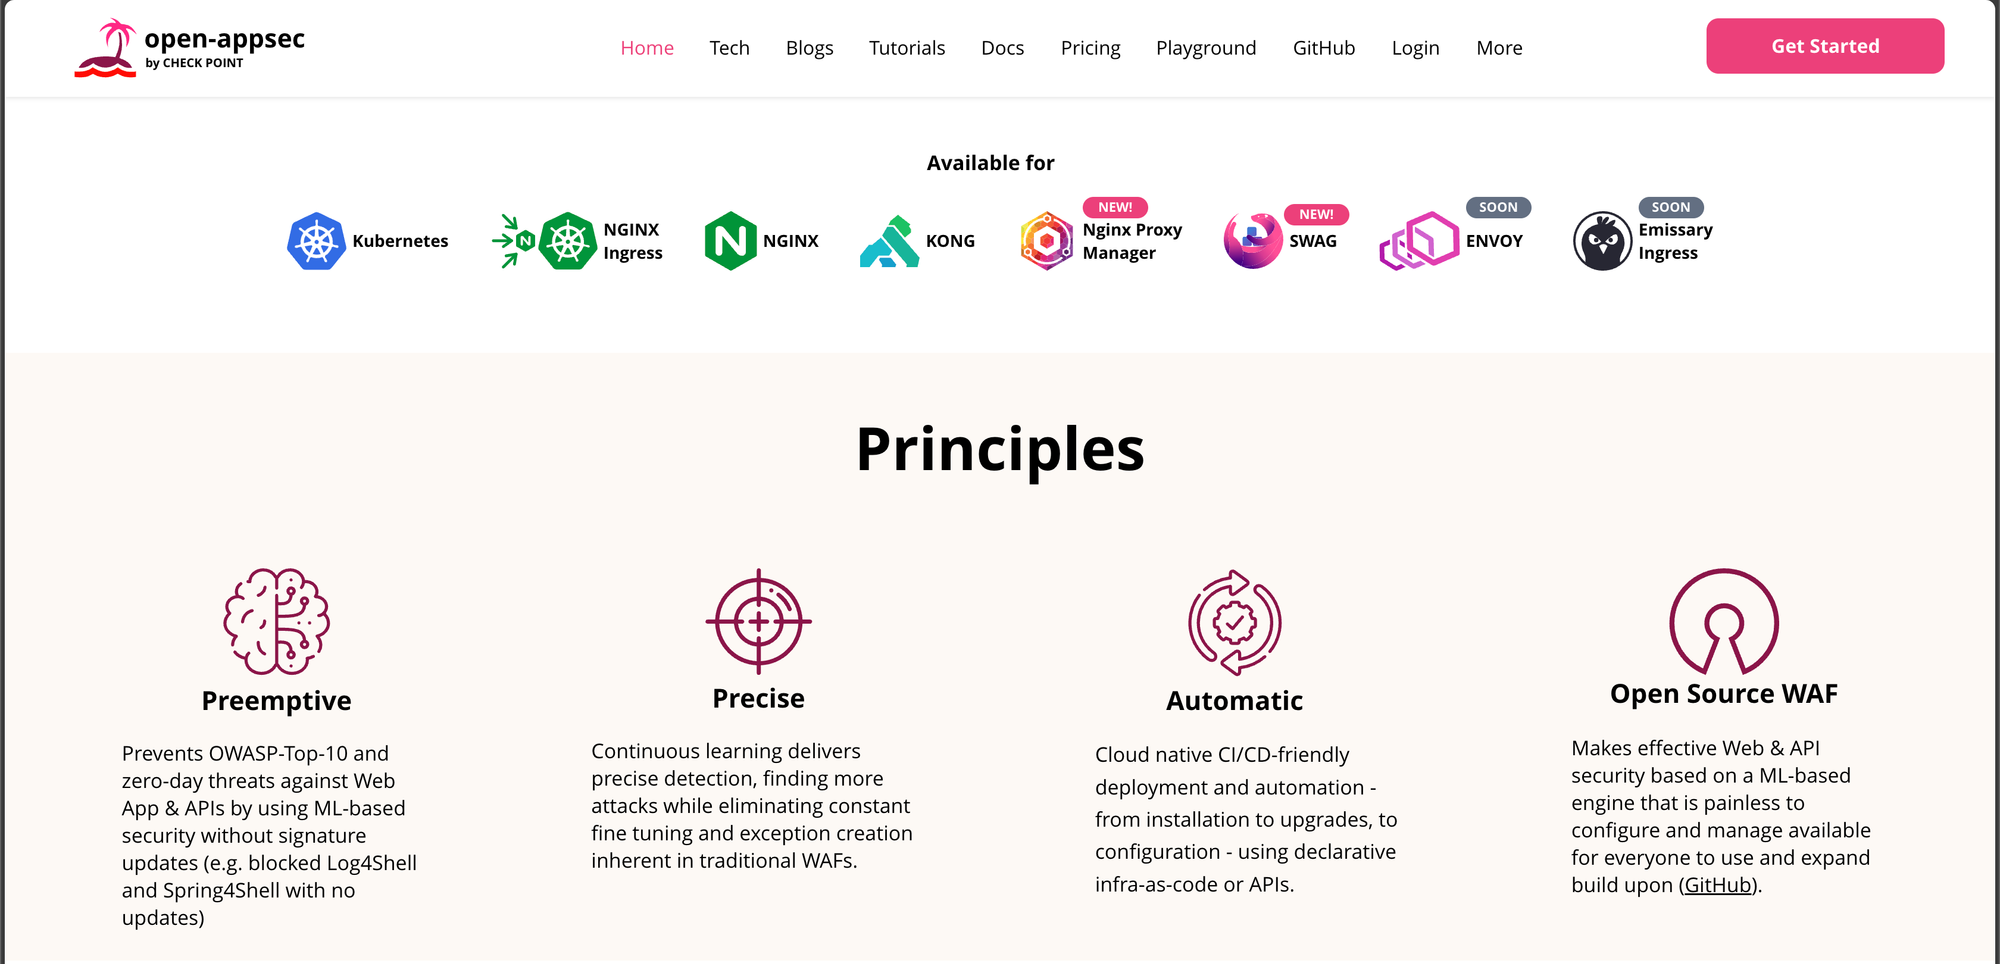
Intro to Open-appsec
Open-appsec leverages machine learning to deliver a fully automated solution for protecting web applications and APIs. Unlike ModSecurity, which depends on static signatures, Open-appsec continuously monitors network traffic to proactively identify both known threats and zero-day vulnerabilities. This dynamic approach offers enhanced defense against the fast-changing landscape of cyber threats.
Check the comparison beetween NGINX App Protect, ModSecurity WAF, and Open-appsec.
Open-appsec integrates seamlessly as an add-on with widely used platforms like NGINX, Kubernetes Ingress Controller, and Kong API Gateway. It claims to offer easier maintenance compared to signature-based WAFs by utilizing automated learning and exception handling, eliminating the need for manual rule adjustments. This approach is designed to free up security resources.
The open-appsec engine learns how users normally interact with your web application. It then uses this information to automatically detect requests that fall outside of normal operations, and conducts further analysis to decide whether the request is malicious or not.
Upon every HTTP request, all parts are decoded, JSON and XML sections are extracted, and any IP-level access control is applied.
Every request to the application goes through two phases:
- Multiple variables are fed to the machine-learning engine. These variables, which are either directly extracted from the HTTP request or decoded from different parts of the payload, include attack indicators, IP addresses, user agents, fingerprints, and many other considerations. The supervised model of the machine learning engine uses these variables to compare the request with many common attack patterns found across the globe.
- If the request is identified as a valid and legitimate request the request is allowed, and forwarded to your application. If, however, the request is considered suspicious or high risk, it then gets evaluated by the unsupervised model, which was trained in your specific environment. This model uses information such as the URL and the users involved to create a final confidence score that determines whether the request should be allowed or blocked.

source: https://github.com/openappsec/openappsec
Prerequisites
- Linux machine with:
wgetcommand-line tool installed on your linux machine
Installation
Download the installer for Linux using these commands:
wget https://downloads.openappsec.io/open-appsec-install && chmod +x open-appsec-installYou can show the installer version and available options by running the following command to show the help info:
./open-appsec-install -hThis interactive installer provides 2 alternative modes for automatic vs. manual installation:
Mode 1: Automatic installation of open-appsec and adding attachment (plugin) to NGINX/Kong
In this mode open-appsec will automatically installed with all required components and the attachment will be added and activated in the existing configuration for NGINX/Kong.
./open-appsec-install --auto --preventThe steps shown below for Mode 2 are the exact steps which are also performed when running the automatic installation.
Optional open-appsec installer parameters
--tokenallows connecting directly to SaaS management, to get the token please follow the instructions here.--preventwill set the default rule in the default policy file toprevent-learninstead ofdetect-learn, but the recommendation is to keepdetect-learnas the default rule.
Mode 2: Download of software components and presenting manual installation instructions
In this mode all required components based on your NGINX/Kong version, OS version, Platform will be downloaded to your machine and instructions are presented for manual installation.
./open-appsec-install --downloadOptionally you can add a --tmpdir <path> option to specify an alternative path for the downloaded software components (default path is /tmp/openappsec/ )
Once the download has finished, follow these steps for manual installation:
Step 1: Deploying the attachment on an existing alpine NGINX/Kong server
Copy the associated libraries as shown in the output for Step 1 with commands similar to this:
cp /tmp/open-appsec/[version specific dir]/libosrc_shmem_ipc.so /usr/lib/libosrc_shmem_ipc.so
cp /tmp/open-appsec/[version specific dir]/libosrc_compression_utils.so /usr/lib/libosrc_compression_utils.so
cp /tmp/open-appsec/[version specific dir]/libosrc_nginx_attachment_util.so /usr/lib/libosrc_nginx_attachment_util.so
Copy the nginx attachment file as shown in the output for Step 1 with command similar to this:
cp /tmp/open-appsec/[version specific dir]/ngx_cp_attachment_module.so /usr/lib/nginx/modules/ngx_cp_attachment_module.so
Load the attachment on your NGINX by adding the following line to your nginx.conf, usually located here: /etc/nginx/
load_module /usr/lib/nginx/modules/ngx_cp_attachment_module.so;Step 2: Installing open-appsec agent
Run the following commands as shown in the output
/tmp/open-appsec/openappsec/install-cp-nano-agent.sh --install --hybrid_mode --server 'NGINX Server'
/tmp/open-appsec/openappsec/install-cp-nano-service-http-transaction-handler.sh --install
Step 3: Validate configuration
nginx -t
service nginx restart
Using the open-appsec-ctl Tool
The interactive CLI tool open-appsec-ctl allows you to perform various tasks related to your open-appsec for NGINX/Kong installation.
To check the available options that can be used with the tool, run:
open-appsec-ctl -hTo see the available policies, use the command open-appsec-ctl --list-policies or open-appsec-ctl -lp.
The open-appsec-ctl tool allows you to view, edit, apply policies, and manage the Open-appsec agent. For a complete list of available options, refer to the official documentation here.
Configuring open-appsec using Local Policy File
When using open-appsec for NGINX on Linux, the configuration can be done in a declarative way using a single YAML file which holds all the relevant configuration objects. This way it is fully compatible for integration in GitOps CD-based processes. Alternatively, management can also soon be done centrally via the open-appsec Web UI.
Location of the declarative configuration file
The default location of the declarative configuration file is /etc/cp/conf/open-appsec.yaml. You can show and edit the full default declarative configuration file using your default text editor like nano or vim or by using the interactive CLI tool open-appsec-ctl --edit-policy [policy-file].
Basic Configuration
The default policy within the default configuration file, which is created during the installation, contains the following setting which sets the mode to detect-learn for all web resources provided by the NGINX:
policies.default.mode: detect-learnIf you want attacks instead to be prevented by default for all web resources, you can change this as follows:
policies.default.mode: prevent-learnThe section policies.specific-rules allows you to create specific rule entries for specific hostnames, hostname-path combinations or paths which override the default policy.
It’s recommended to define specific rules in the policies.specific-rules section. These rules should be tailored to the hostnames, hostname-path combinations, or paths where you wish to transition to prevent-learn mode.
For detailed information on the various configuration sections and elements that can be included in the declarative configuration file, along with examples, refer to the Advanced Policy Configuration documentation.
Monitor Events
You can then run this command to view logs:
open-appsec-ctl --view-logsBy default, logs are stored here: /var/log/nano_agent/cp-nano-http-transaction-handler.log<number>
You can configure flexible logging according to your requirements by using a custom log-trigger. You can find details of how to configure the log trigger when using declarative configuration file in the Advanced policy configuration documentation
Monitor from the Web UI (SaaS)
Open-appsec provides a cloud-hosted central management for assets and policies, cloud logging, graphical dashboards, events analysis and ability to manage multiple deployments/clusters in a scalable way. The cloud is highly available.
You can decide to use it for all functions above or do asset and policy management via Kubernetes declarative configuration while using the SaaS Web UI just for visibility and event analysis.
You can find full details on how to use the Web UI on the official documentation
Sign-Up & Login to Portal
To reach the portal browse to https://my.openappsec.io

Connect Deployed Agents to SaaS
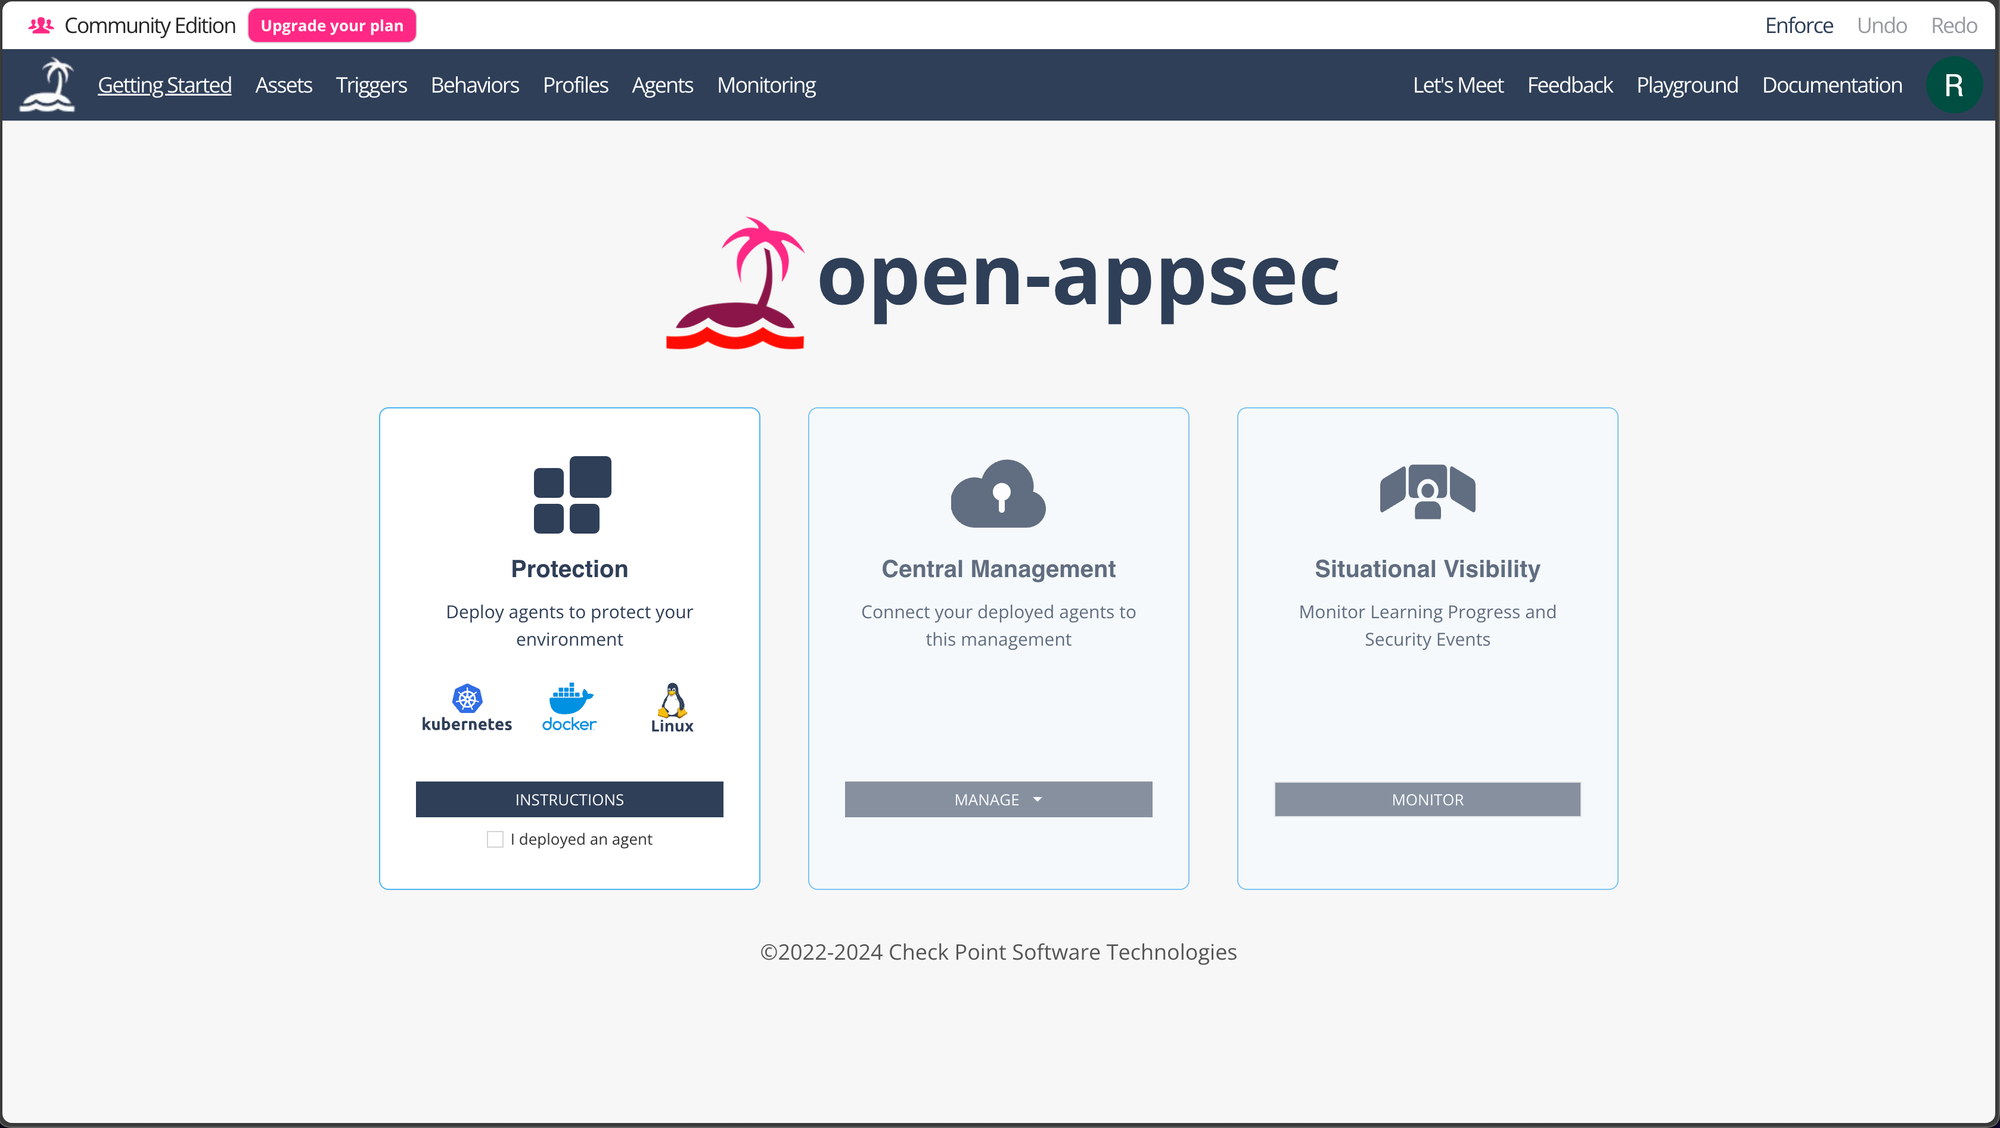
Step 1: Confirm agent is deployed
Check the "I deployed an agent" box, the Central Management box will become enabled.
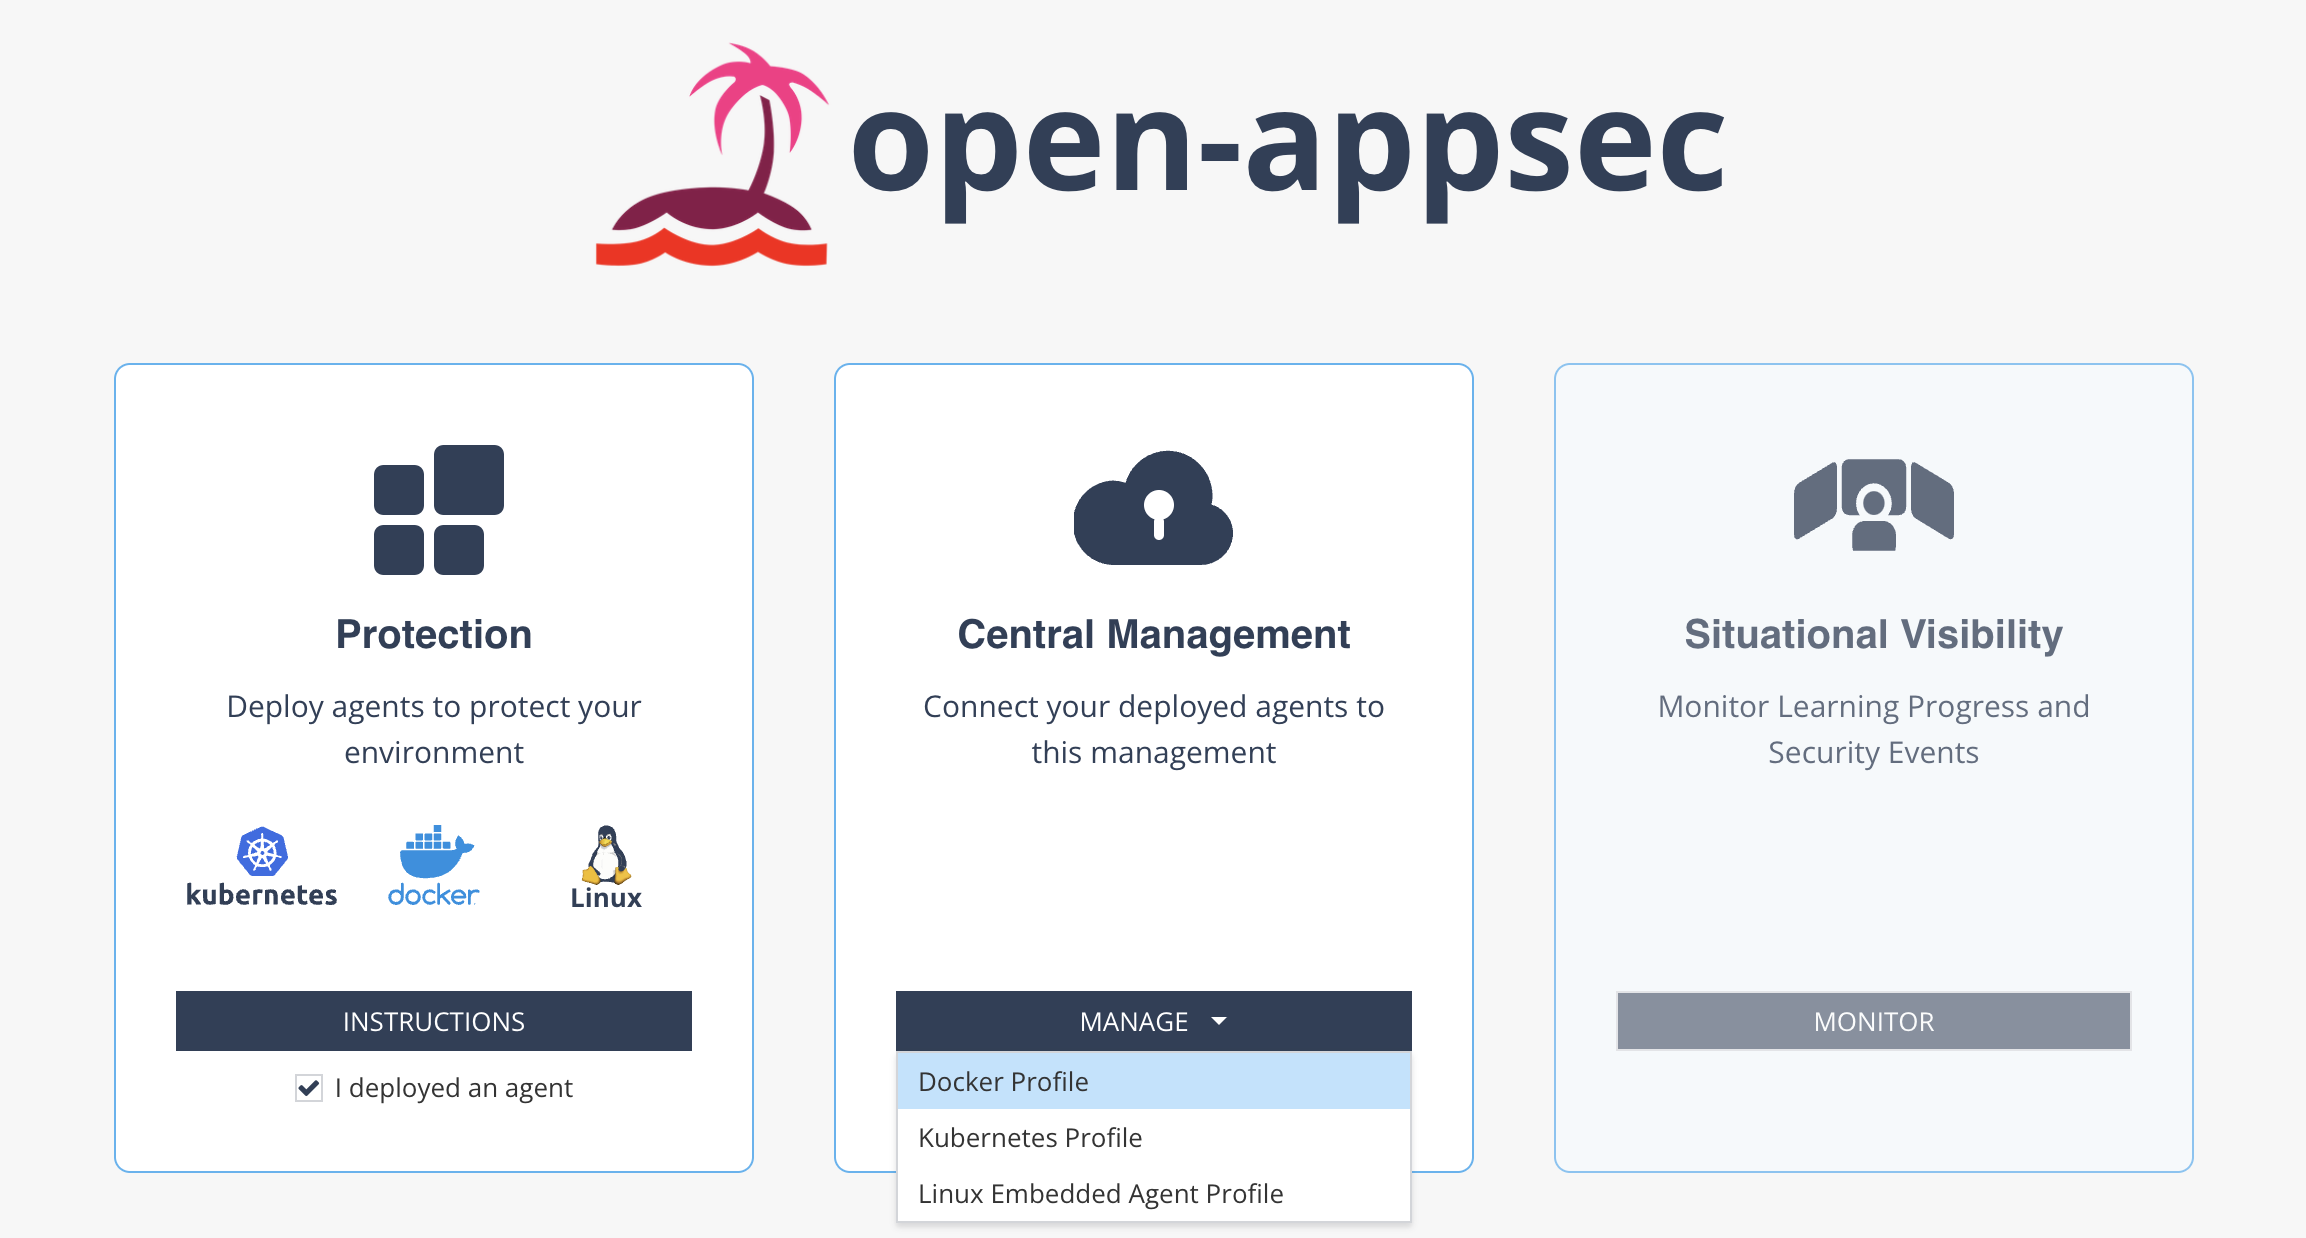
Step 2: Create a profile
click Manage and choose Linux Embedded Agent Profile. You will get into the related Profile page:
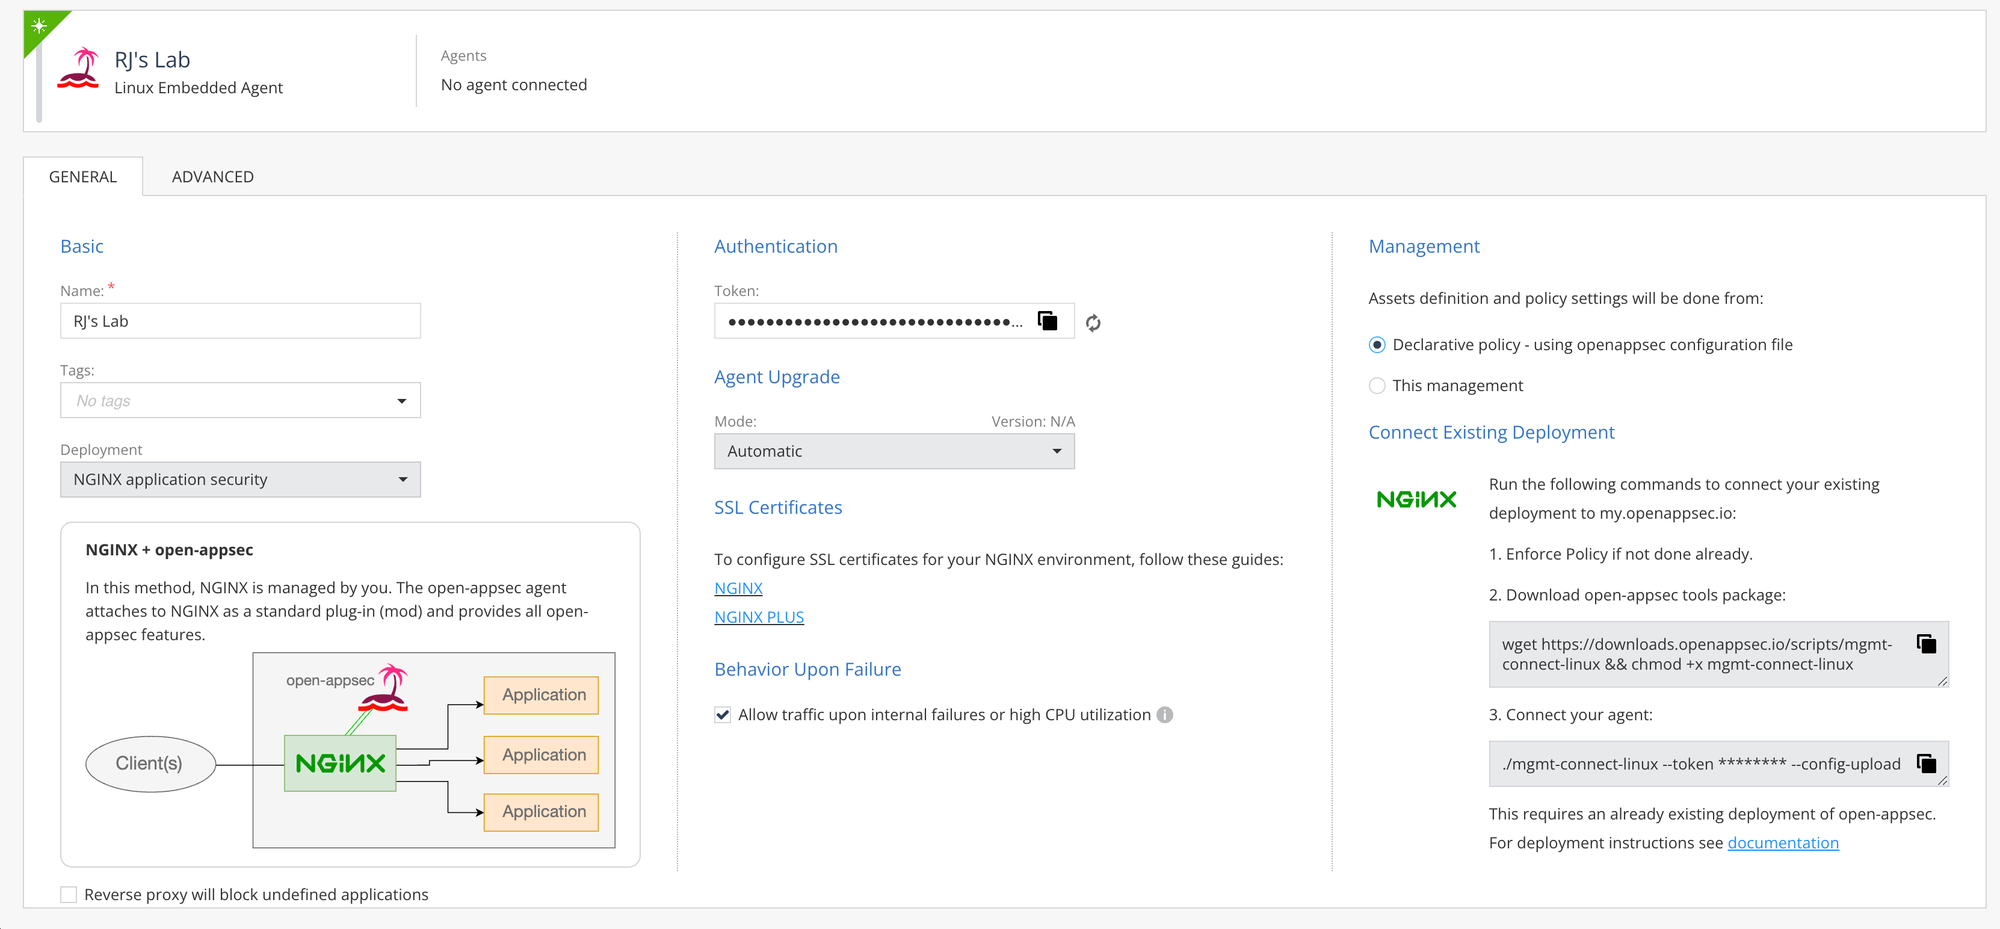
Step 3: Select Subtype
In the "sub type" field select NGINX.
Step 4: Determine Management Master
Choose the relevant option to decide whether you want to edit assets and policies via the WebUI or locally in a declarative way (using CRDs or configuration file). If you choose a declarative option you can still view the configuration in the WebUI in read-only mode.
Step 5: Create secure communication channel between Agent(s) and Management
- Enforce policy, by clicking the button at the top right of the page.
- Copy the commands as shown in the selected profile and run it in your Linux Environment to connect your deployed agents to this profile and the central management.
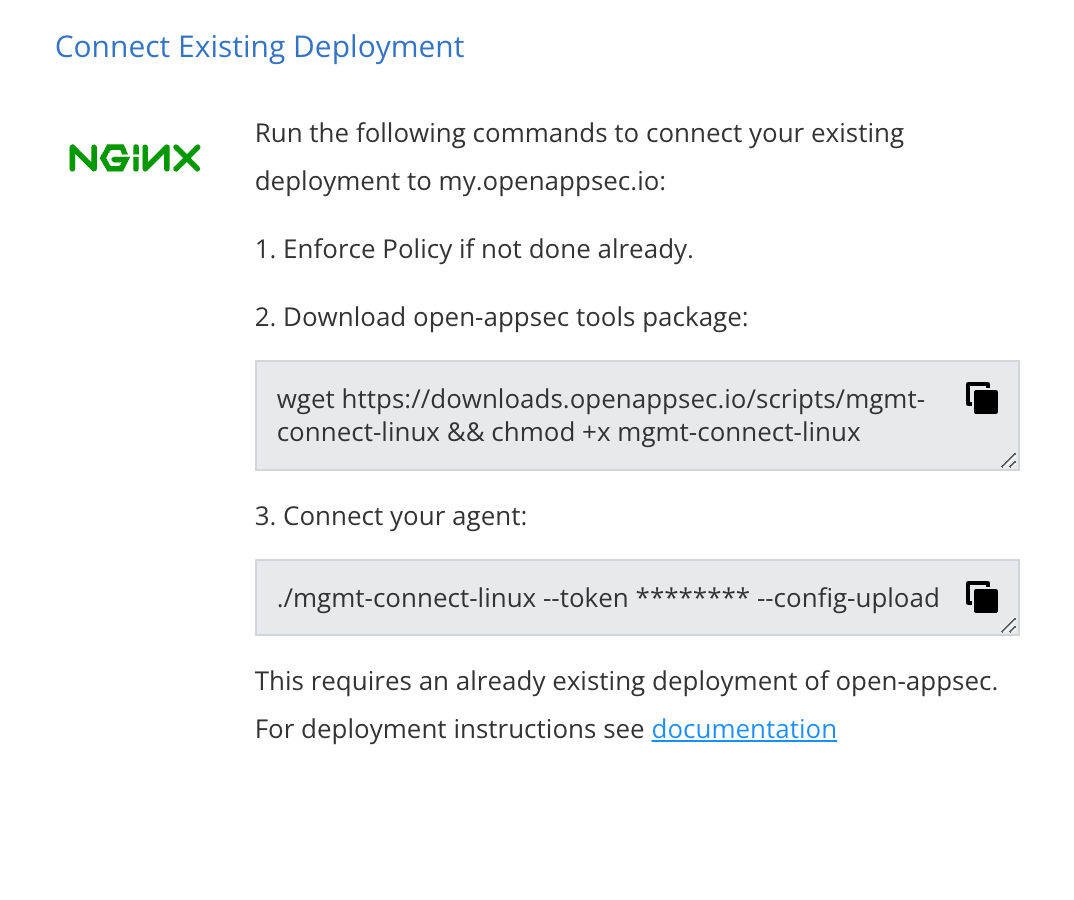
./mgmt-connect-linux --token ********* --config-upload
Uploading local policy configuration to cloud...
....
Registering open-appsec Nano Agent to Fog..
open-appsec Nano Agent is registered to https://inext-agents.cloud.ngen.checkpoint.com
Orchestration mode changed successfully
Upgrade to Advanced ML Model
open-appsec uses two machine learning models:
- A "Supervised Model" that was trained offline based on millions of requests, both malicious and benign.
- An "Unsupervised Model" that is being built in real time in the protected environment.
This model uses traffic patterns specific to the environment.
For the supervised model (see above) there are two alternative options you can chose from:
- A "Basic Model" is provided as part of the GitHub repository and the default installations.
This is recommended for use in Monitor-Only and Test environments. - An "Advanced Model" can be downloaded from open-appsec portal.
This is more accurate and recommended for Production use.
To download and extract the open-appsec advanced machine learning model follow these steps:
- Login to the open-appsec portal at my.openappsec.io .
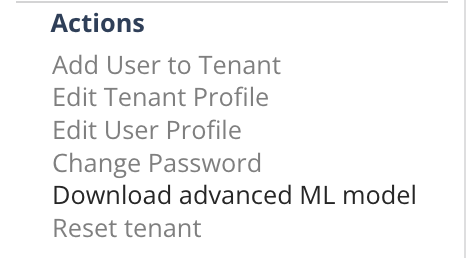
- Download the advanced machine learning model by going to:
User Menu -> Download Advanced ML Model.
- Create a folder under the following path in the root directory: /advanced-model
mkdir -p /advanced-model - Copy the .tgz file into the folder you created
cp ./open-appsec-advanced-model.tgz /advanced-model/open-appsec-advanced-model.tgz. - Replace Agent
- Run
open-appsec-ctl --stop-agent - Extract the model to the relevant folder by running
tar -xzf /advanced-model/open-appsec-advanced-model.tgz -C /etc/cp/conf/waap - Run
open-appsec-ctl --start-agent
- Validate the use of Advanced Model
The machine learning AI model type and version being used can be validated using the command:
open-appsec-ctl --status ~# open-appsec-ctl --status
---- open-appsec Nano Agent ----
Version: 1.1.15-open-source
Status: Running
AI model version: Advanced model V1.0
Management mode: Cloud management (Visibility mode)
Agent ID: e18667db-5601-4ea1-a581-806a0a1a1217
Profile ID: 04c8b844-e28b-8f6f-13db-cfe09d062523
Policy files:
/etc/cp/conf/local_policy.yaml
Policy load status: Success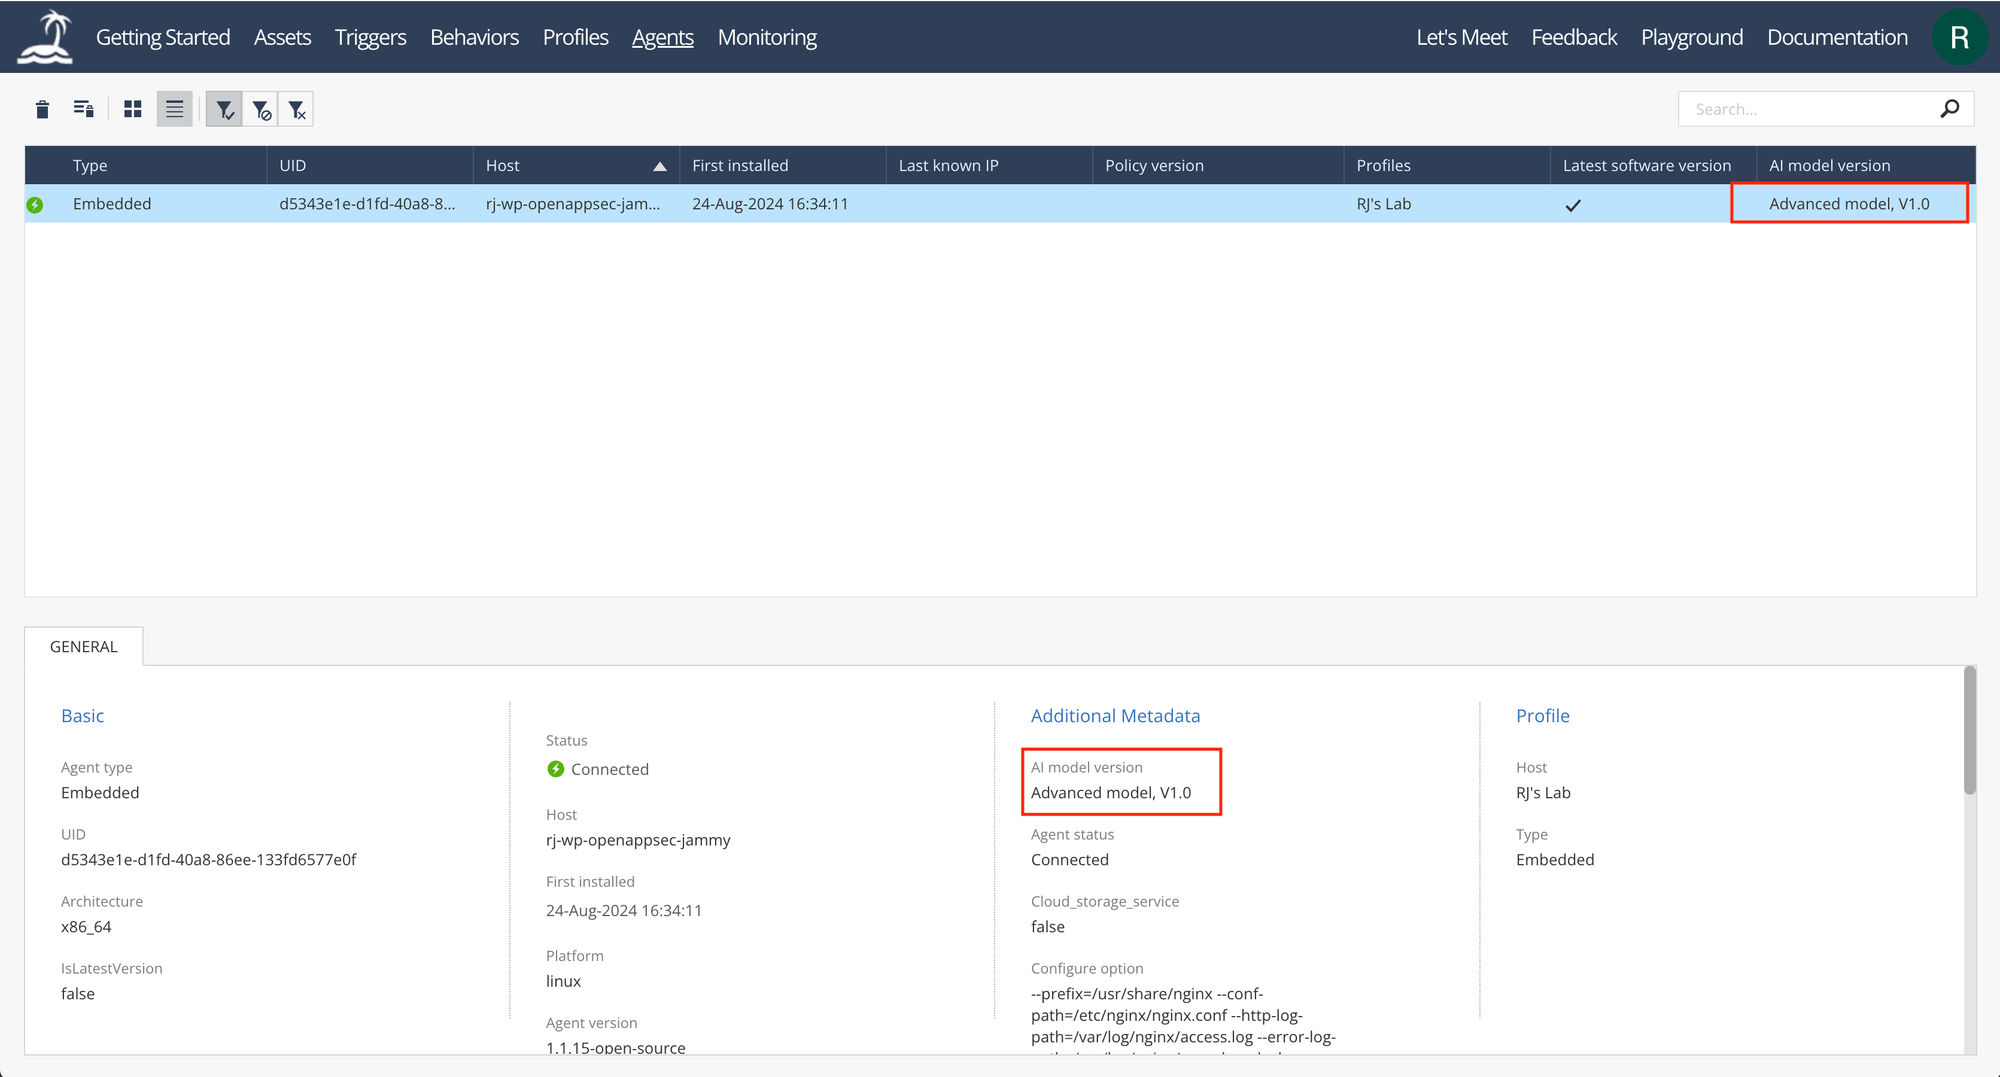
Operational Test
The image below illustrates the overall topology of the test lab.
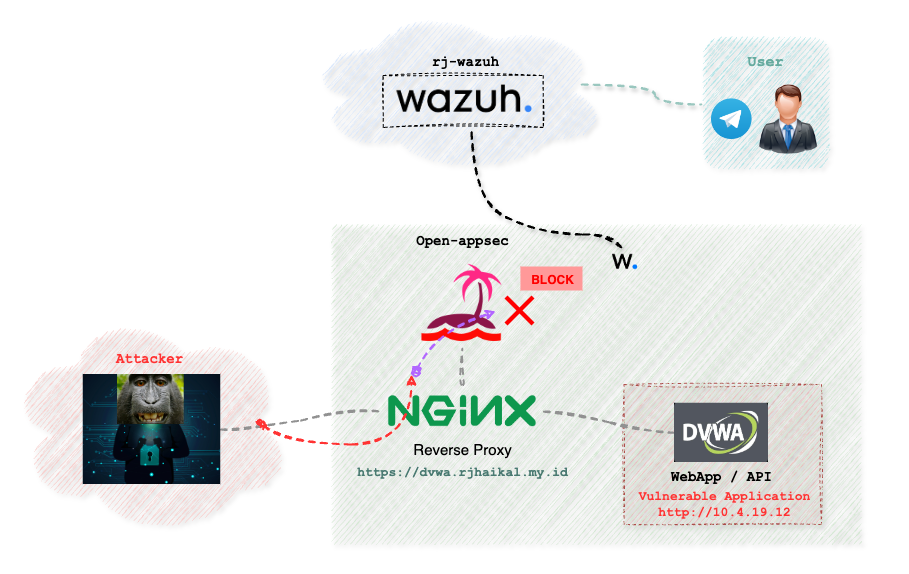
As shown, I've also integrated open-appsec with Wazuh SIEM. This integration enables us to execute response actions on all Wazuh agents when the WAF detects an attack.
For testing, I used DVWA as the vulnerable application. Damn Vulnerable Web Application (DVWA) is purposely designed to be insecure, allowing users to practice their skills in a legal and safe environment. It is intentionally built with vulnerabilities to showcase different web application weaknesses and exploitation techniques.
SQL Injection without open-appsec (WAF)
Now we’ll run some simple SQL Injection tests on the vulnerable application. Before we proceed, let's deactivate the Open-AppSec agent.
open-appsec-ctl --stop-agent
open-appsec Nano Agent is not running
~# open-appsec-ctl --status
---- open-appsec Nano Agent ----
Version: 1.1.15-open-source
Status: Not running
AI model version: Advanced model V1.0
Management mode: Cloud management (Visibility mode)
Agent ID: d5343e1e-d1fd-40a8-86ee-133fd6577e0f
Profile ID: 0ac8c1dc-7d07-e0cd-bca0-44f837f1535c
Policy files:
/etc/cp/conf/local_policy.yaml
Policy load status: SuccessAfter disabling the WAF, we navigate to DVWA (with the security level set to LOW) and select SQL Injection.
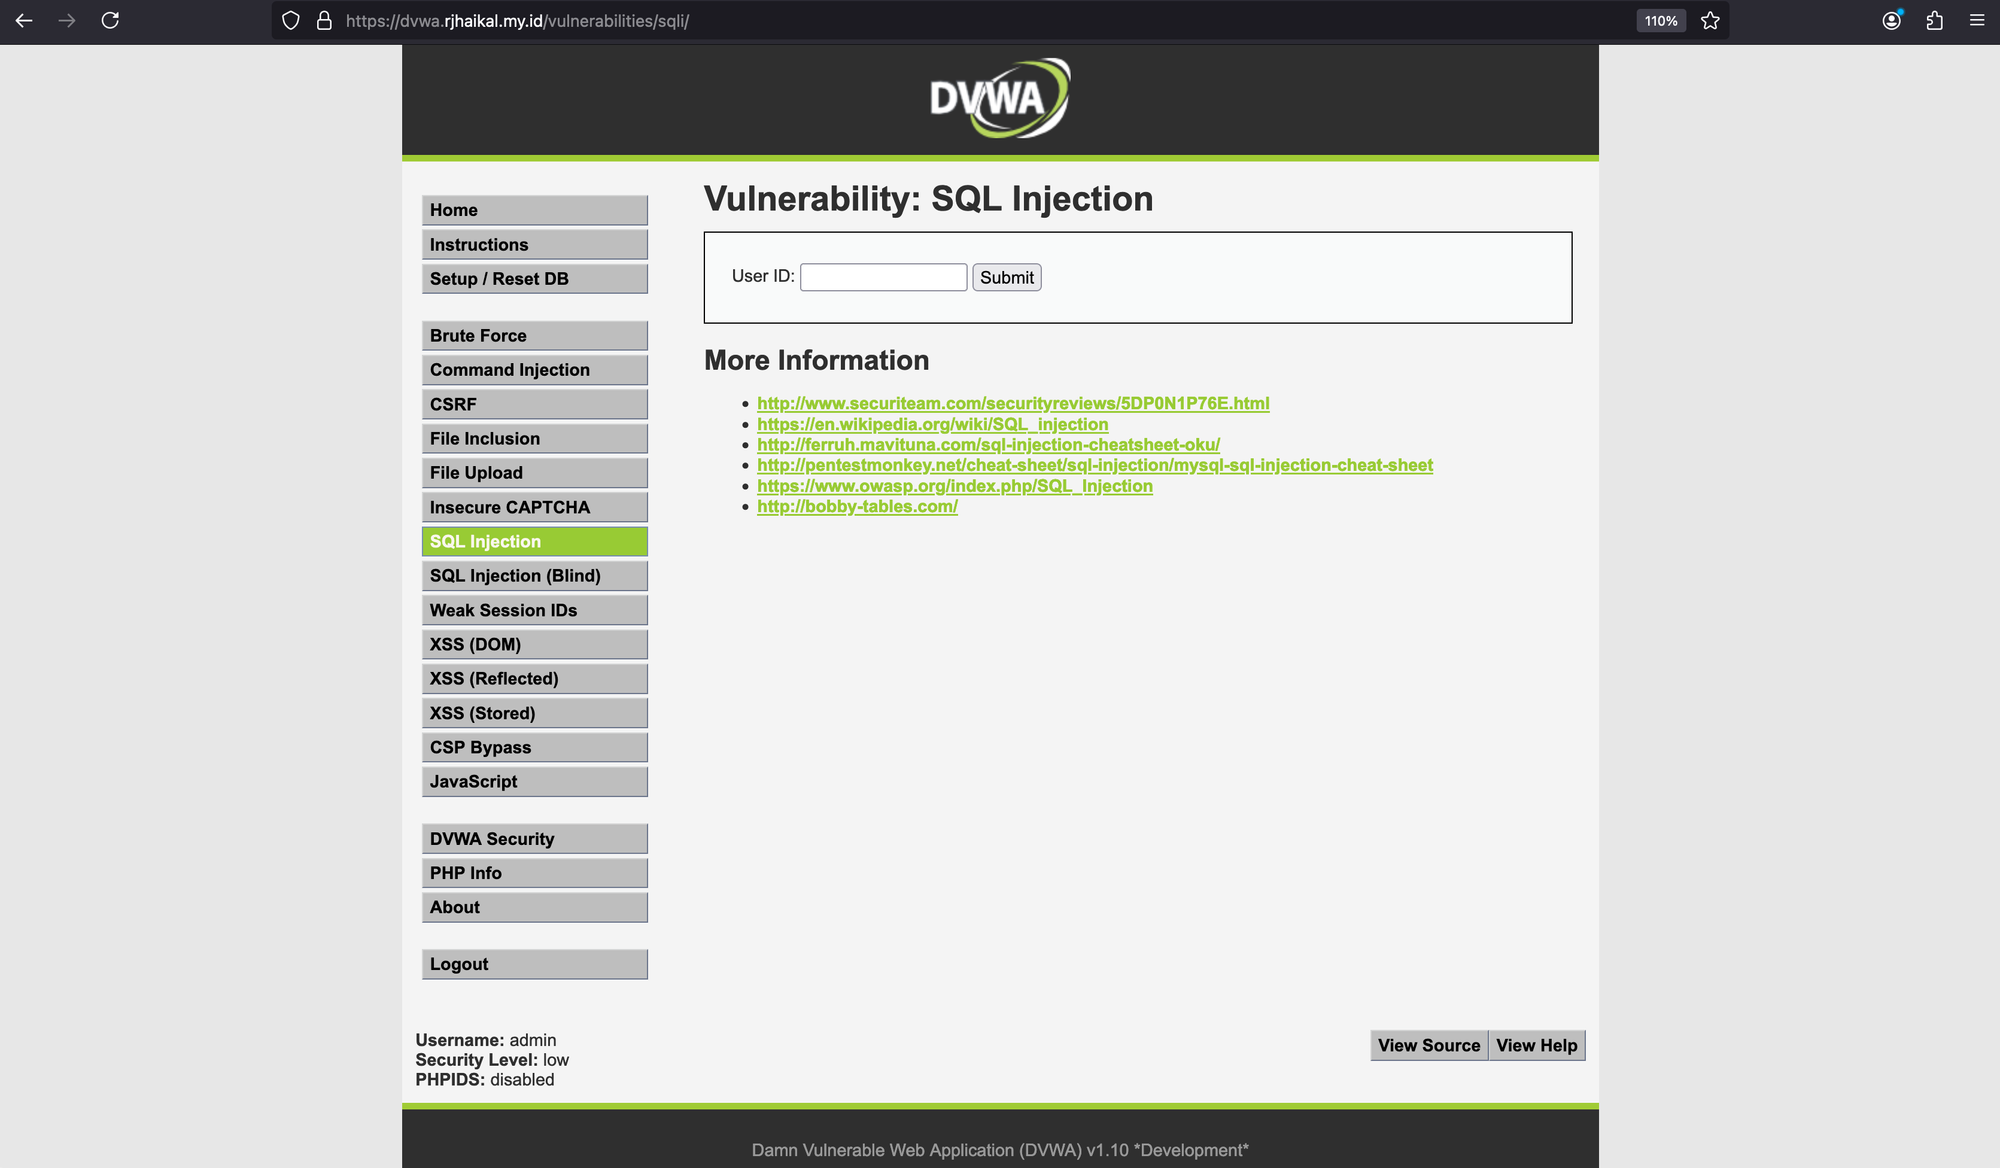
With this access, we'll attempt to enumerate all users. To do so, in the 'User ID' box, we'll enter the following text: 1 ' OR 1=1--.
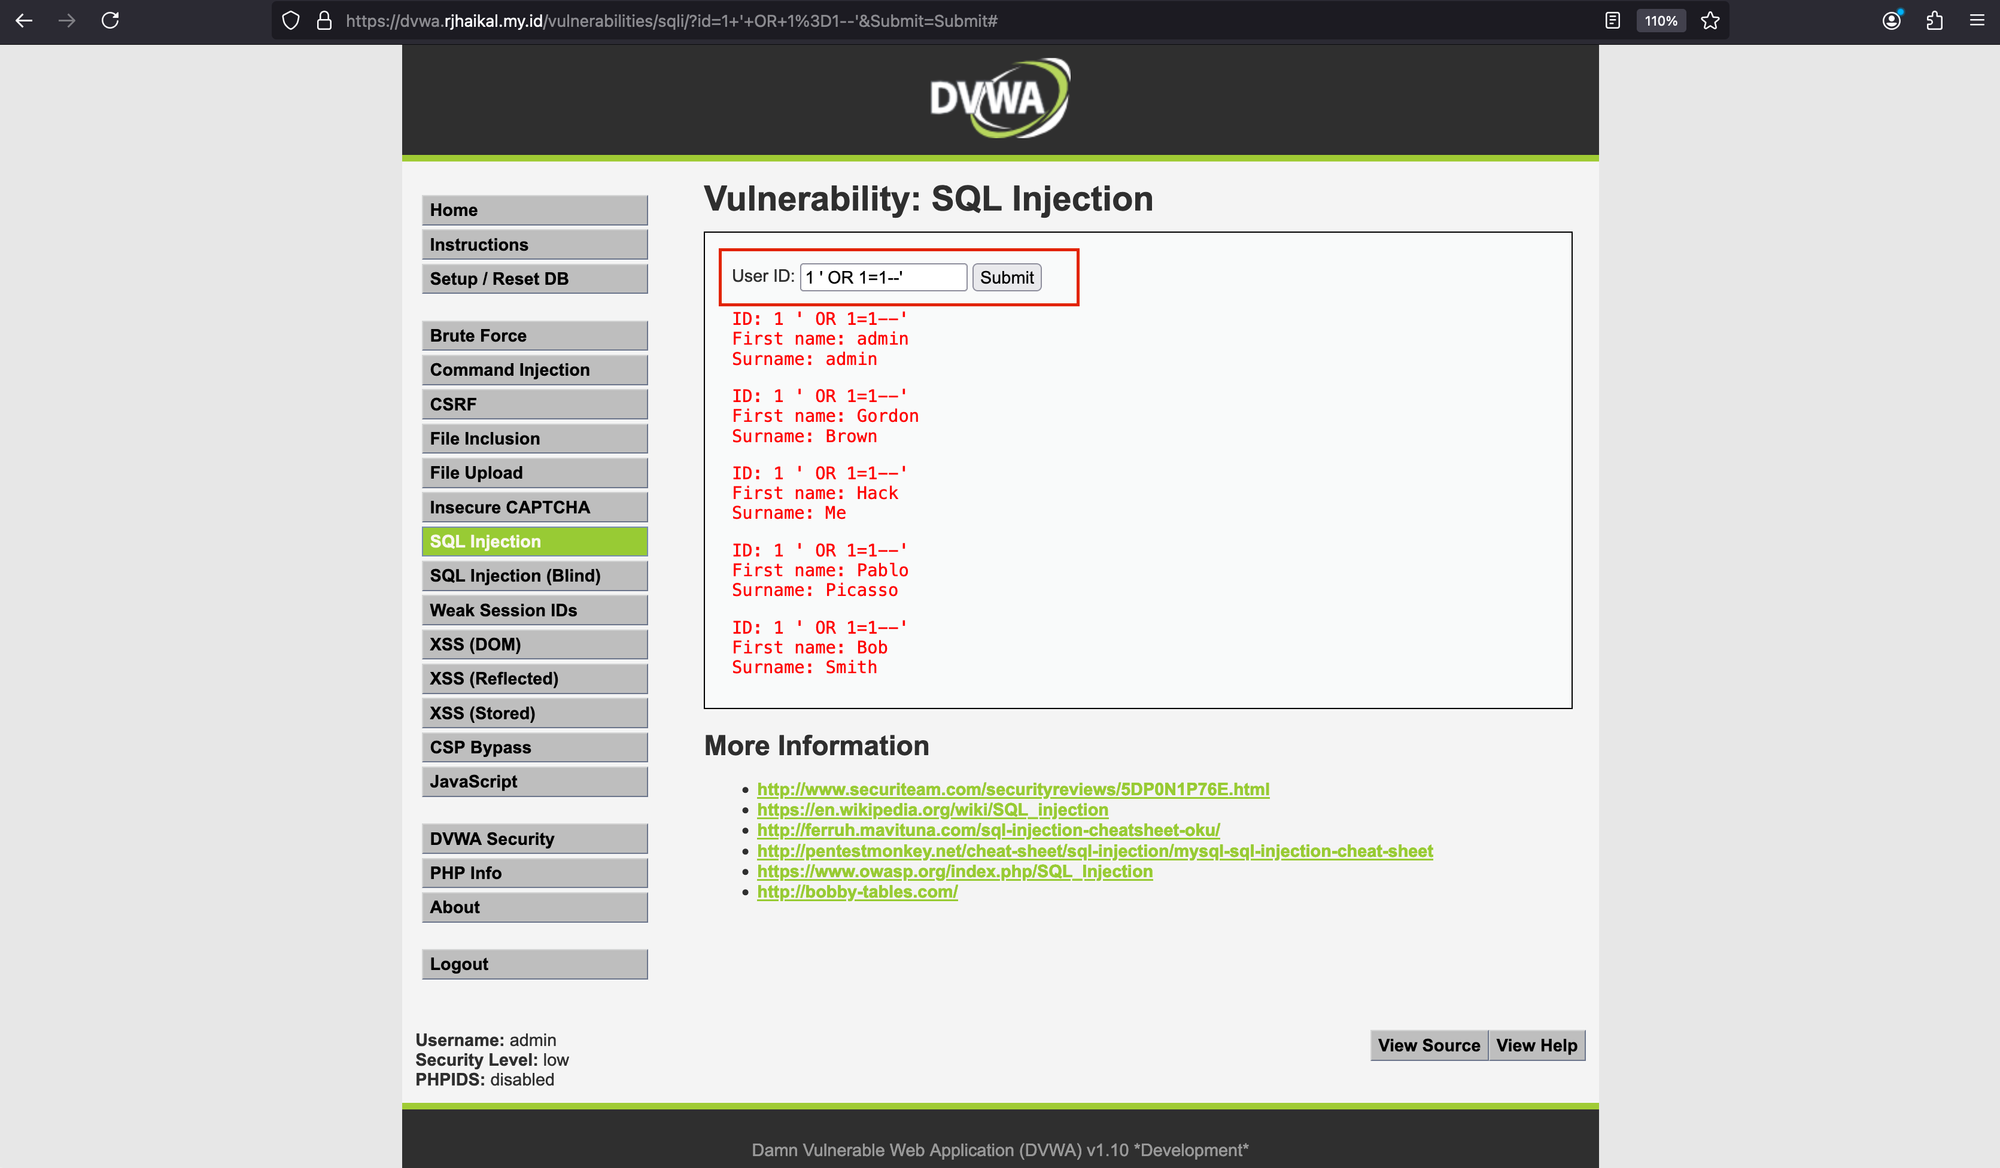
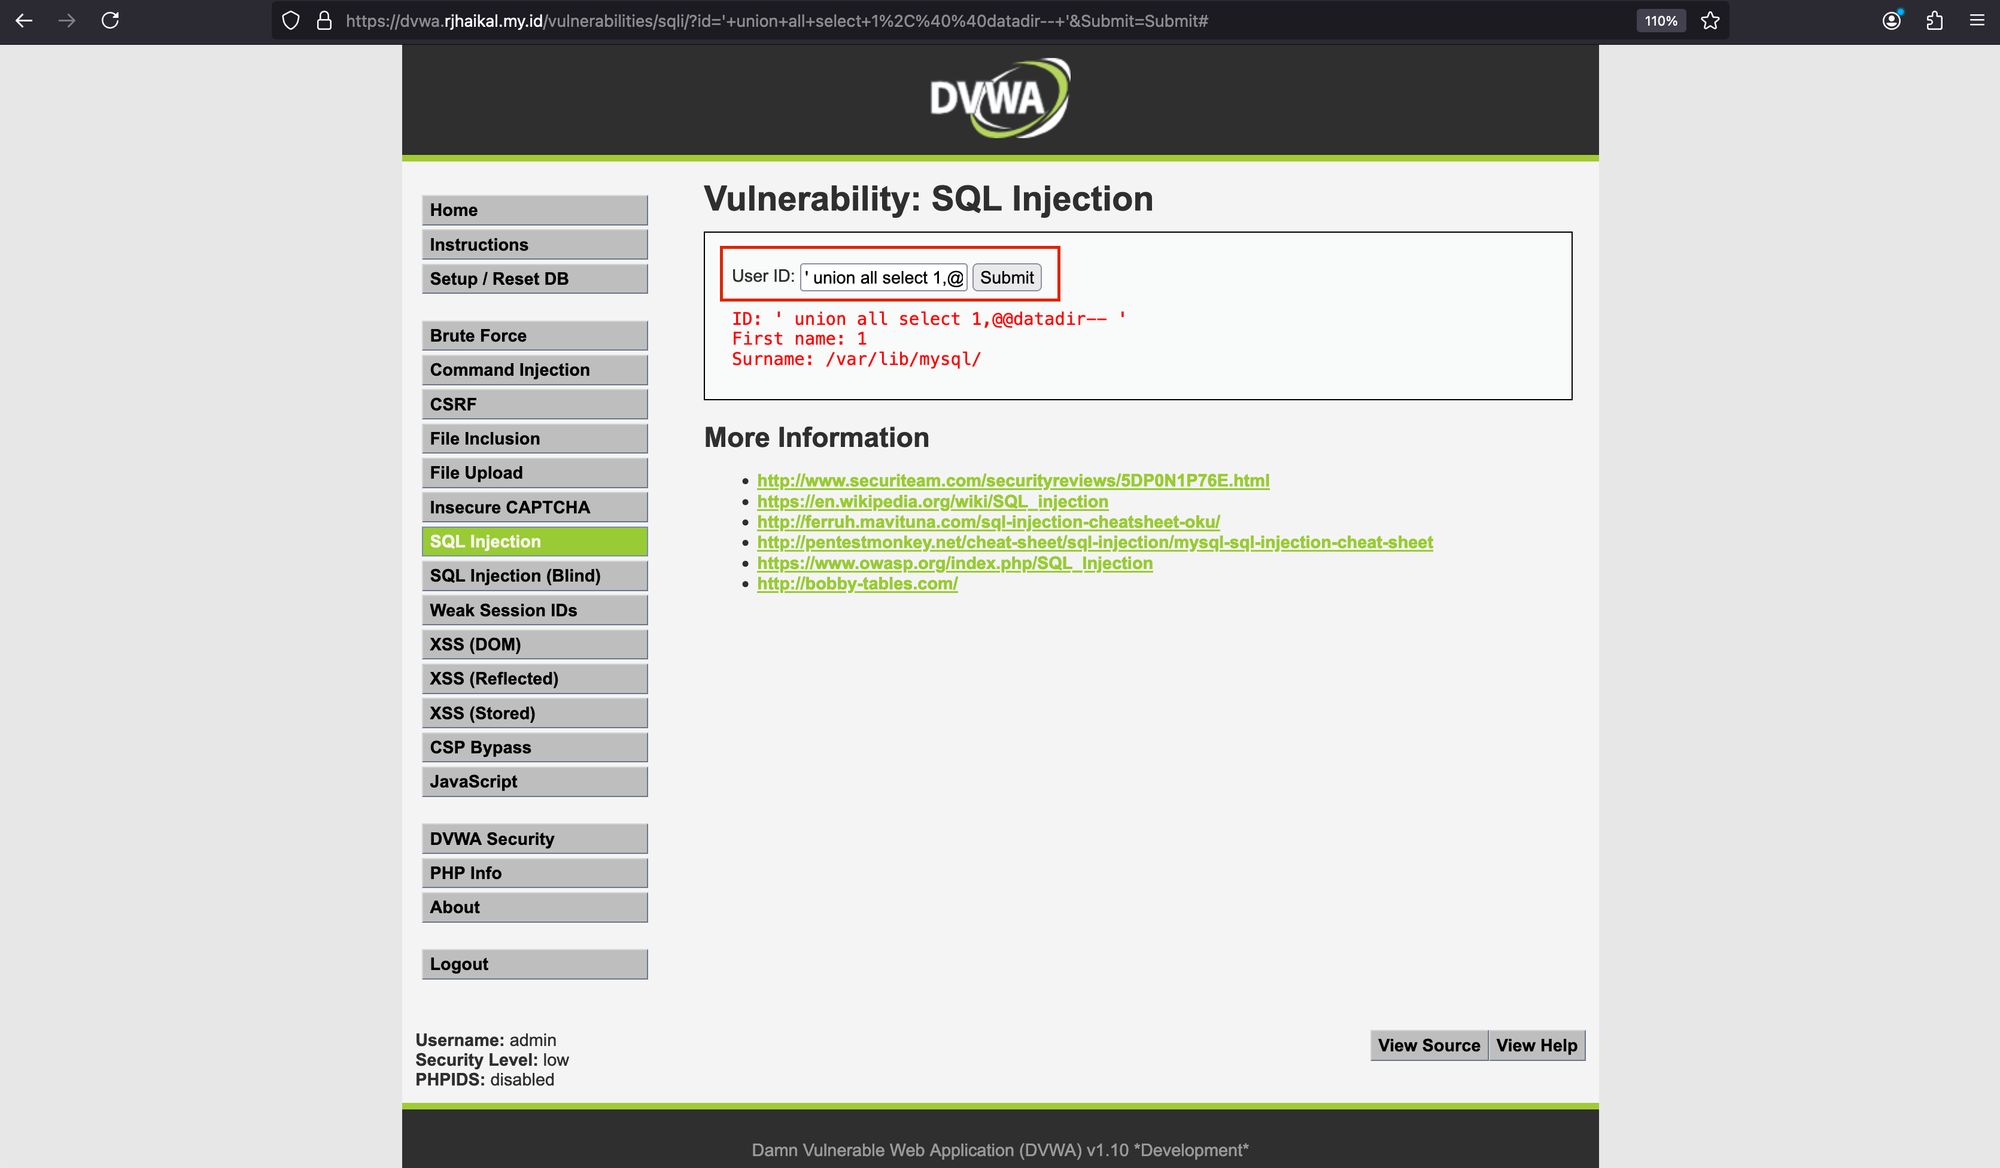
As shown, we’ve managed to get this information. To make it more complex, we could use: ' union all select 1,@@datadir– '.
SQL Injection with open-appsec (WAF)
Now, let's activate Open-AppSec in prevent-learn mode and see if this attack is blocked.
open-appsec-ctl --start-agent
open-appsec Nano Agent watchdog started successfully
~# open-appsec-ctl --status
---- open-appsec Nano Agent ----
Version: 1.1.15-open-source
Status: Running
AI model version: Advanced model V1.0
Management mode: Cloud management (Visibility mode)
Agent ID: d5343e1e-d1fd-40a8-86ee-133fd6577e0f
Profile ID: 0ac8c1dc-7d07-e0cd-bca0-44f837f1535c
Policy files:
/etc/cp/conf/local_policy.yaml
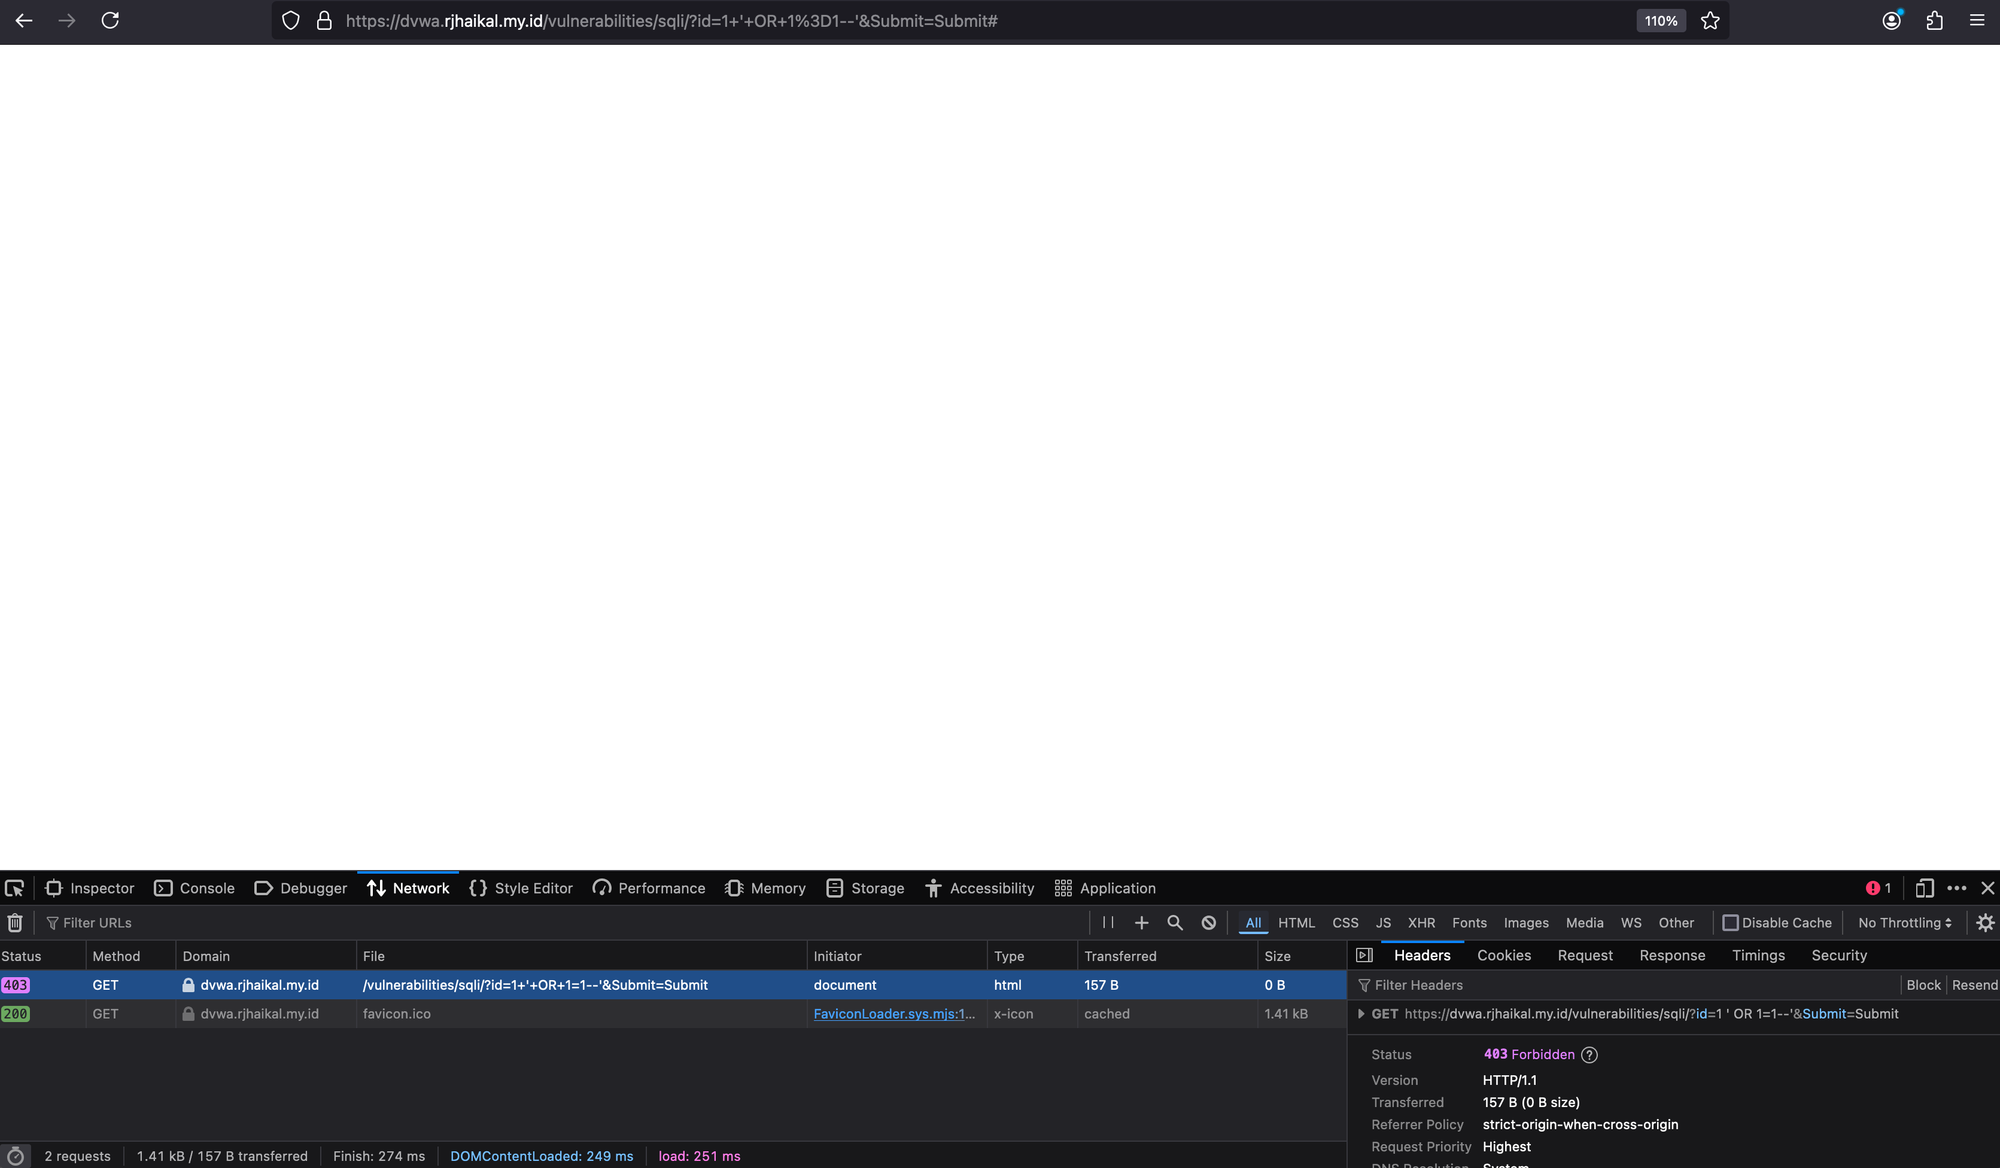
Policy load status: SuccessRevisit the vulnerable application.

Once you click 'submit,' the browser console shows a '403 Forbidden' message.
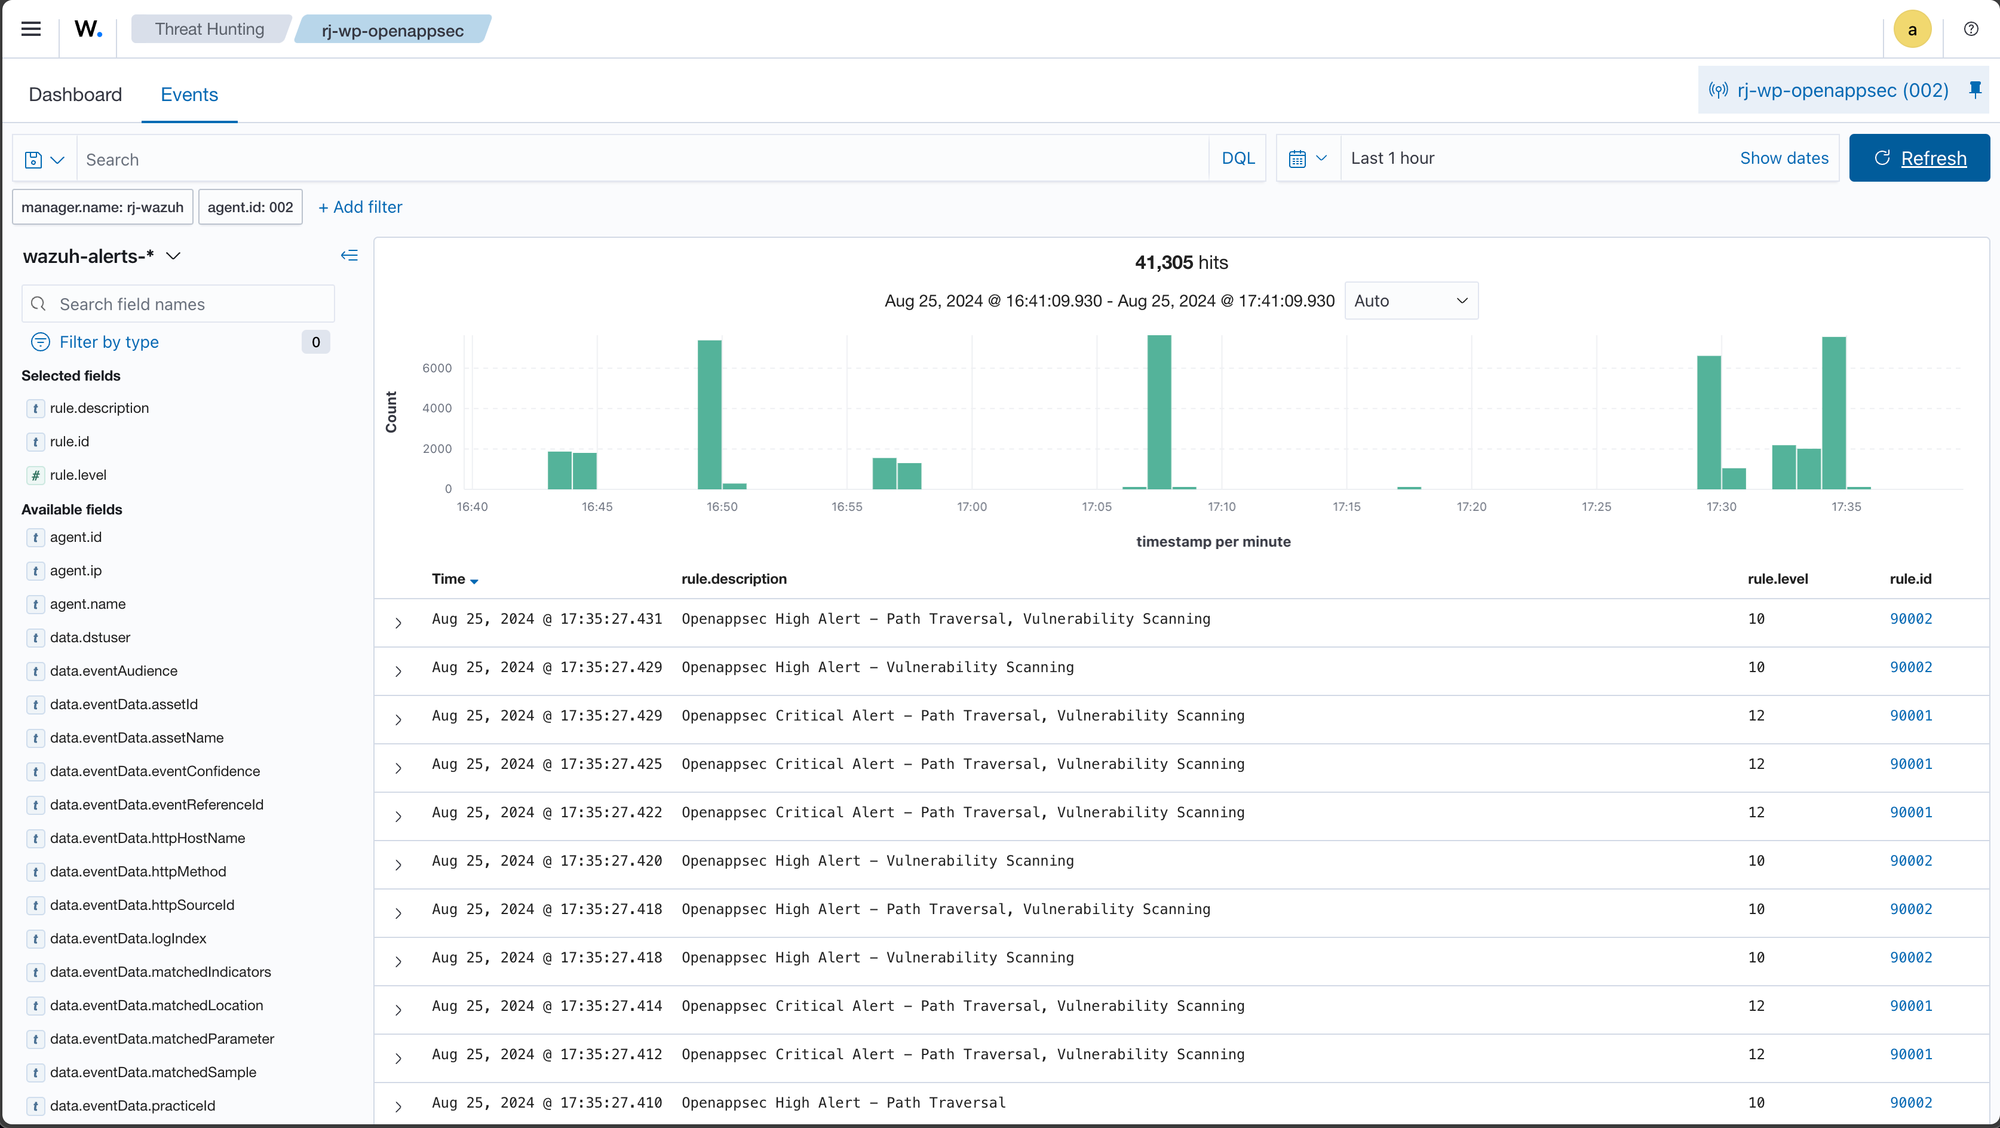
When we examine the logs in Open-AppSec, we can find the detection.
open-appsec-ctl -vl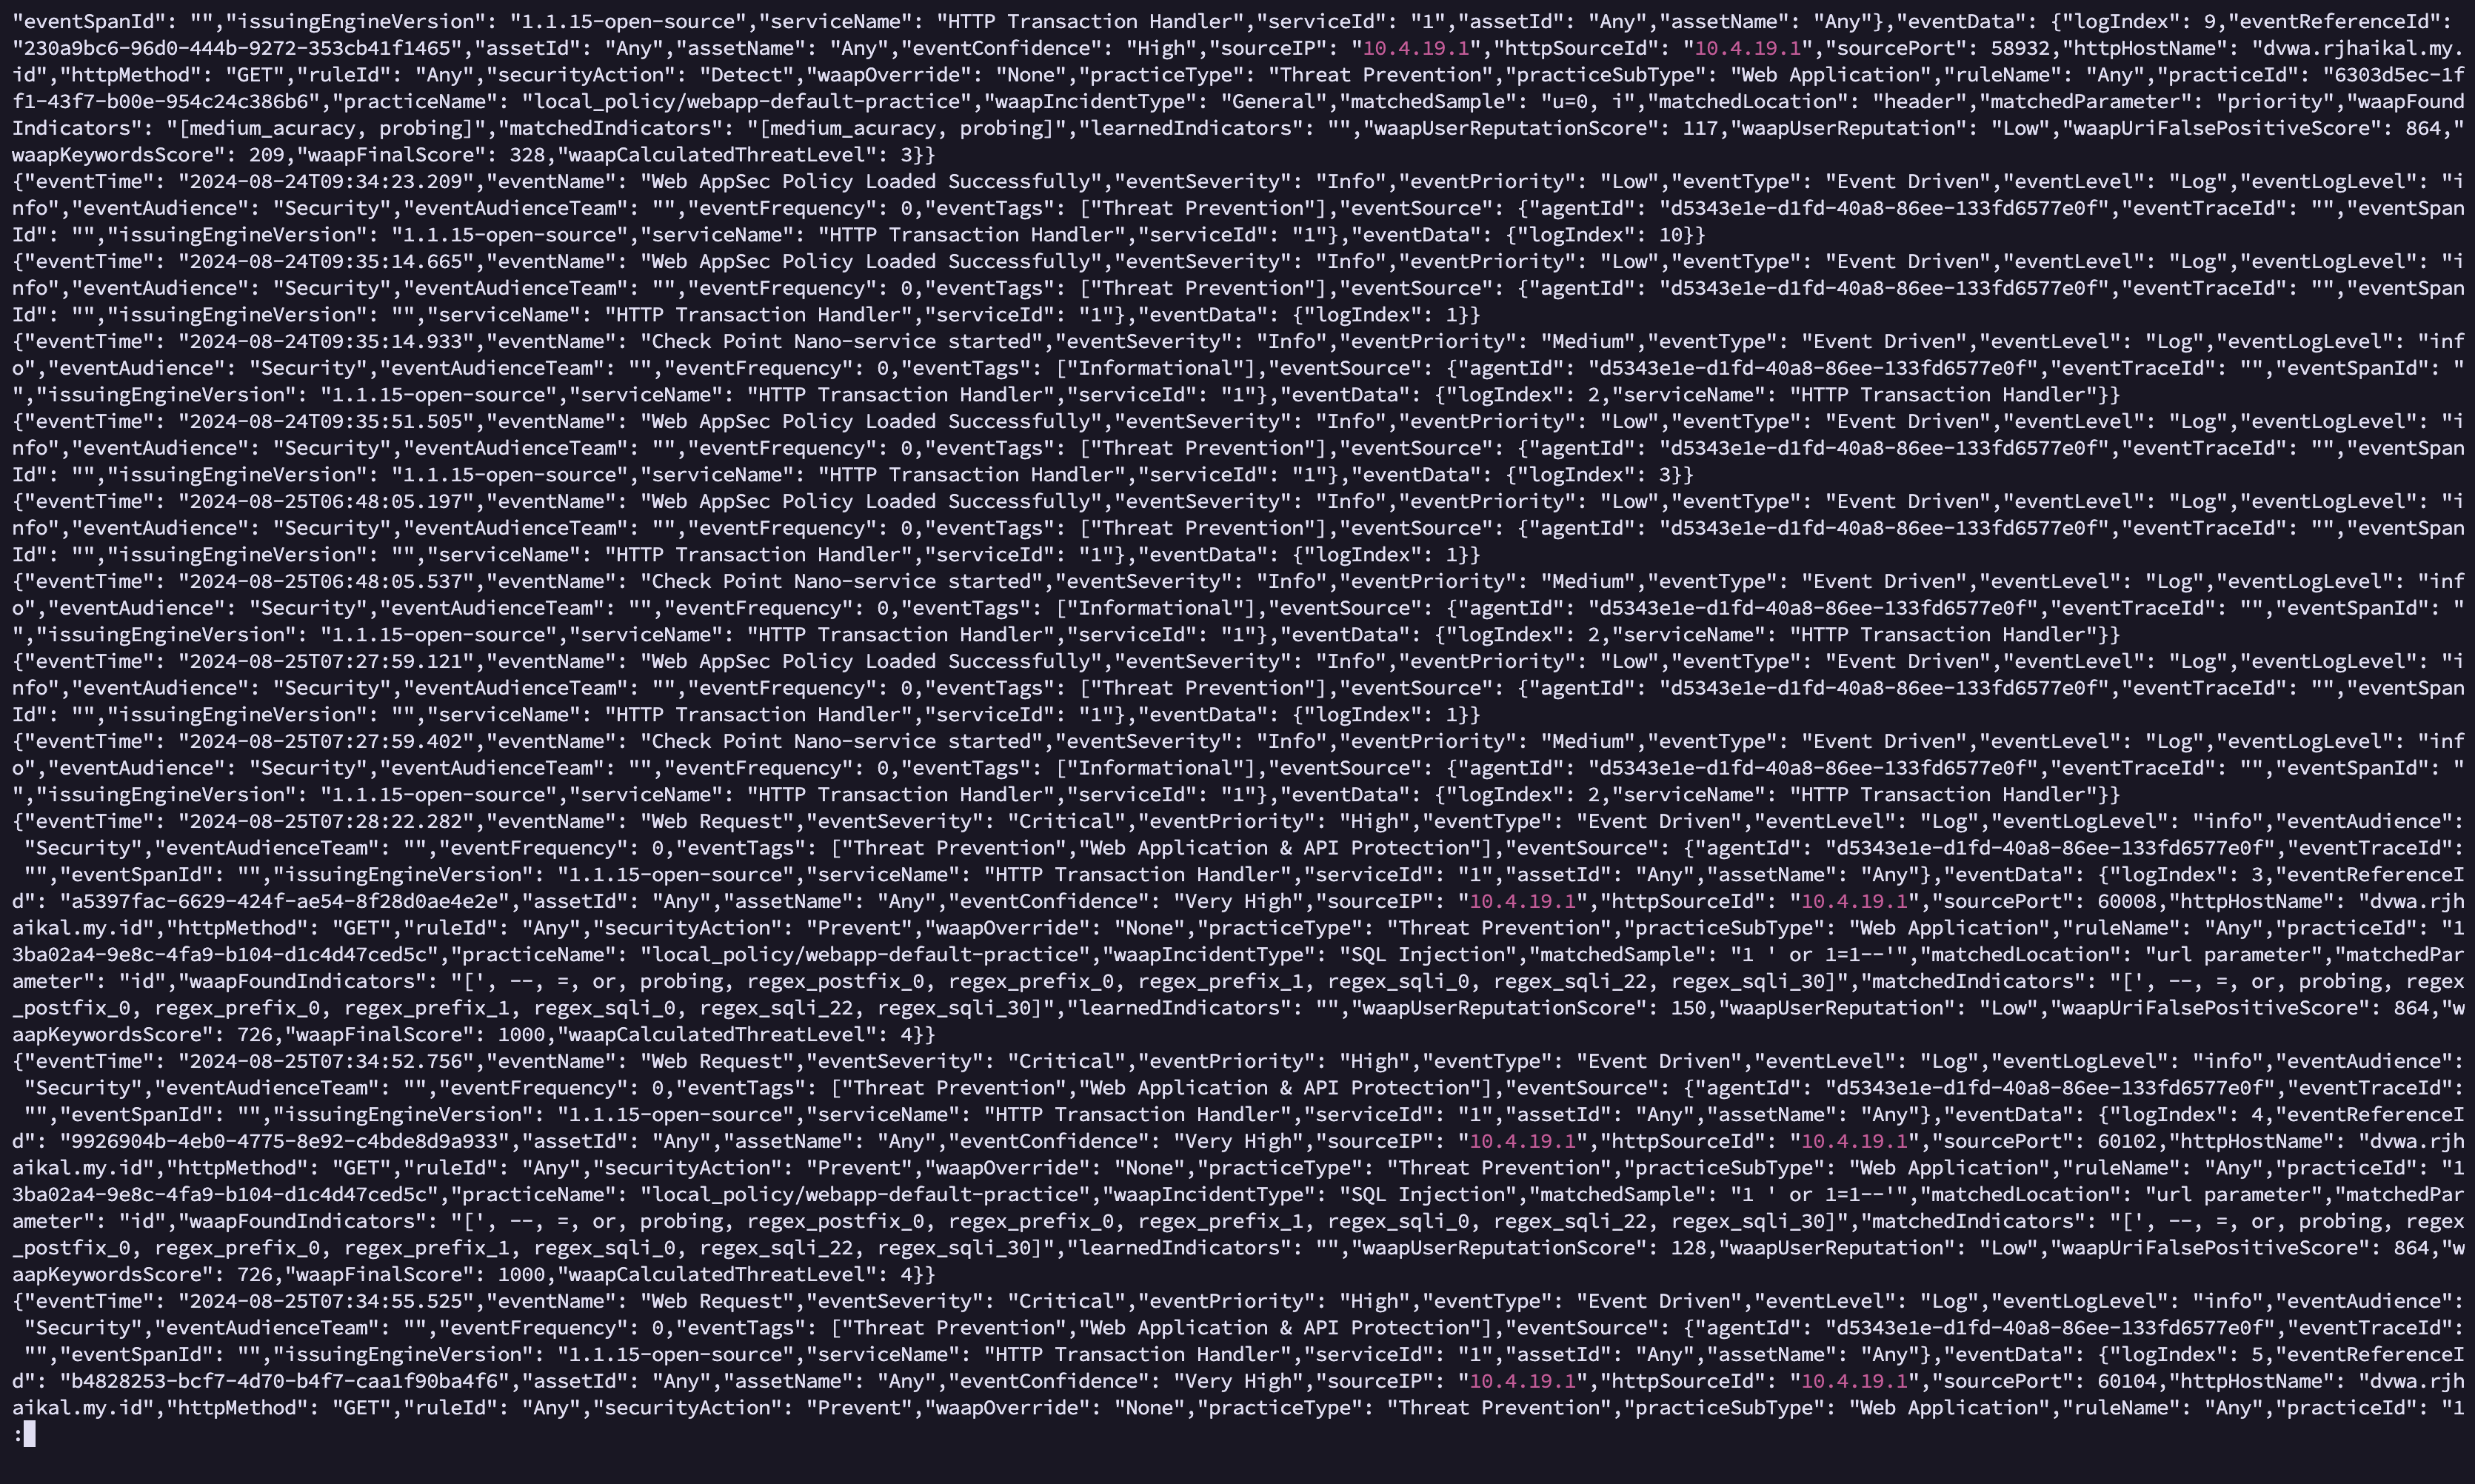
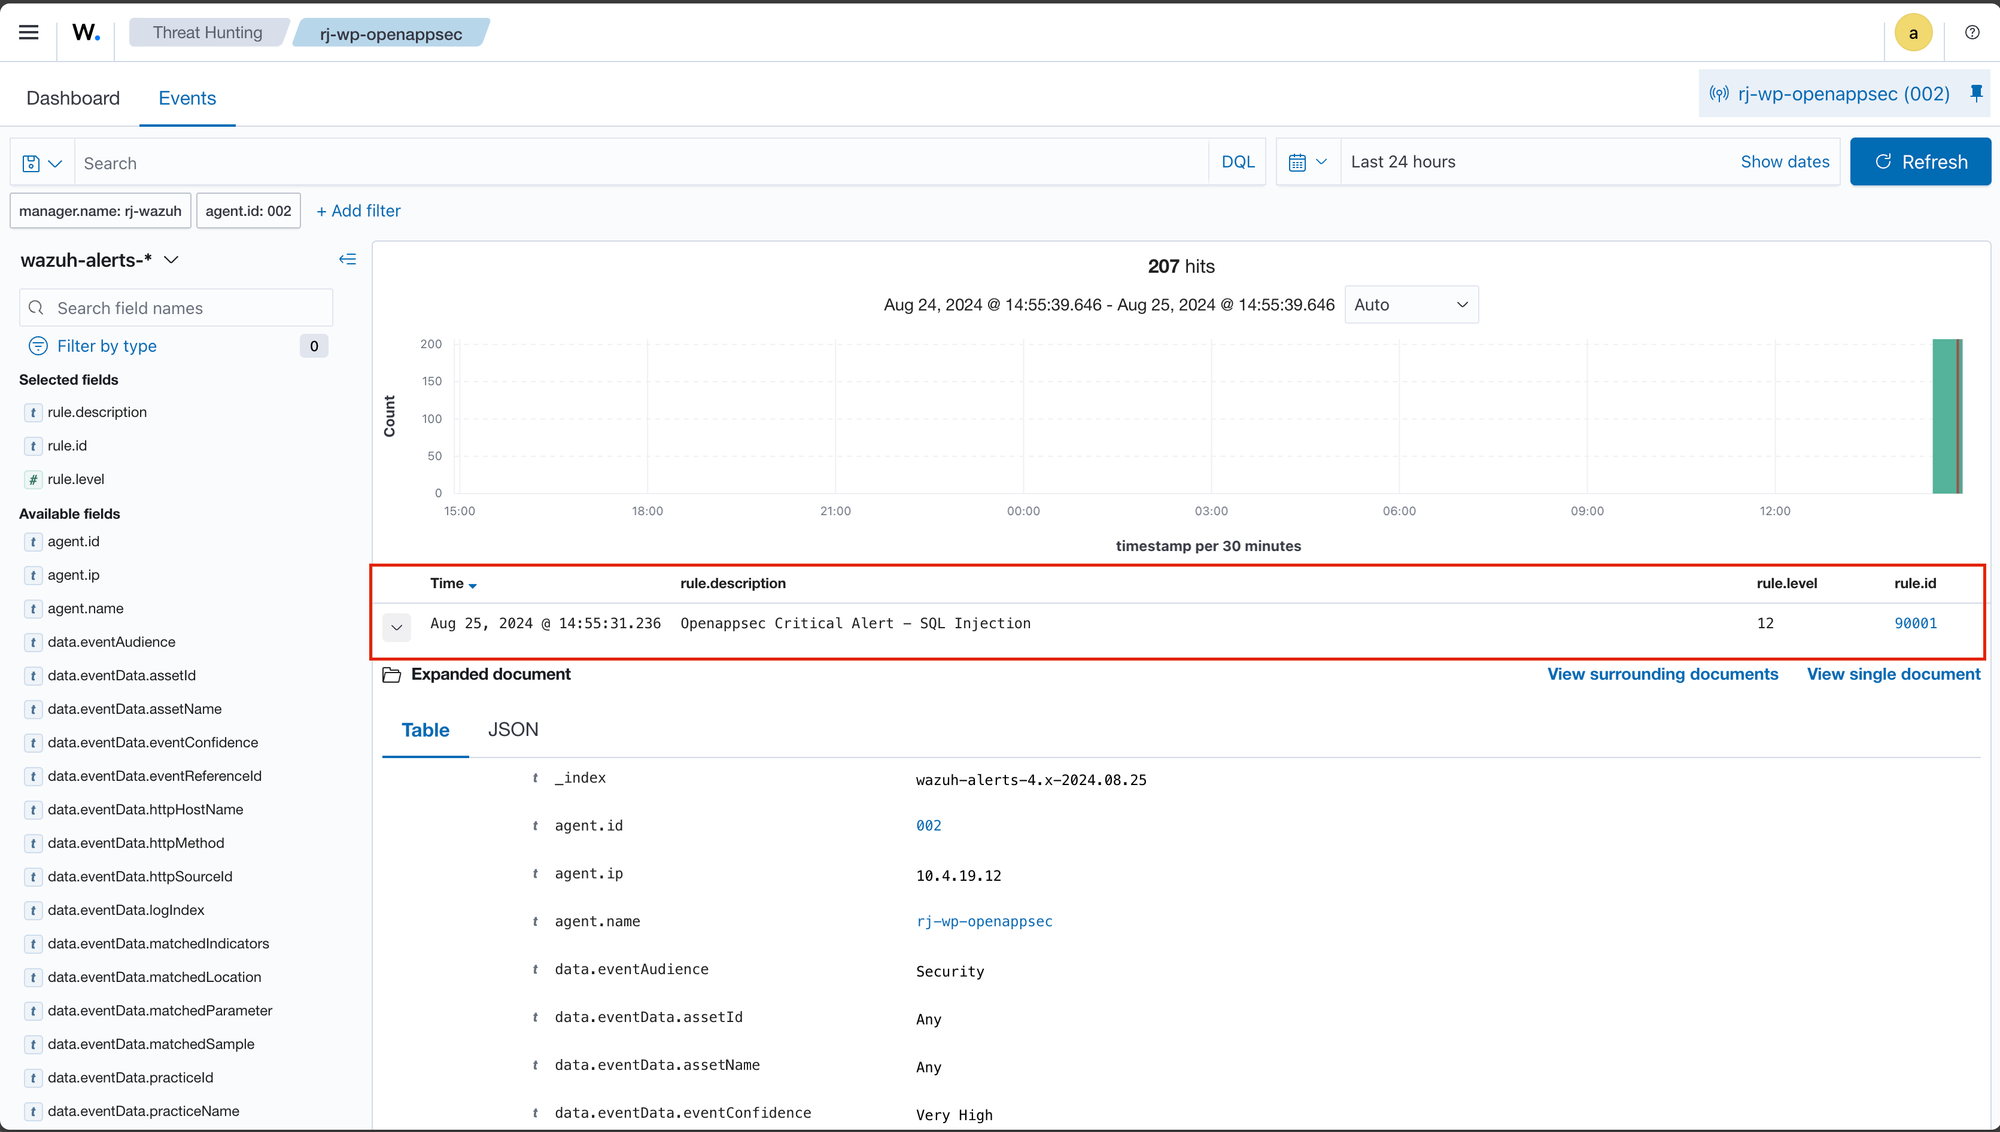
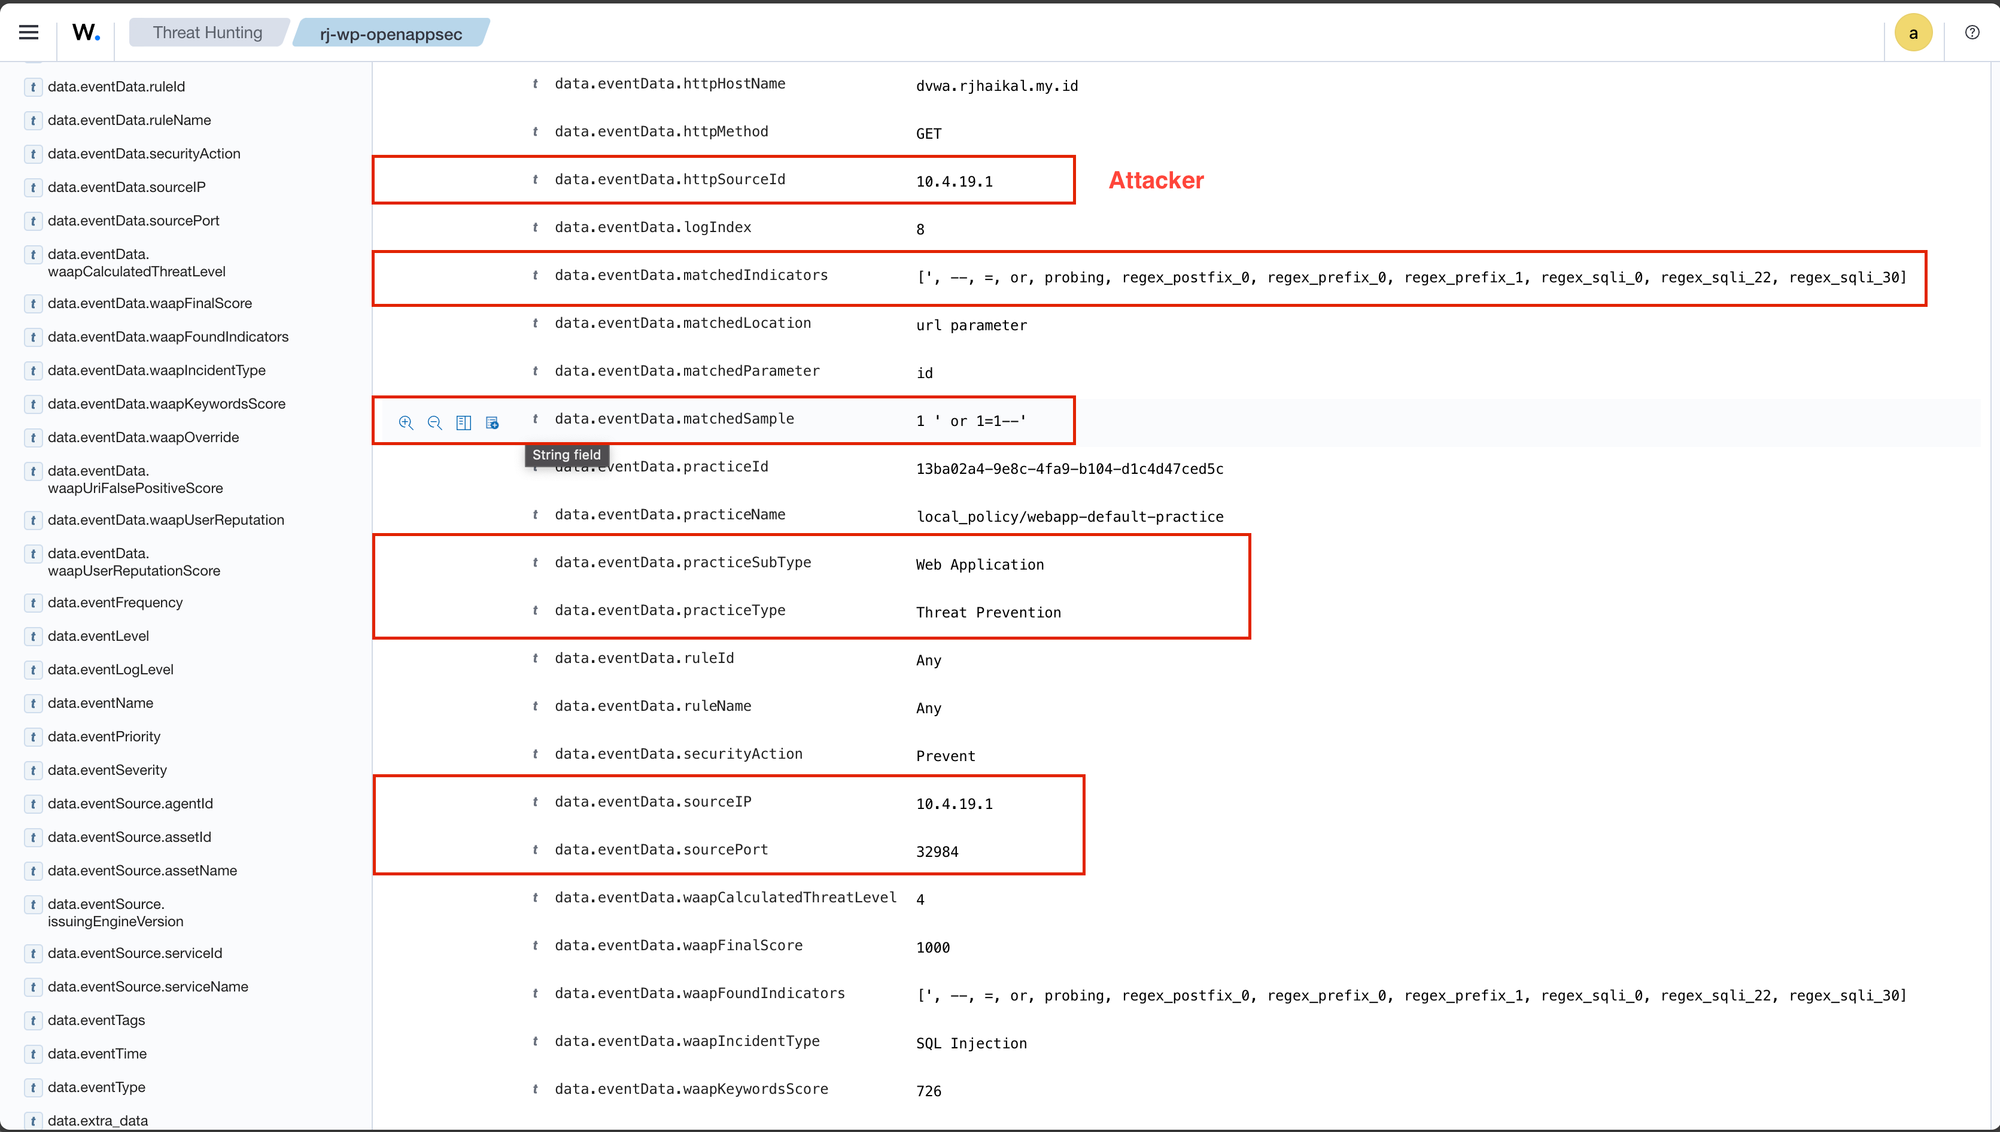
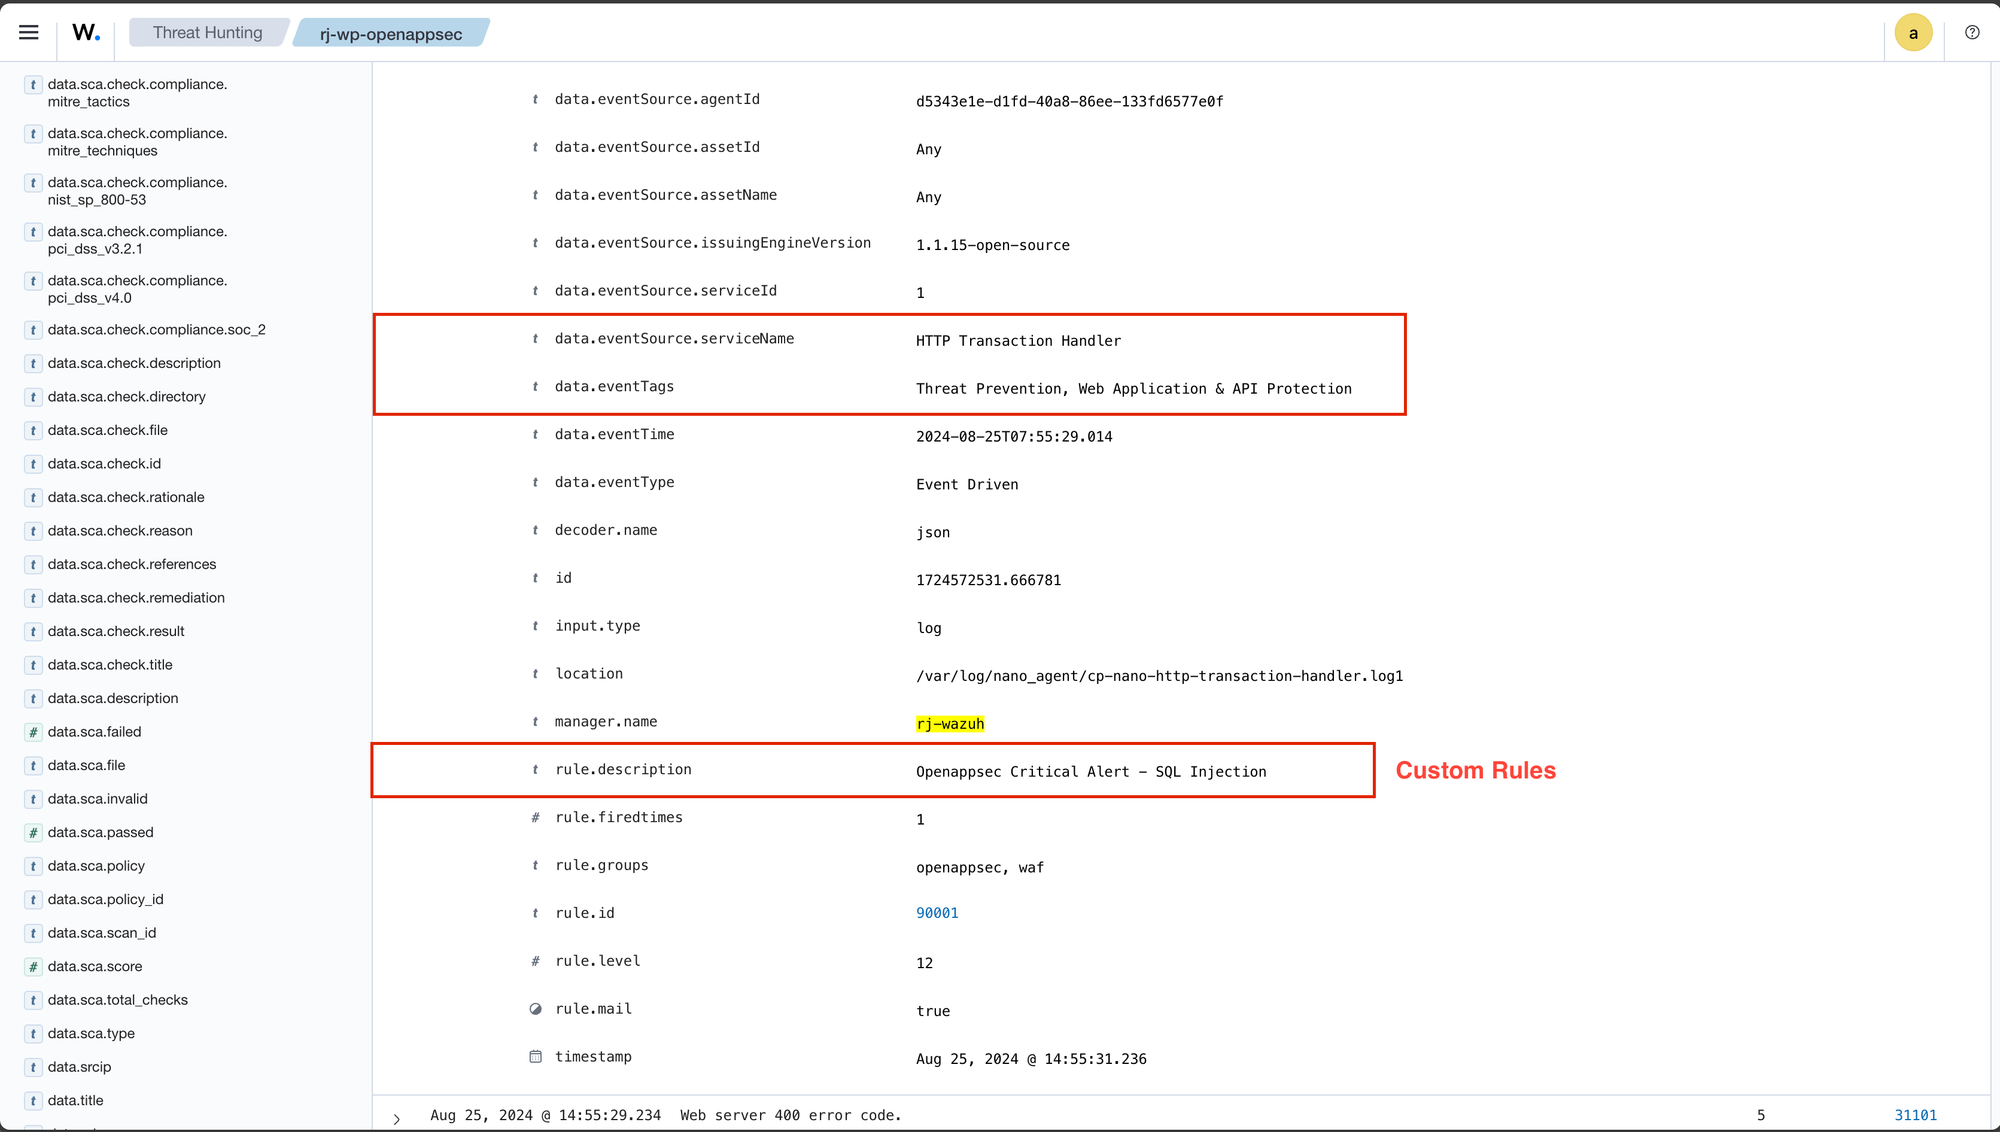
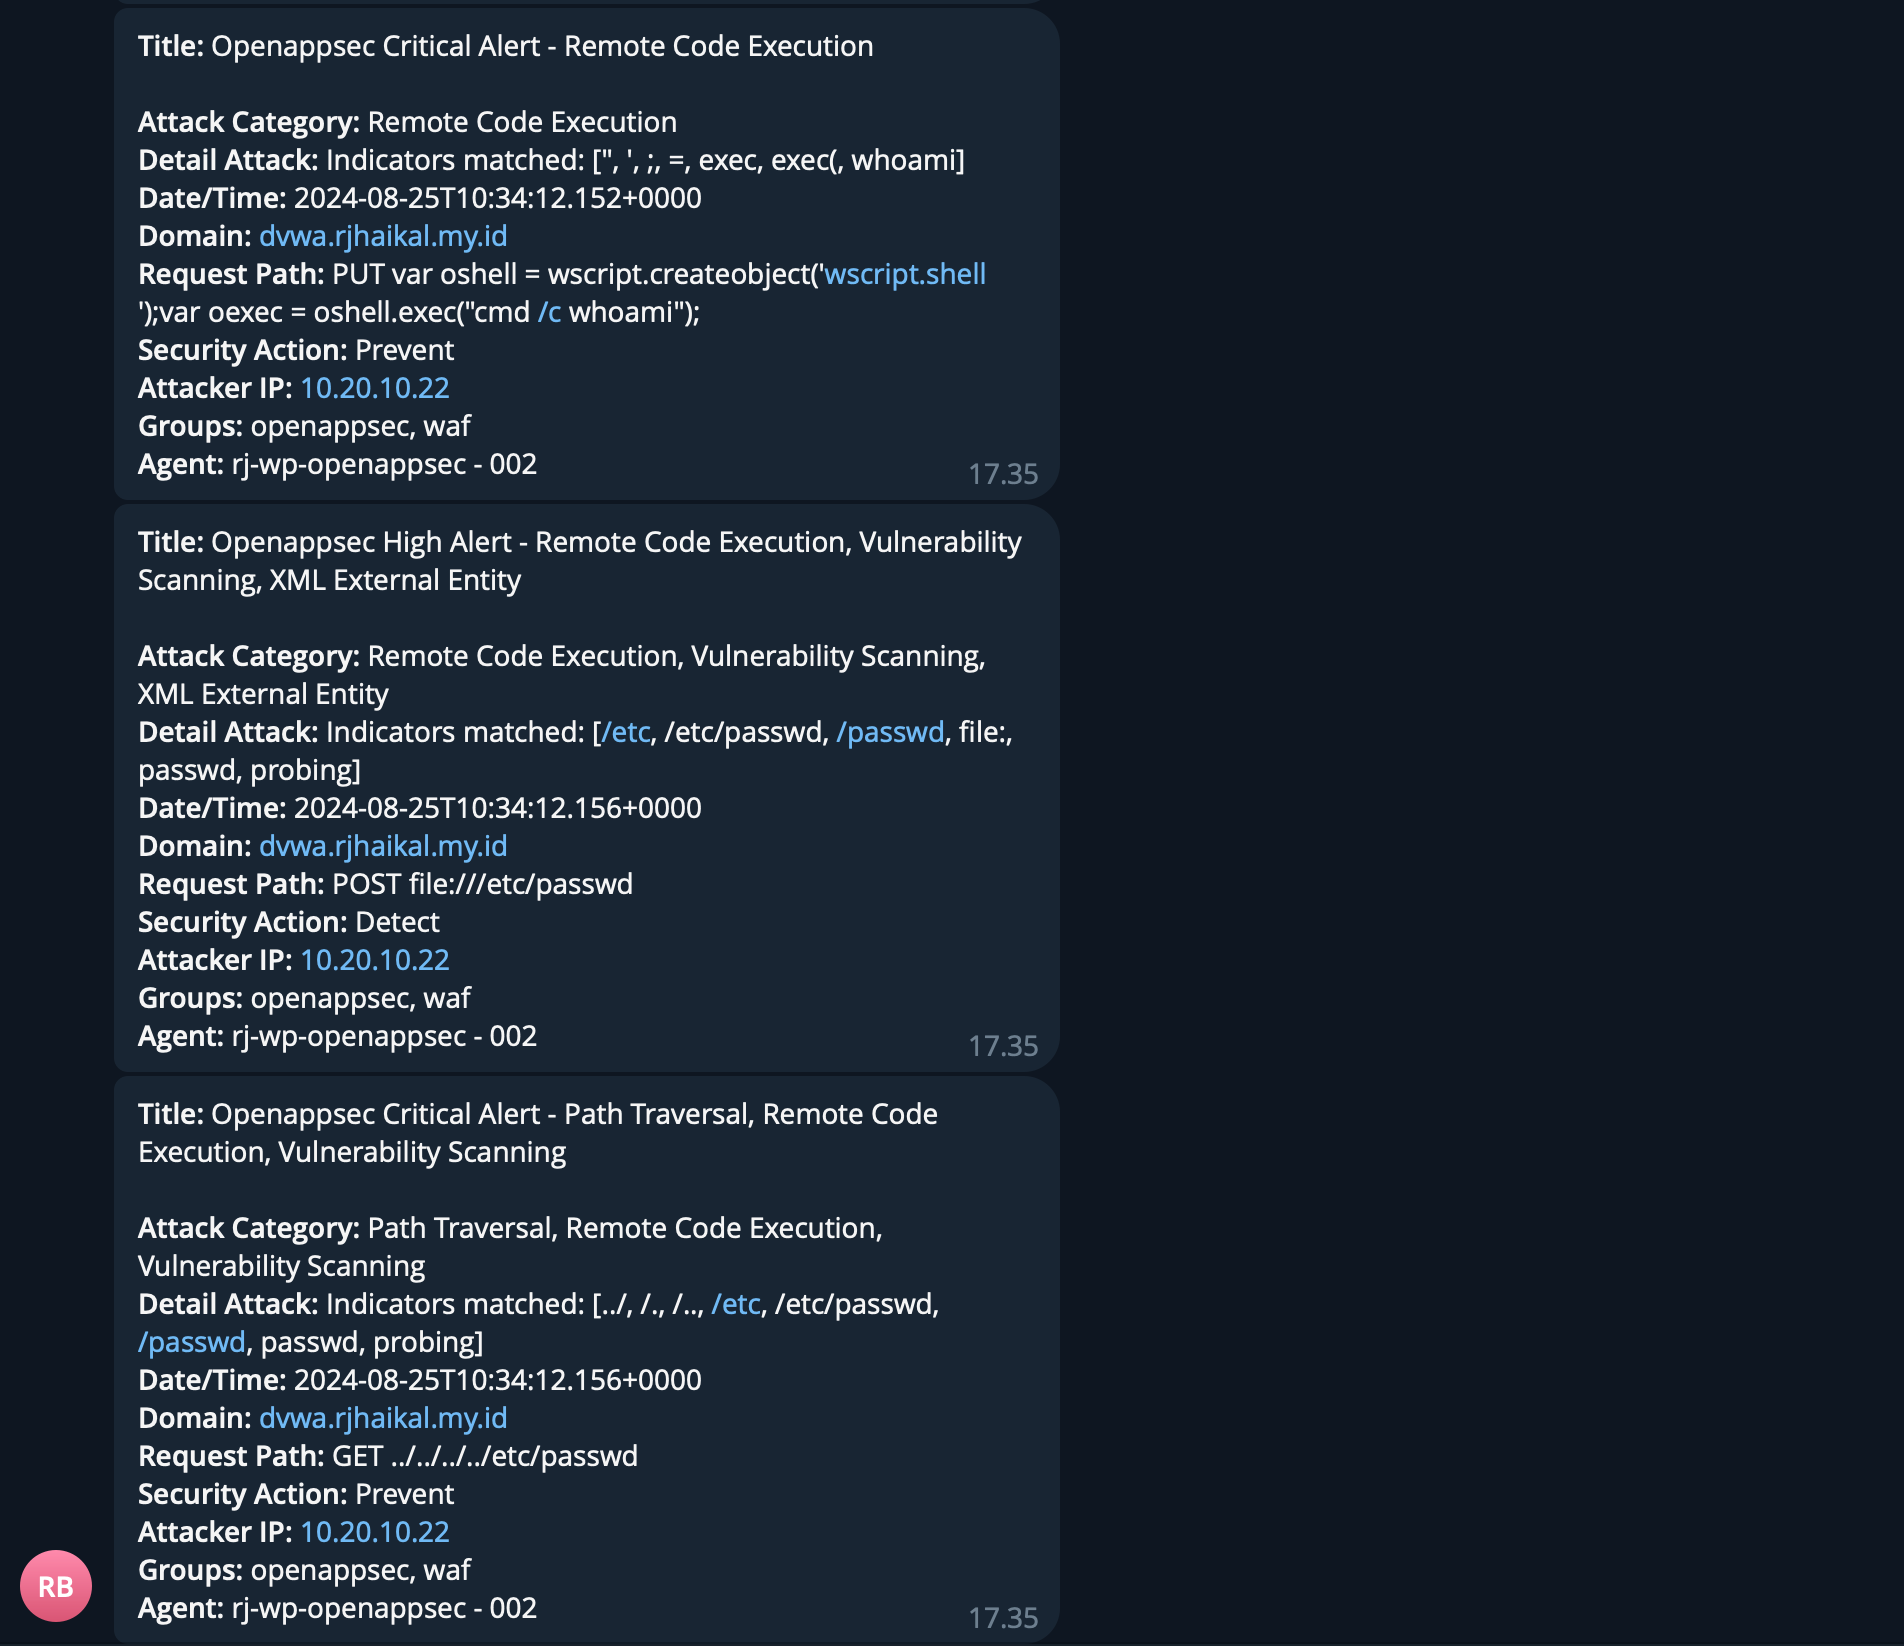
Wazuh Integration
As mentioned before, I've integrated Open-AppSec with Wazuh. The goal is to see how we can handle WAF detections within our SIEM. After some effort and research, I’ll provide a few images that summarize this.

Additional testing with Nuclei
Nuclei is Fast and customizable vulnerability scanner based on simple YAML based DSL.
nuclei -u https://dvwa.rjhaikal.my.id
                     __     _
   ____  __  _______/ /__  (_)
  / __ \/ / / / ___/ / _ \/ /
 / / / / /_/ / /__/ /  __/ /
/_/ /_/\__,_/\___/_/\___/_/   v3.3.1

                projectdiscovery.io

[WRN] Found 1 templates with runtime error (use -validate flag for further examination)
[INF] Current nuclei version: v3.3.1 (latest)
[INF] Current nuclei-templates version: v9.9.3 (latest)
[WRN] Scan results upload to cloud is disabled.
[INF] New templates added in latest release: 56
[INF] Templates loaded for current scan: 8388
[INF] Executing 8388 signed templates from projectdiscovery/nuclei-templates
[INF] Targets loaded for current scan: 1
[INF] Templates clustered: 1573 (Reduced 1478 Requests)
[dns-rebinding:IPv4] [dns] [unknown] dvwa.rjhaikal.my.id ["10.4.19.12"]
[INF] Using Interactsh Server: oast.site
[dvwa-default-login] [http] [critical] https://dvwa.rjhaikal.my.id/index.php [password="password",username="admin"]
[waf-detect:nginxgeneric] [http] [info] https://dvwa.rjhaikal.my.id
[INF] Skipped dvwa.rjhaikal.my.id:443 from target list as found unresponsive 30 times
[ssh-server-enumeration] [javascript] [info] dvwa.rjhaikal.my.id:22 ["SSH-2.0-OpenSSH_8.9p1 Ubuntu-3ubuntu0.10"]
[ssh-auth-methods] [javascript] [info] dvwa.rjhaikal.my.id:22 ["["publickey","password"]"]
[ssh-sha1-hmac-algo] [javascript] [info] dvwa.rjhaikal.my.id:22
[ssh-password-auth] [javascript] [info] dvwa.rjhaikal.my.id:22
Here's the result
Conclusion
OpenAppSec is a solid option for those transitioning from ModSecurity who still want a flexible, open-source WAF. Its machine learning features give it an edge over traditional signature-based WAFs and offer potential protection against zero-day attacks. With strong support from Checkpoint, a leading name in IT security, and active community contributions, OpenAppSec is a reliable choice.
Reference
openappsec


