
This article is more like a note to myself, but this may help if you are looking at Deploy a Production Ready Kubernetes Cluster using Kubespray.
Kubespray is an Ansible Playbook for deploying Kubernetes Cluster and provides a High Availability cluster, composable attributes, components, and supports multiple Linux distributions. Kubespray also supports cloud services like AWS, GCE, and Azure.
Prerequisites
- Two or more Linux servers – This demo uses four Ubuntu 20.04 servers for the Kubernetes cluster. Refer to the table below to know each server’s details and roles.
- Set up passwordless SSH from ansible-host to Kubernetes cluster servers.
| Hostname | IP Address | Role |
|---|---|---|
| rj-master1 | 192.168.1.121 | Control Plane |
| rj-master2 | 192.168.1.122 | Control Plane |
| rj-master3 | 192.168.1.123 | Control Plane |
| rj-worker1 | 192.168.1.131 | Worker Node |
| rj-worker2 | 192.168.1.132 | Worker Node |
| rj-worker3 | 192.168.1.133 | Worker Node |
Setting up Ansible Kubespray
Before deploying the Kubernetes cluster using Kubespray, you must download the Kubespray source code and install some Python dependencies.
- Install Python dependencies for Kubespray and git to clone/download the Kubespray source code.
# install python3-pip and git
sudo apt install python3-pip git -y
2. Clone the Ansible Kubespray repository to the Ansible host.
# clone the Kubespray repository
git clone https://github.com/kubernetes-incubator/kubespray.git
3. Install the Kubespray dependencies.
# change working directory and install Python
cd kubespray
sudo pip3 install -r requirements.txt
Generating the Ansible Inventory List
Kubespray provides a Python script for generating Ansible inventory configuration to deploy the Kubernetes cluster. The Kubespray inventory configuration has three groups:
kube_control_planefor the Kubernetes control plane.kube_nodefor the Kubernetes worker nodes.etcdfor the etcd servers.
- Install some additional Python dependencies
# install Python dependencies
sudo pip3 install -r contrib/inventory_builder/requirements.txt
2. Copy the sample directory inventory/samples to inventory/kubecluster.
The directory inventory/kubecluster will be the main directory for setting up the Kubernetes cluster.
# copy sample of inventory to kubecluster
cp -rfp inventory/sample inventory/kubecluster
3. Create a new variable called IPS, which contains the IP addresses of all servers in the Kubernetes cluster.
# create variable IPS
declare -a IPS=(192.168.1.121 192.168.1.122 192.168.1.123 192.168.1.131 192.168.1.132 192.168.1.133)
4. Generate the Ansible inventory using the inventory builder script inventory.py and using the IPS variable.
This command will generate a new inventory configuration file called hosts.yml inside the inventory/kubecluster directory.
# generating inventory file
CONFIG_FILE=inventory/kubecluster/hosts.yml python3 contrib/inventory_builder/inventory.py ${IPS[@]}
5. Lastly, open the inventory file in your preferred text editor.
vim inventory/kubecluster/hosts.ymlIn the below example, the Kubernetes control plane and etcd will be available at the master server with IP address 192.168.1.121, 192.168.1.122, 192.168.2.133. And rj-worker1, rj-worker2, and rj-worker3 are the Kubernetes worker nodes.
all:
  hosts:
    rj-master1:
      ansible_host: 192.168.1.121
      ip: 192.168.1.121
      access_ip: 192.168.1.121
    rj-master2:
      ansible_host: 192.168.1.122
      ip: 192.168.1.122
      access_ip: 192.168.1.122
    rj-master3:
      ansible_host: 192.168.1.123
      ip: 192.168.1.123
      access_ip: 192.168.1.123
    rj-worker1:
      ansible_host: 192.168.1.131
      ip: 192.168.1.131
      access_ip: 192.168.1.131
    rj-worker2:
      ansible_host: 192.168.1.132
      ip: 192.168.1.132
      access_ip: 192.168.1.132
    rj-worker3:
      ansible_host: 192.168.1.133
      ip: 192.168.1.133
      access_ip: 192.168.1.133
  children:
    kube_control_plane:
      hosts:
        rj-master1:
        rj-master2:
        rj-master3:
    kube_node:
      hosts:
        rj-worker1:
        rj-worker2:
        rj-worker3:
    etcd:
      hosts:
        rj-master1:
        rj-master2:
        rj-master3:
    k8s_cluster:
      children:
        kube_control_plane:
        kube_node:
    calico_rr:
      hosts: {}
Deploying the Kubernetes Cluster with Kubespray
Now that you have generated the inventory hosts.yml file, you’re ready to start the Kubernetes cluster deployment. But, before you do, there are a few things to verify and change first.
- Open the main Kubespray file inventory/kubecluster/group_vars/all/all.yml
vim inventory/kubecluster/group_vars/all/all.ymllook for the below line and uncomment it to open the kubelet port 10255. Doing so enables metrics for Kubernetes resource utilization.
kube_read_only_port: 102552. open another file called inventory/kubecluster/group_vars/k8s_cluster/k8s-cluster.yml
vim inventory/kubecluster/group_vars/k8s_cluster/k8s-cluster.ymlThe default configuration is using the Calico network plugin, and for this example, leave the default and close the file.
# Choose network plugin (cilium, calico, contiv, weave or flannel.# Use cni for generic cni plugin)# Can also be set to 'cloud', which lets the cloud provider# setup appropriate routing
kube_network_plugin: calico
Other network plugins are available, such as weave, flannel, contiv, and cilium. Each network plugin has different implementations. For example, the calico plugin runs on the layer 3 network stack while the flannel runs on layer 2 .
3. Run the ansible-playbook command to deploy the Kubernetes cluster.
Include the correct inventory host file inventory/kubecluster/hosts.yml and append the option –become to enable privileges escalation for all Ansible tasks. Also, the additional option –become-user=root will enforce all commands to run as the root user.
# deploy Kubernetes Cluster
ansible-playbook -i inventory/kubecluster/hosts.yml --become --become-user=root cluster.yml
Depending on your environment, the Kubespray deployment could take 20-30 to finish or more. If you are stuck with some tasks, you can press Ctrl+c to exit and re-run the ansible-playbook command.
4. Run the below kubectl command to verify the Kubernetes cluster deployment.
# Copy admin.conf as kubeconfig file
mkdir -p ~/.kube
cp /etc/kubernetes/admin.conf ~/.kube/config
chown $USER: ~/.kube/config

# Check Kubernetes Cluster
kubectl get nodes -o wide
NAME         STATUS   ROLES           AGE   VERSION   INTERNAL-IP     EXTERNAL-IP   OS-IMAGE             KERNEL-VERSION     CONTAINER-RUNTIME
rj-master1   Ready    control-plane   12m   v1.24.6   192.168.1.121   <none>        Ubuntu 20.04.5 LTS   5.4.0-54-generic   containerd://1.6.8
rj-master2   Ready    control-plane   11m   v1.24.6   192.168.1.122   <none>        Ubuntu 20.04.5 LTS   5.4.0-54-generic   containerd://1.6.8
rj-master3   Ready    control-plane   11m   v1.24.6   192.168.1.123   <none>        Ubuntu 20.04.5 LTS   5.4.0-54-generic   containerd://1.6.8
rj-worker1   Ready    <none>          10m   v1.24.6   192.168.1.131   <none>        Ubuntu 20.04.5 LTS   5.4.0-54-generic   containerd://1.6.8
rj-worker2   Ready    <none>          10m   v1.24.6   192.168.1.132   <none>        Ubuntu 20.04.5 LTS   5.4.0-54-generic   containerd://1.6.8
rj-worker3   Ready    <none>          10m   v1.24.6   192.168.1.133   <none>        Ubuntu 20.04.5 LTS   5.4.0-54-generic   containerd://1.6.8
Create a Test Deployment
- Create Nginx Deployment
kubectl create deployment nginx --image nginx:alpine
kubectl expose deployment nginx --type NodePort --port 80
kubectl get svc

NAME         TYPE        CLUSTER-IP      EXTERNAL-IP   PORT(S)        AGE
kubernetes   ClusterIP   10.233.0.1      <none>        443/TCP        20m
nginx        NodePort    10.233.14.234   <none>        80:30758/TCP   4s
3. Access Test with Curl
curl http://192.168.1.121:30758
<!DOCTYPE html>
<html>
<head>
<title>Welcome to nginx!</title>
<style>
html { color-scheme: light dark; }
body { width: 35em; margin: 0 auto;
font-family: Tahoma, Verdana, Arial, sans-serif; }
</style>
</head>
<body>
<h1>Welcome to nginx!</h1>
<p>If you see this page, the nginx web server is successfully installed and
working. Further configuration is required.</p>

<p>For online documentation and support please refer to
<a href="http://nginx.org/">nginx.org</a>.<br/>
Commercial support is available at
<a href="http://nginx.com/">nginx.com</a>.</p>

<p><em>Thank you for using nginx.</em></p>
</body>
</html>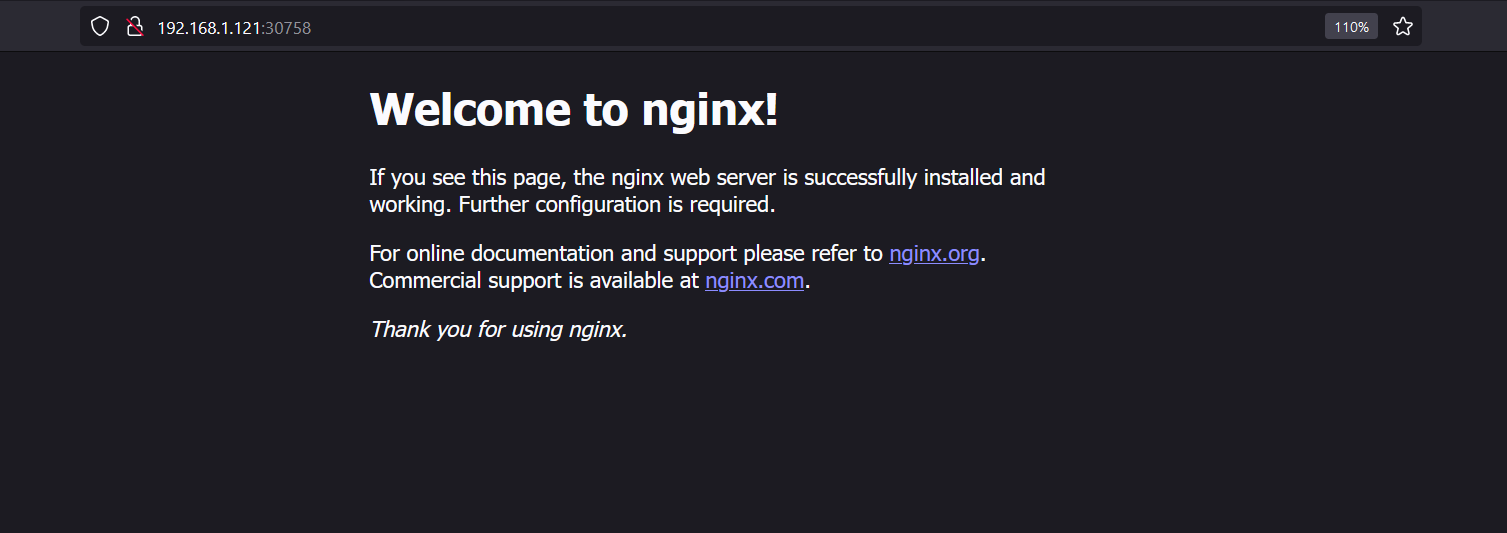
Conclusion
Throughout this tutorial, you have completed the deployment of the Kubernetes cluster automatically using the Ansible Kubespray.
At this point, you’ve got a fully functional Kubernetes cluster. What’s next? Perhaps you will want to learn about the NGINX Ingress Controller, MetalLB, and Dynamic NFS Client Provisioner on Kubernetes.
Reference
 kubernetes-sigs


