Install Nginx
Install dependencies
sudo apt install -y curl gnupg2 ca-certificates lsb-release ubuntu-keyringThen run an update and install nginx :
sudo apt update
sudo apt install -y nginx
Allow UFW
sudo ufw allow 'Nginx Full'
sudo ufw reload
To check the status, run the following: sudo ufw status.
Install & Configure MySQL
MySQL is an open-source relational database management system. To install MySQL on ubuntu, use:
sudo apt install mysql-serverAfter completing the installation, it's recommended to run a security script that comes with MySQL. This script helps to remove insecure default settings and secure access to your database. You can start the interactive script by using the following command:
sudo mysql_secure_installationOnce you're done, you can test your ability to log into the MySQL console with:
mysql -u root -p
Since no password is set for the root user, leave the password field blank when prompted. However, it's recommended to set a password after logging in. Use the following command in the MySQL shell:
ALTER USER 'root'@'localhost' IDENTIFIED WITH mysql_native_password BY 'Str0ngP@ssw0rd!';
mysql_native_password method is deprecated. Refer to the official guide for the updated way to change the root password. From now on, you'll need to use the new password when logging in as root.Create Wordpress Database
Log in to the MySQL command line using mysql -u root -p and enter the password you set earlier. Once in the MySQL console, create the WordPress database with:
CREATE DATABASE wordpress DEFAULT CHARACTER SET utf8 COLLATE utf8_unicode_ci;
Next, create a dedicated MySQL user account for the WordPress database:
CREATE USER 'wordpressuser'@'localhost' IDENTIFIED BY 'password';
Grant this user access to the WordPress database:
GRANT ALL ON wordpress.* TO 'wordpressuser'@'localhost';
FLUSH PRIVILEGES;
Finally, exit the MySQL shell with the exit command.
Install Additional PHP and PHP Extensions
Nginx requires an external program to handle PHP processing, bridging the gap between the PHP interpreter and the web server, which enhances performance for PHP-based sites. You'll need to install php8.1-fpm for PHP processing and php-mysql for PHP to communicate with MySQL databases.
sudo apt install -y php8.3-fpm php-mysql
Additional PHP extensions like php-curl, php-gd, and others may be needed depending on your WordPress plugins.
sudo apt install -y php-curl php-gd php-intl php-mbstring php-soap php-xml php-xmlrpc php-zip php-mysql
After installing, restart the PHP-FPM process:
sudo systemctl restart php8.3-fpm
Ensure the PHP-FPM service is enabled and running with:
sudo systemctl enable php8.3-fpm.service
sudo systemctl start php8.3-fpm.service
Download & Install Wordpress
For security purposes, it's best to download the latest version of WordPress from the official website. Navigate to a writable directory and download the compressed file:
cd /tmp
curl -LO https://wordpress.org/latest.tar.gz
Extract the archive, configure WordPress, and move it to your document root:
tar xzvf latest.tar.gz
mv /tmp/wordpress/wp-config-sample.php /tmp/wordpress/wp-config.php
sudo cp -a /tmp/wordpress/. /var/www/wordpress
Set ownership to the www-data user and group so Nginx can manage the files:
sudo chown -R www-data:www-data /var/www/wordpress
Configure Wordpress
To enhance security, edit the wp-config.php file and replace the default sample secret keys with unique ones. Generate secure keys using:
curl -s https://api.wordpress.org/secret-key/1.1/salt/
Open the config file:
sudo nano /var/www/wordpress/wp-config.php
Replace the placeholder keys, update the database details, and add:
define( 'FS_METHOD', 'direct' );
This prevents WordPress from asking for FTP credentials during certain actions.
Configure Nginx
Create a new configuration file in Nginx's sites-available directory using your preferred text editor:
sudo nano /etc/nginx/sites-available/wordpress.confThen, paste the required content into the file, ensuring you replace any placeholders with the correct values.
# Redirect HTTP -> HTTPS
server {
    listen 80;
    server_name www.your_domain.com your_domain.com;
    return 301 https://your_domain.com$request_uri;
}

# Redirect WWW -> NON-WWW
server {
    listen 443 ssl;
    http2 on;
    server_name www.your_domain.com;

    ssl_certificate /etc/letsencrypt/live/your_domain.com/fullchain.pem;
    ssl_certificate_key /etc/letsencrypt/live/your_domain.com/privkey.pem;
    ssl_trusted_certificate /etc/letsencrypt/live/your_domain.com/chain.pem;
    #include snippets/ssl.conf;

    return 301 https://your_domain.com$request_uri;
}

server {
    listen 443 ssl;
    http2 on;

    server_name your_domain.com;
    ssl_certificate /etc/letsencrypt/live/your_domain.com/fullchain.pem;
    ssl_certificate_key /etc/letsencrypt/live/your_domain.com/privkey.pem;
    ssl_trusted_certificate /etc/letsencrypt/live/your_domain.com/chain.pem;

    root /var/www/wordpress;

    index index.html index.htm index.php;

    location / {
        try_files $uri $uri/ =404;
    }

    location ~ \.php$ {
        include snippets/fastcgi-php.conf;
        fastcgi_pass unix:/var/run/php/php8.3-fpm.sock;
    }

    location ~ /\.ht {
        deny all;
    }

}
Insert additional location blocks within the main server block to handle requests for the favicon, robots.txt, and static files like HTML, CSS, and JavaScript:
location = /favicon.ico { log_not_found off; access_log off; }
location = /robots.txt { log_not_found off; access_log off; allow all; }
location ~* \.(css|gif|ico|jpeg|jpg|js|png)$ { expires max; log_not_found off; }
Modify the try_files directive by commenting out the default line and adding the following to pass requests to index.php:
location / {
    #try_files $uri $uri/ =404;
    try_files $uri $uri/ /index.php$is_args$args;
}
Your final config file should look like this:
# Redirect HTTP -> HTTPS
server {
    listen 80;
    server_name www.your_domain.com your_domain.com;
    return 301 https://your_domain.com$request_uri;
}

# Redirect WWW -> NON-WWW
server {
    listen 443 ssl;
    http2 on;
    server_name www.your_domain.com;

    ssl_certificate /etc/letsencrypt/live/your_domain.com/fullchain.pem;
    ssl_certificate_key /etc/letsencrypt/live/your_domain.com/privkey.pem;
    ssl_trusted_certificate /etc/letsencrypt/live/your_domain.com/chain.pem;
    #include snippets/ssl.conf;

    return 301 https://your_domain.com$request_uri;
}

server {
    listen 443 ssl;
    http2 on;

    server_name your_domain.com;
    ssl_certificate /etc/letsencrypt/live/your_domain.com/fullchain.pem;
    ssl_certificate_key /etc/letsencrypt/live/your_domain.com/privkey.pem;
    ssl_trusted_certificate /etc/letsencrypt/live/your_domain.com/chain.pem;

    root /var/www/wordpress;

    index index.html index.htm index.php;

    location / {
        #try_files $uri $uri/ =404;
        try_files $uri $uri/ /index.php$is_args$args;
    }

    location ~ \.php$ {
        include snippets/fastcgi-php.conf;
        fastcgi_pass unix:/var/run/php/php8.3-fpm.sock;
    }

    location = /favicon.ico { log_not_found off; access_log off; }
    location = /robots.txt { log_not_found off; access_log off; allow all; }
    location ~* \.(css|gif|ico|jpeg|jpg|js|png)$ {
        expires max;
        log_not_found off;
    }

    location ~ /\.ht {
        deny all;
    }

}
Enable your configuration by creating a symbolic link from the Nginx sites-enabled directory:
sudo ln -s /etc/nginx/sites-available/wordpress.conf /etc/nginx/sites-enabled/
Next, remove the default configuration link:
sudo unlink /etc/nginx/sites-enabled/default
Check the syntax for errors:
sudo nginx -t
If everything is correct, reload Nginx:
sudo systemctl reload nginx
Open your web browser and go to your server's domain name or public IP address:
https://your_domain.com
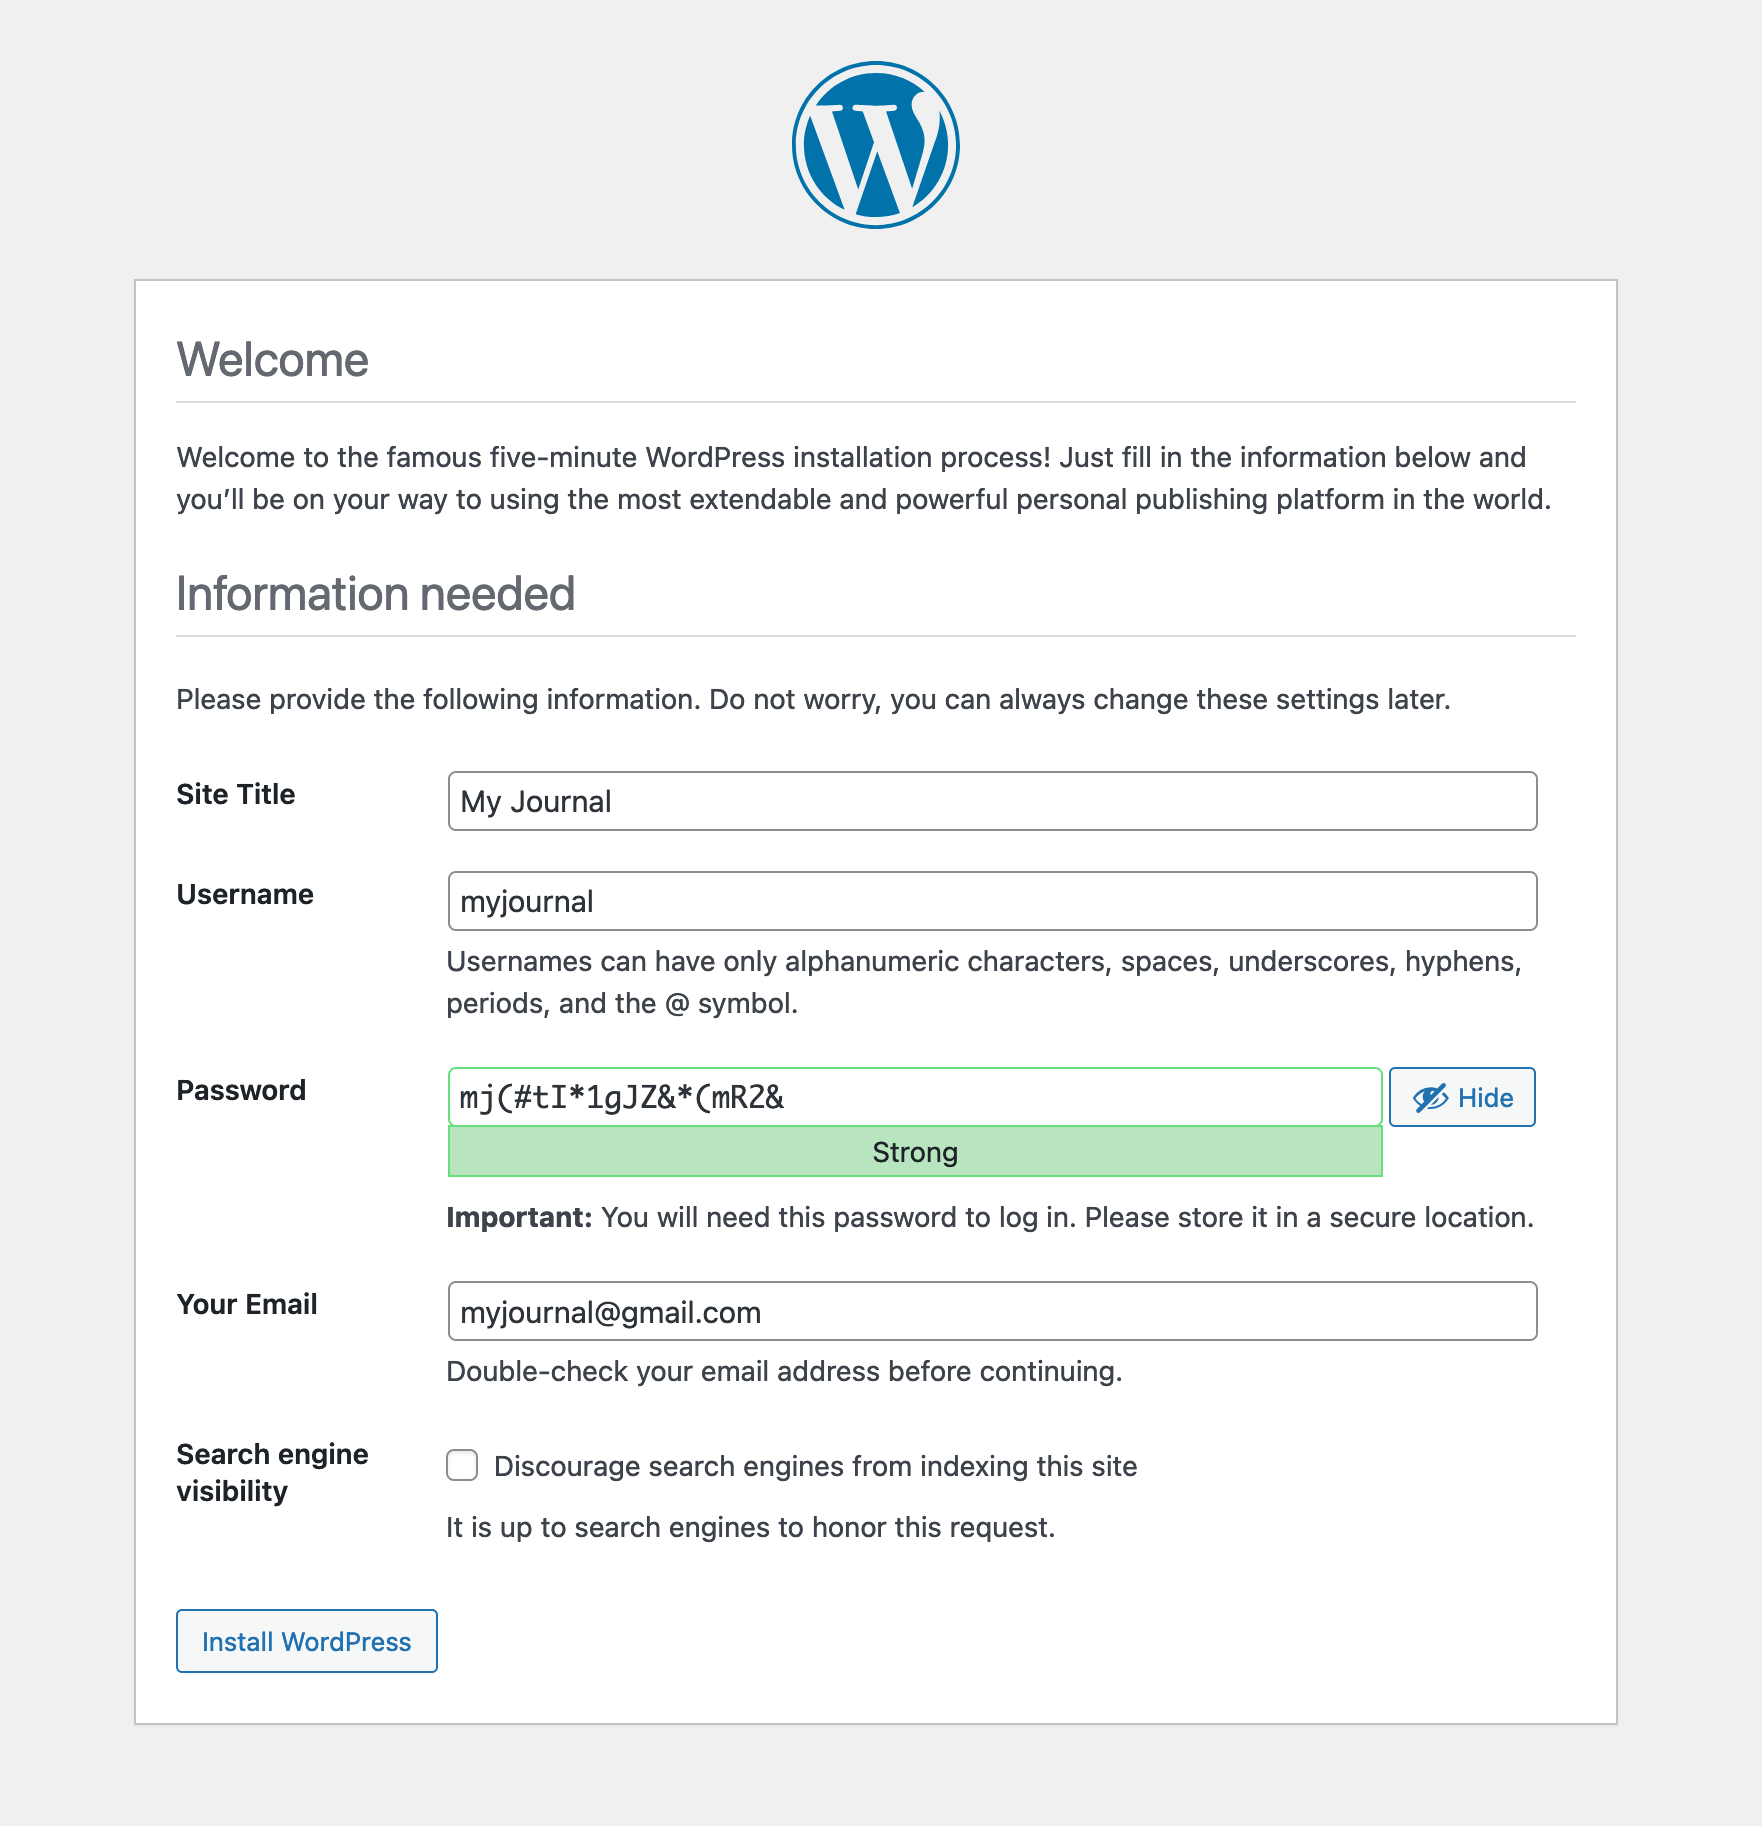
Then, choose your preferred language.

Choose a name for your WordPress site and create a username (avoid using "admin" for better security). A strong password will be automatically generated; you can save this password or choose a different strong one. Enter your email address and decide whether to discourage search engines from indexing your site.