Creating a Kubernetes Cluster within Rancher
In this step, we will be creating a Kubernetes Lab environment within Rancher. Normally, in a production case, you would create a Kubernetes Cluster with multiple nodes; however, with this lab environment, we will only be using one virtual machine for the cluster.
- Go to the Rancher Home Page
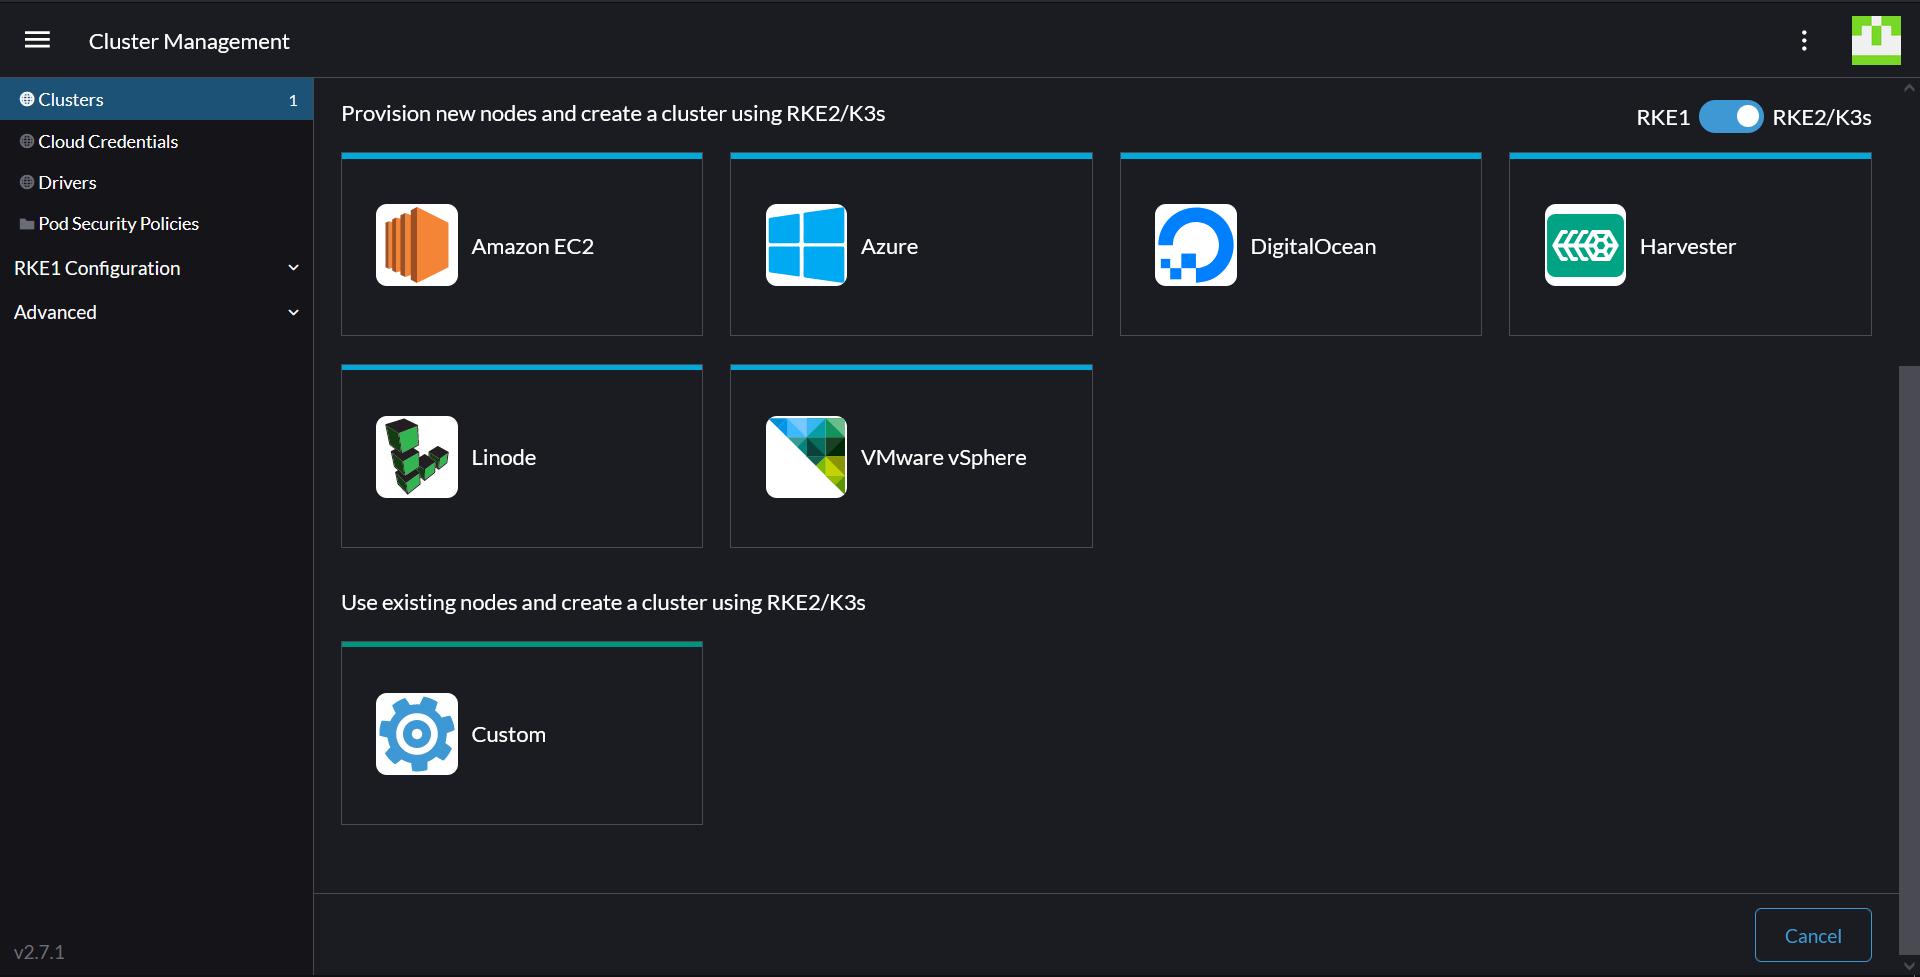
- On top of the list of available clusters, click Create
- We will be using RKE2 cluster, so make sure to switch the toggle to RKE2/K3s
- Note the multiple types of Kubernetes cluster Rancher supports. We will be using Custom cluster on existing nodes for this lab, but there are a lot of possibilities with Rancher.
3. Click on the Custom Cluster box in the Use existing nodes and create a cluster using RKE2 section
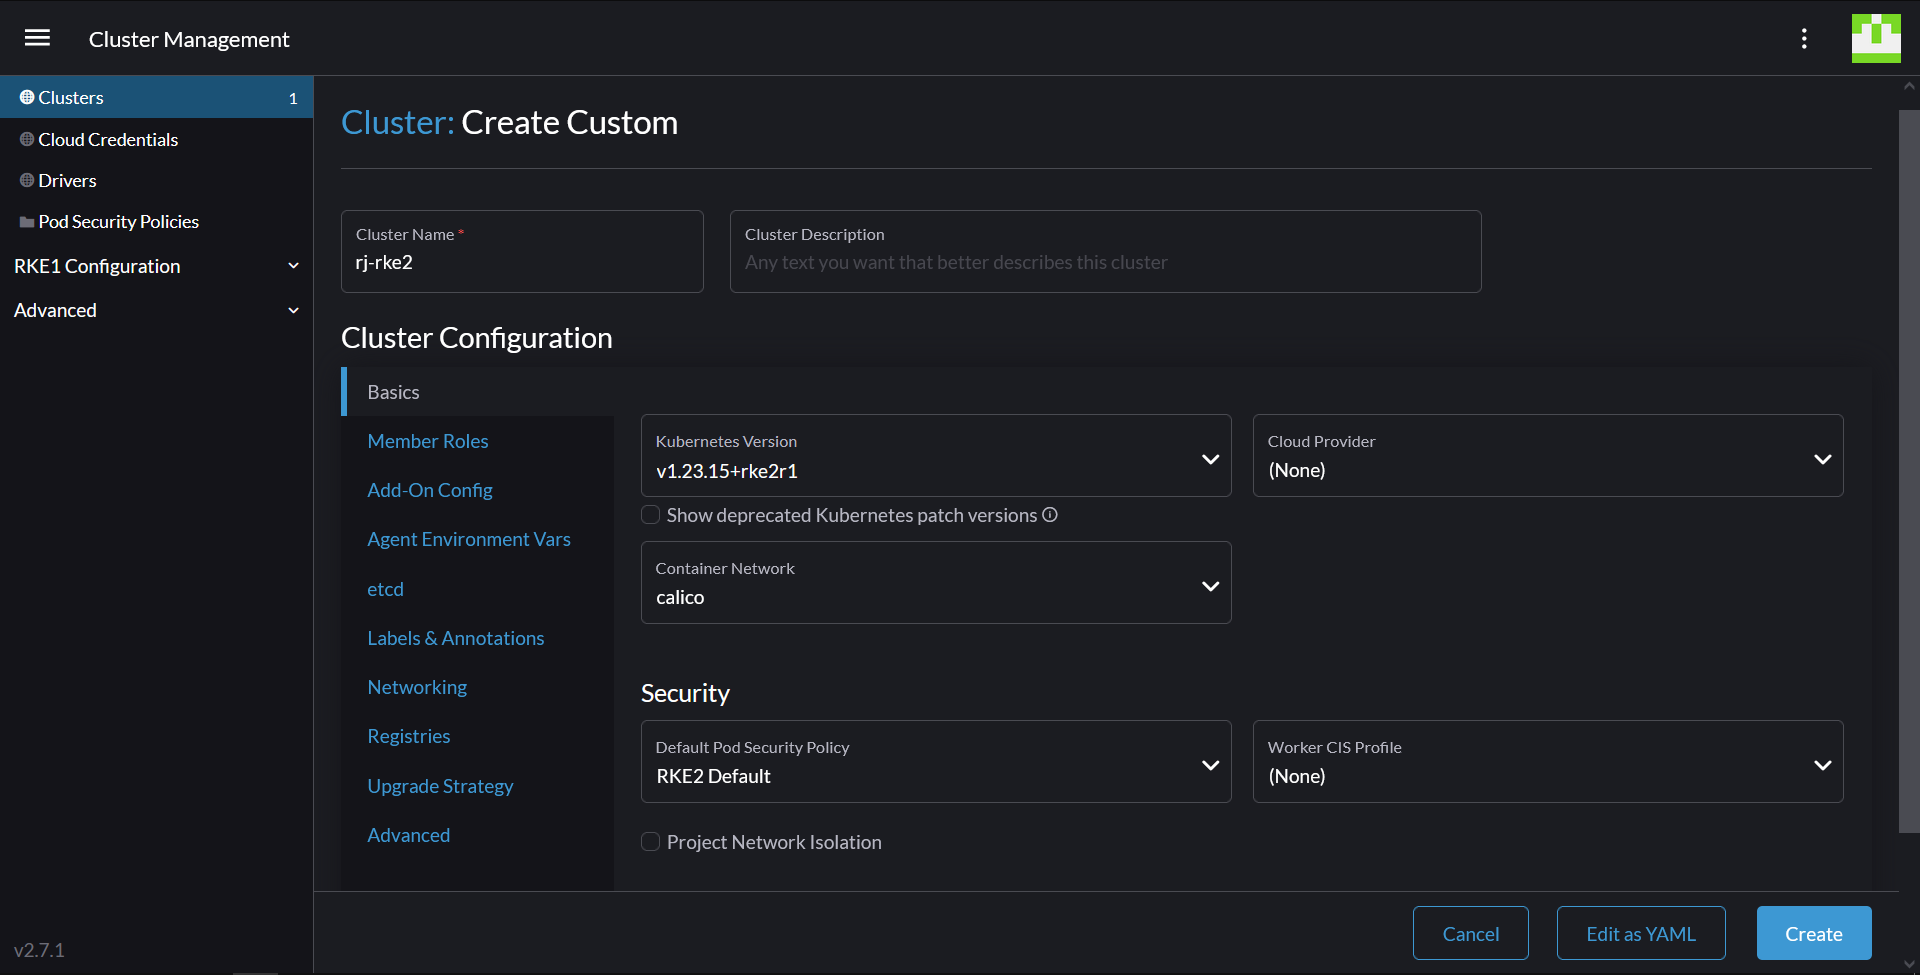
4. Enter a name in the Cluster Name box. Set the Kubernetes Version to a v1.23.x version. All other settings can be kept as default. Click Create at the bottom.
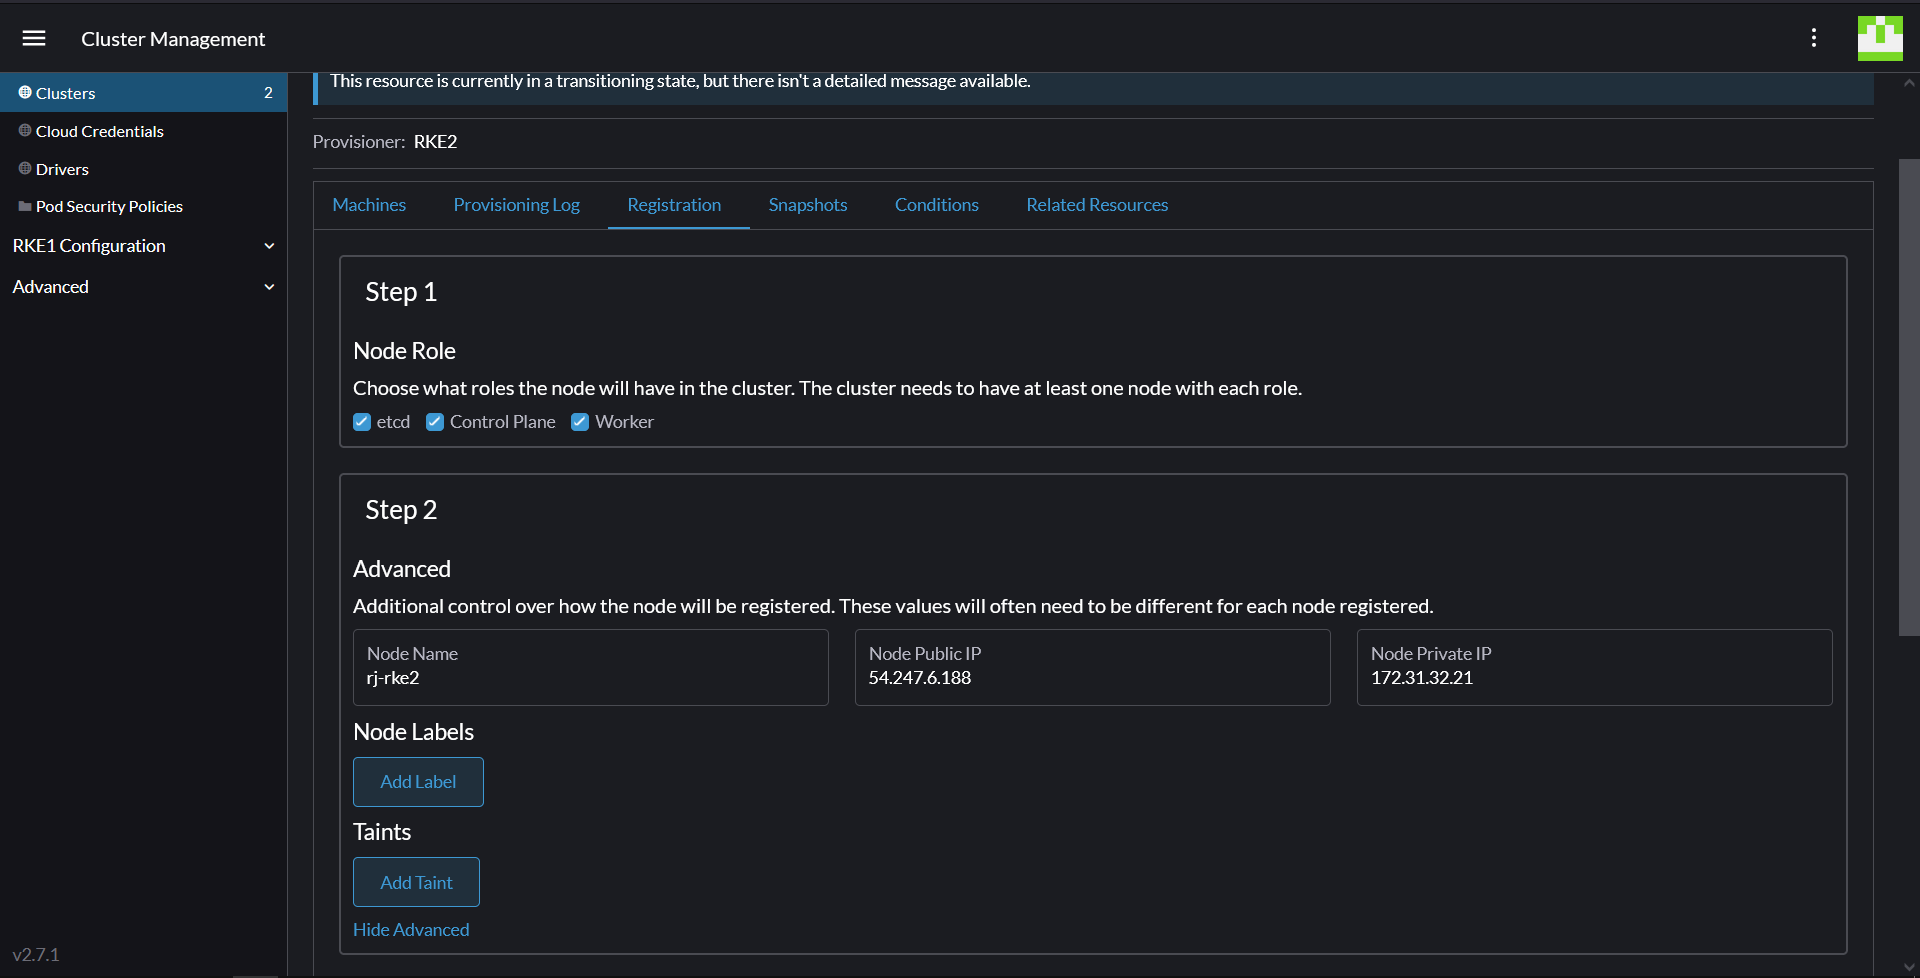
5. Once the cluster is created, you can retrieve an installation command in the Registration tab that you can use to add new nodes to your Kubernetes cluster.
Make sure the boxes etcd, Control Plane, and Worker are all ticked. Click Show Advanced to the bottom right of the checkboxes.
6. Enter the Node Public IP (54.247.6.188) and Node Private IP (172.31.32.21).
IMPORTANT: It is VERY important that you use the correct External and Internal addresses from the rj-rke2 machine for this step, and run it on the correct machine. Failure to do this will cause the future steps to fail.
7. Check the checkbox to skip the TLS verification and accept insecure certificates below the registration command. Double click the registration command to copy it to your clipboard.
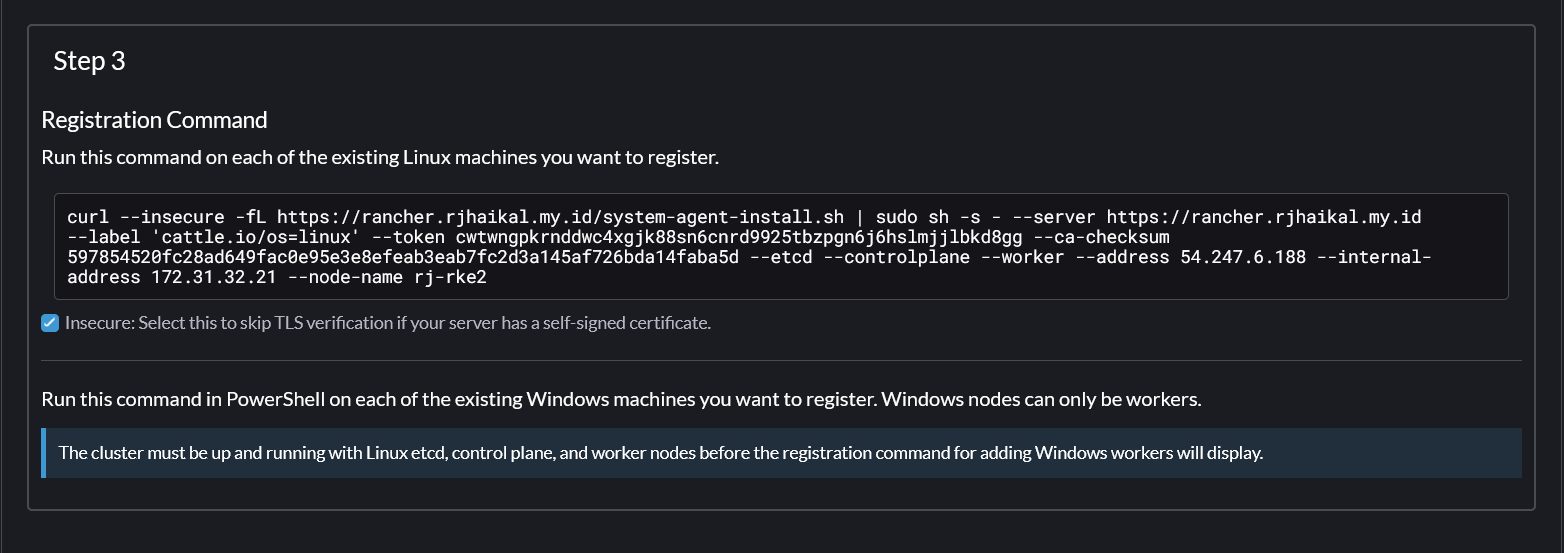
8. Start the Rancher Kubernetes Cluster Bootstrapping Process
Take the copied command and run it on rj-rke2 VM.
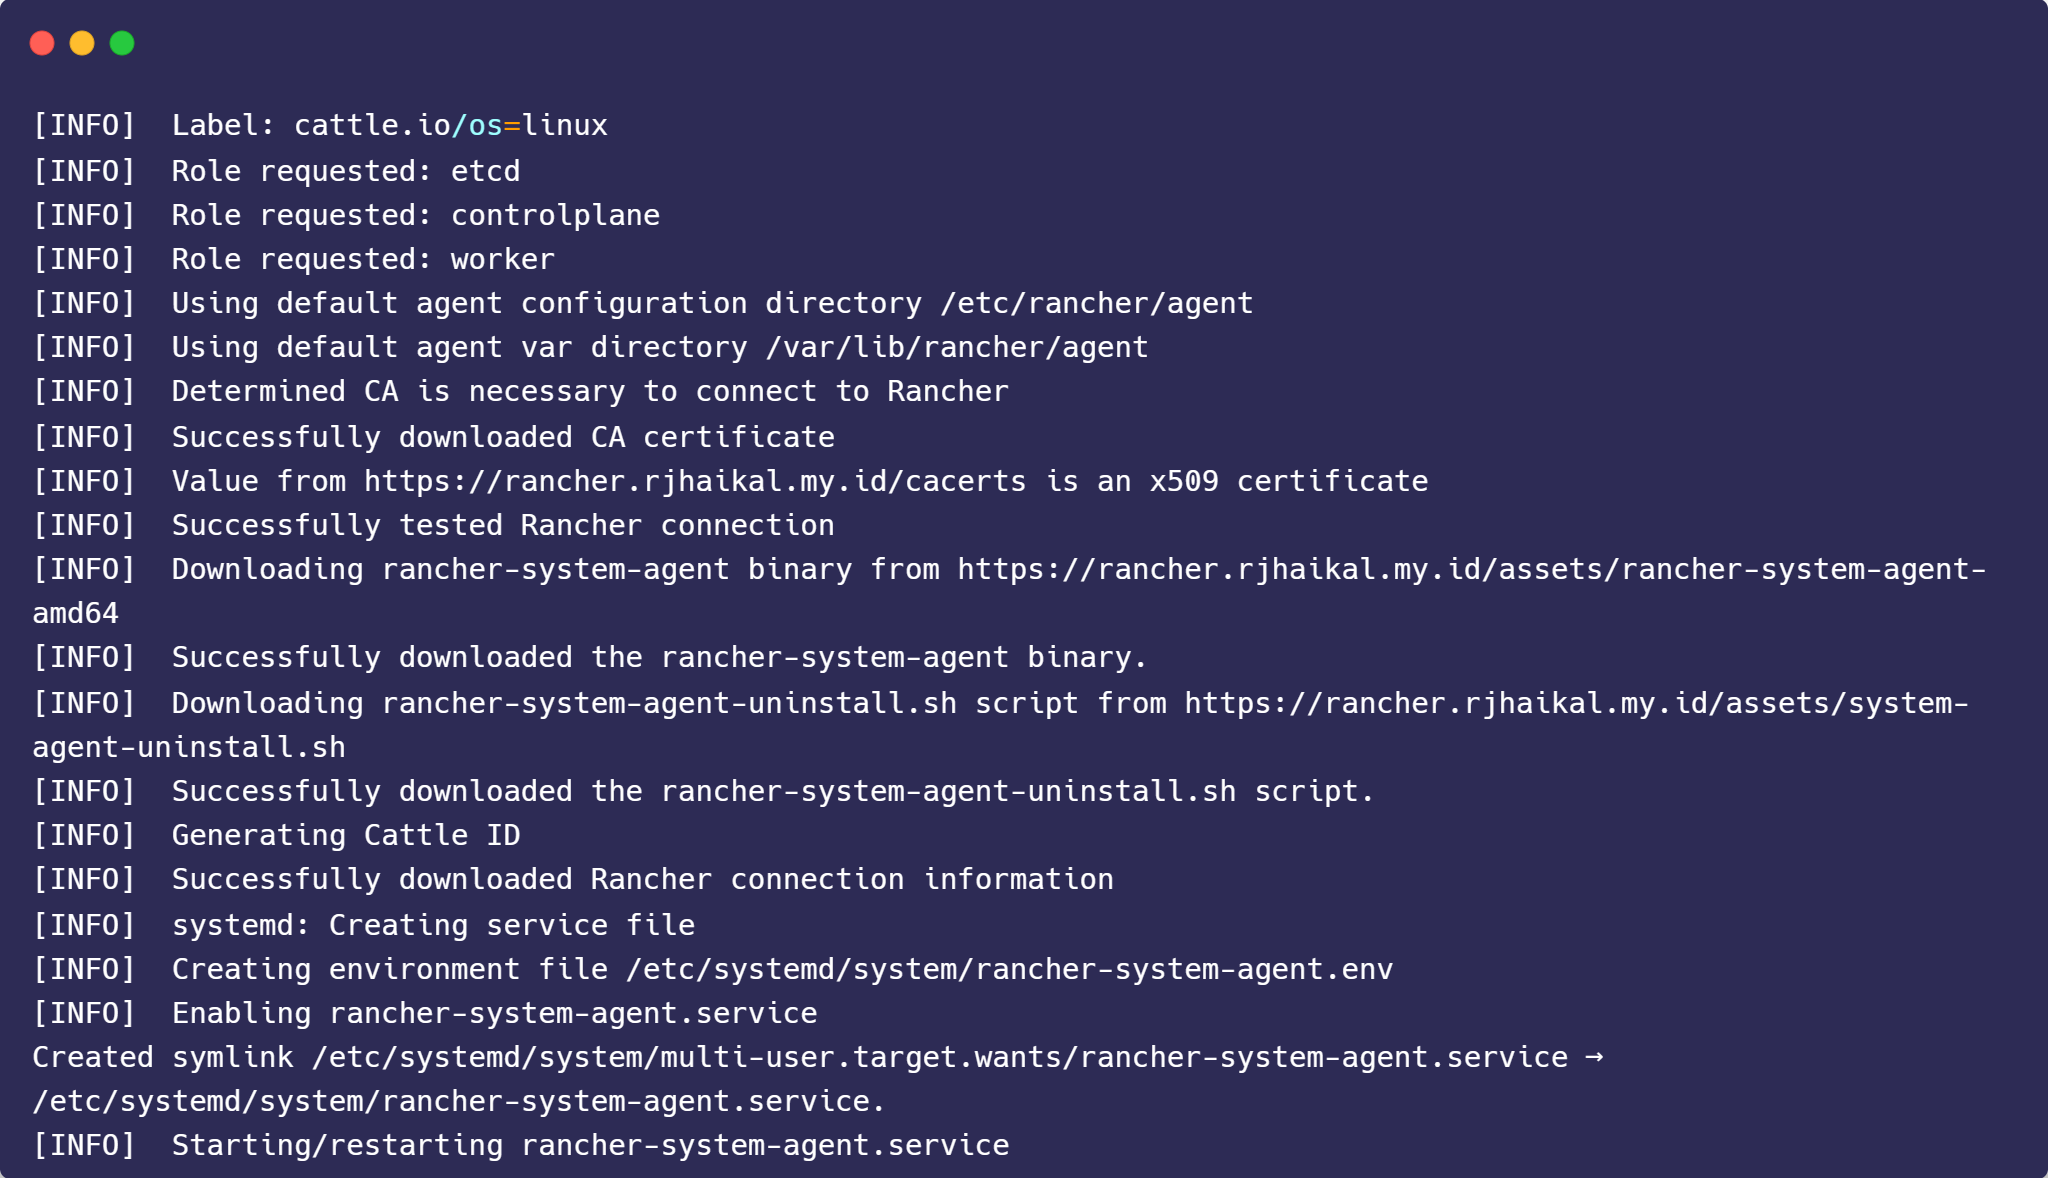
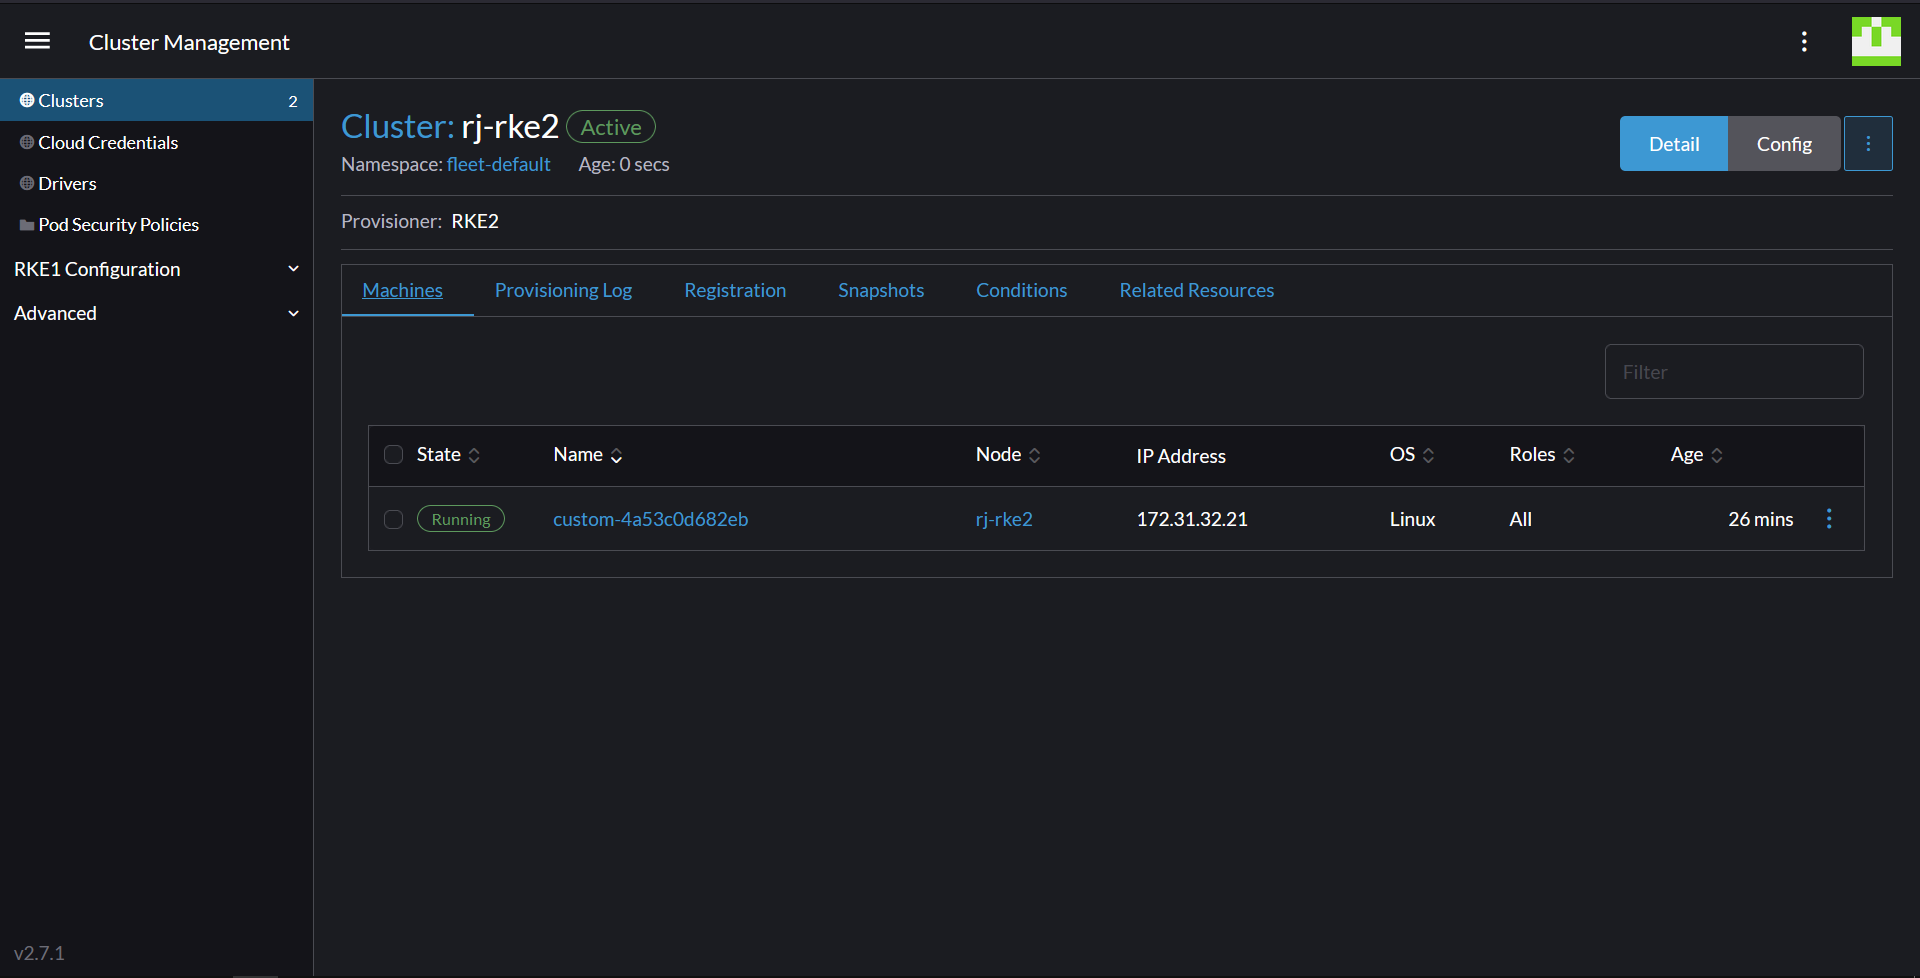
You can follow the provisioning process in the Machine Pools, Conditions and Related Resources tabs. Your cluster state in the cluster list and on the cluster detail page will change to Active
Once your cluster has gone to Active you can start exploring it by either clicking the Explore button in the cluster list on the home page, or by selecting the cluster in the global menu.
Interacting with the Kubernetes Cluster
In this step, we will be showing basic interaction with our Kubernetes cluster.
- Click into your newly active cluster.
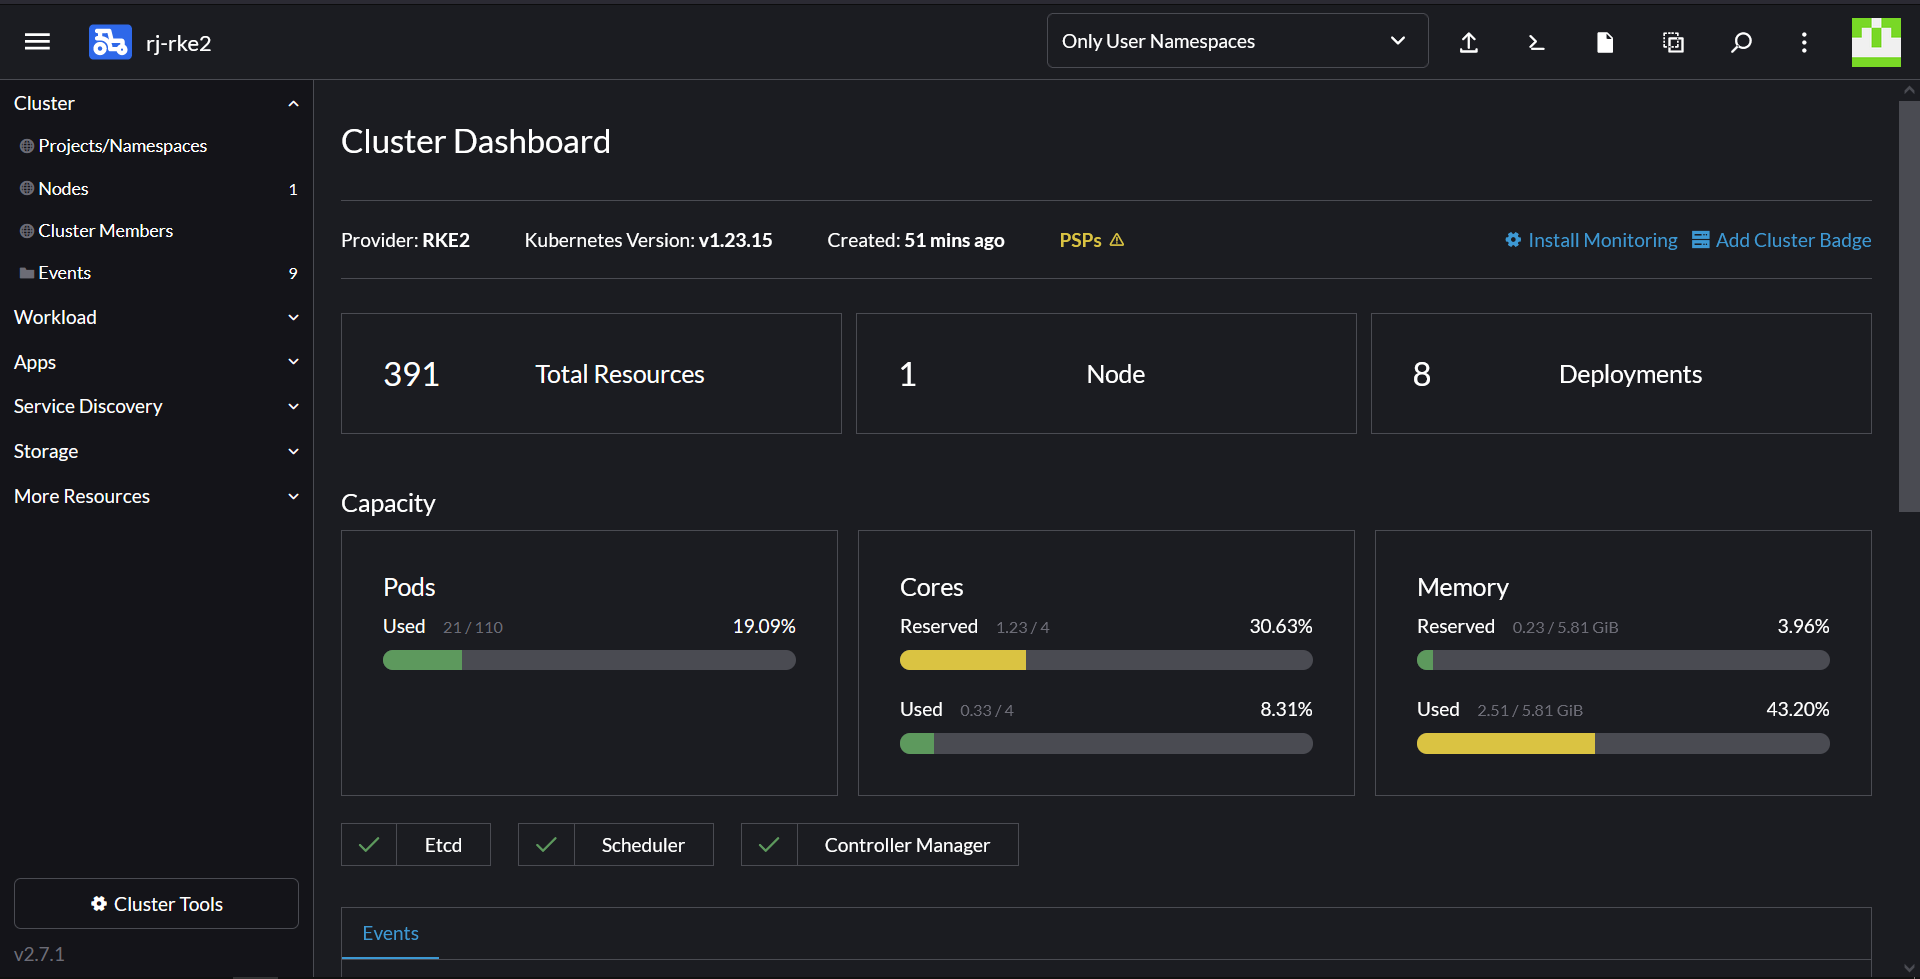
Note the diagrams dials, which illustrate cluster capacity, and the box that show you the recent events in your cluster.
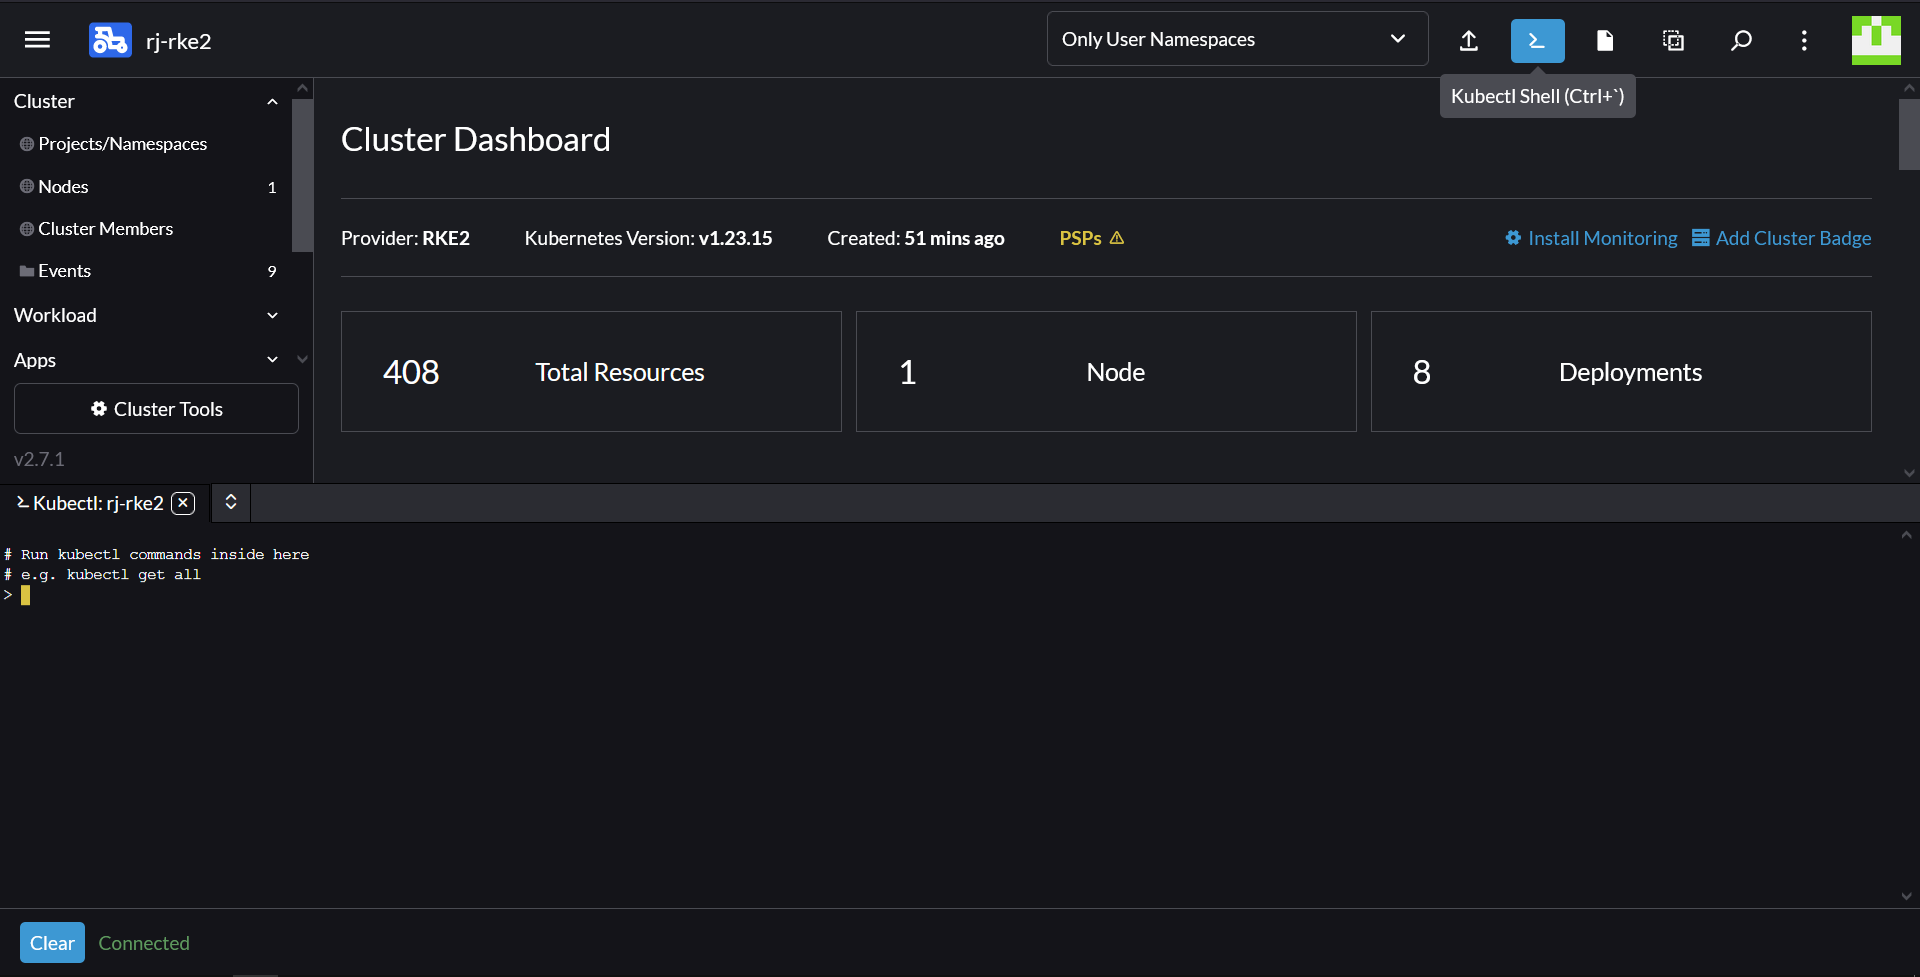
2. Interact with Kubernetes Cluster
Click the Kubectl Shell button (the button with the Prompt icon) in the top right corner of the Cluster Explorer, and enter kubectl get pods --all-namespaces and observe the fact that you can interact with your Kubernetes cluster using kubectl.
In the left menu, you have access to all Kubernetes resources, the Rancher Application Marketplace and additional cluster tools.
Enable Rancher Monitoring
To deploy the Rancher Monitoring feature:
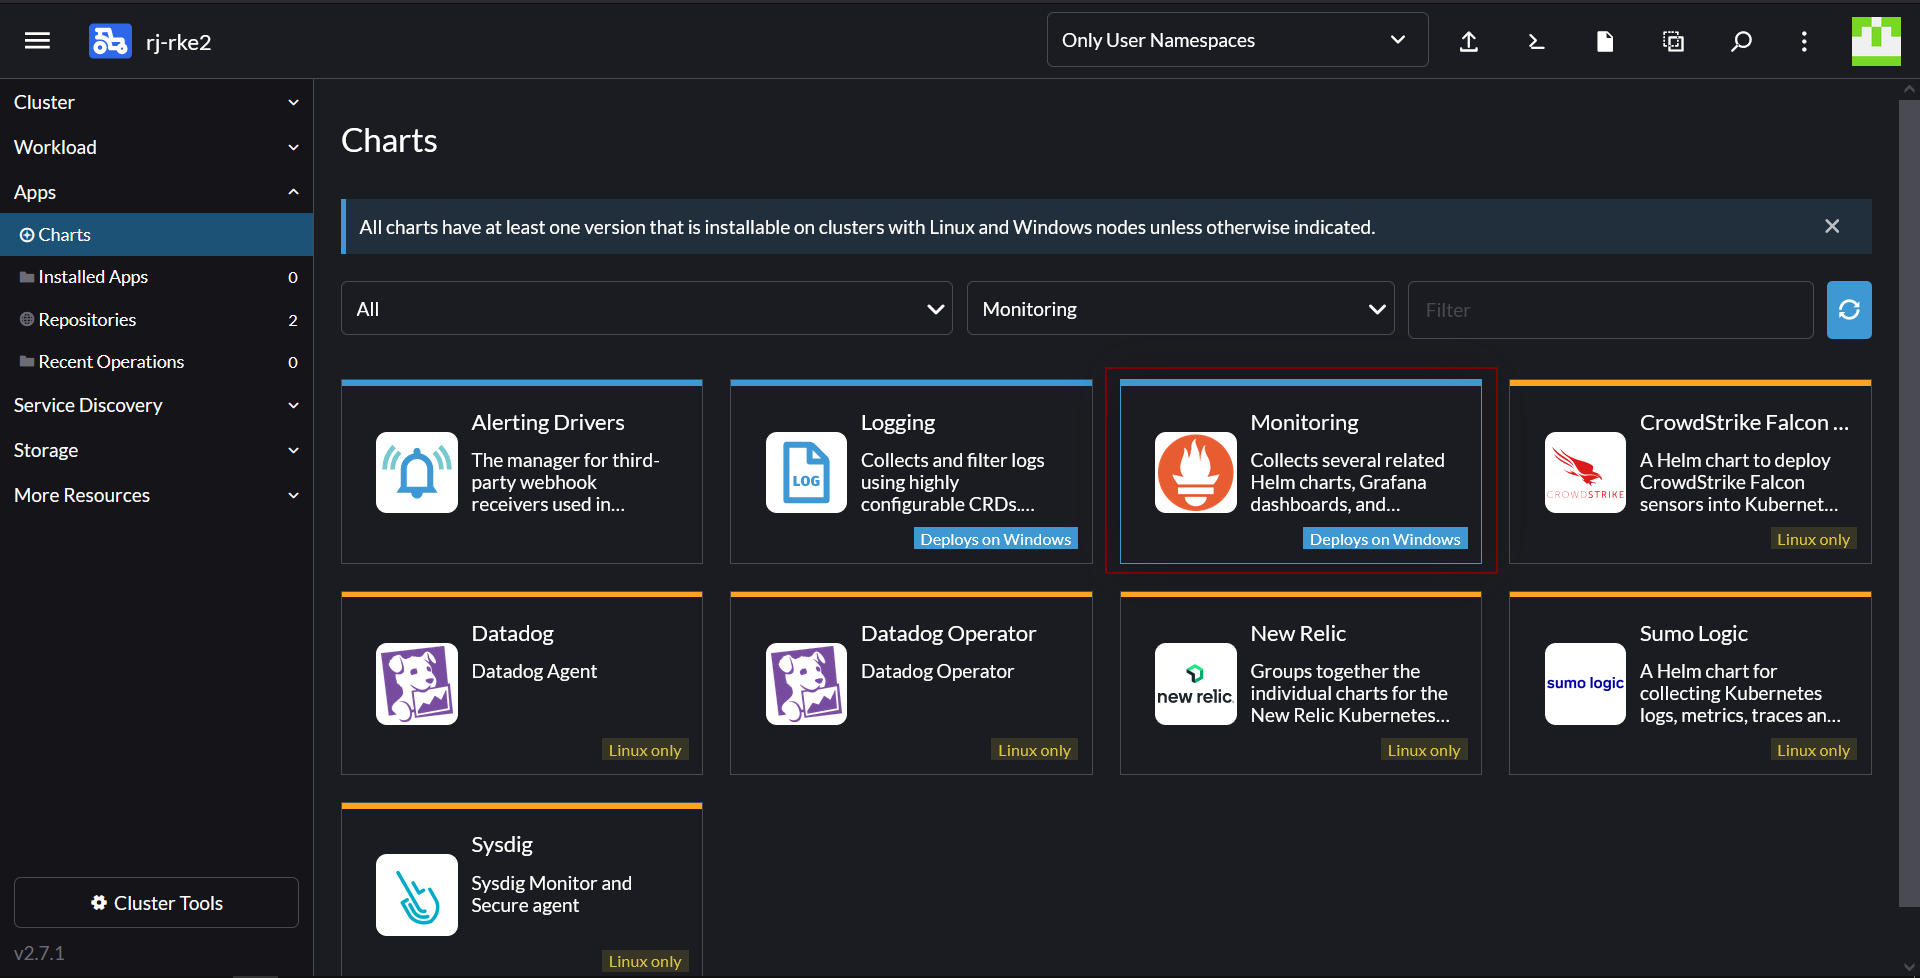
Navigate to Apps & Charts. in the left menu. Under Charts Locate the Monitoring chart, and click on it. On the Monitoring App Detail page click the Install button in the top right.
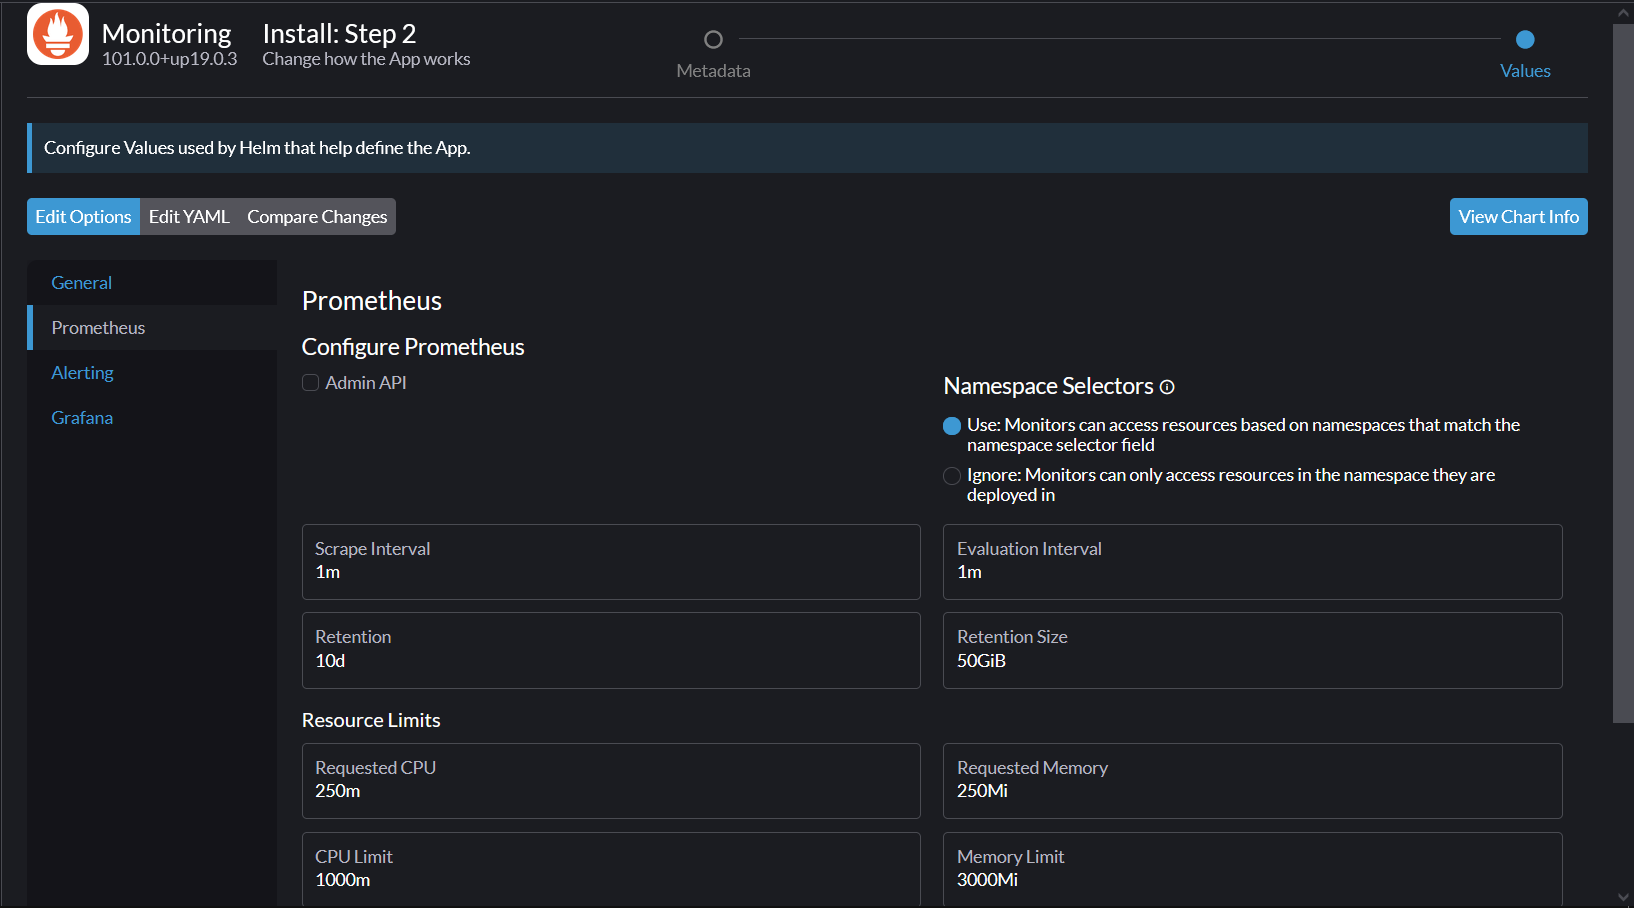
This leads you to the installation wizard. In the first Metadata step, we can leave everything as default and click Next.
In the Values step, select the Prometheus section on the left. Change Resource Limits > Requested CPU from 750m to 250m and Requested Memory from 750Mi to 250Mi. This is required because our scenario virtual machine has limited CPU and memory available.
Click "Install" at the bottom of the page, and wait for the helm install operation to complete.
Once Monitoring has been installed, you can click on that application under "Installed Apps" to view the various resources that were deployed.
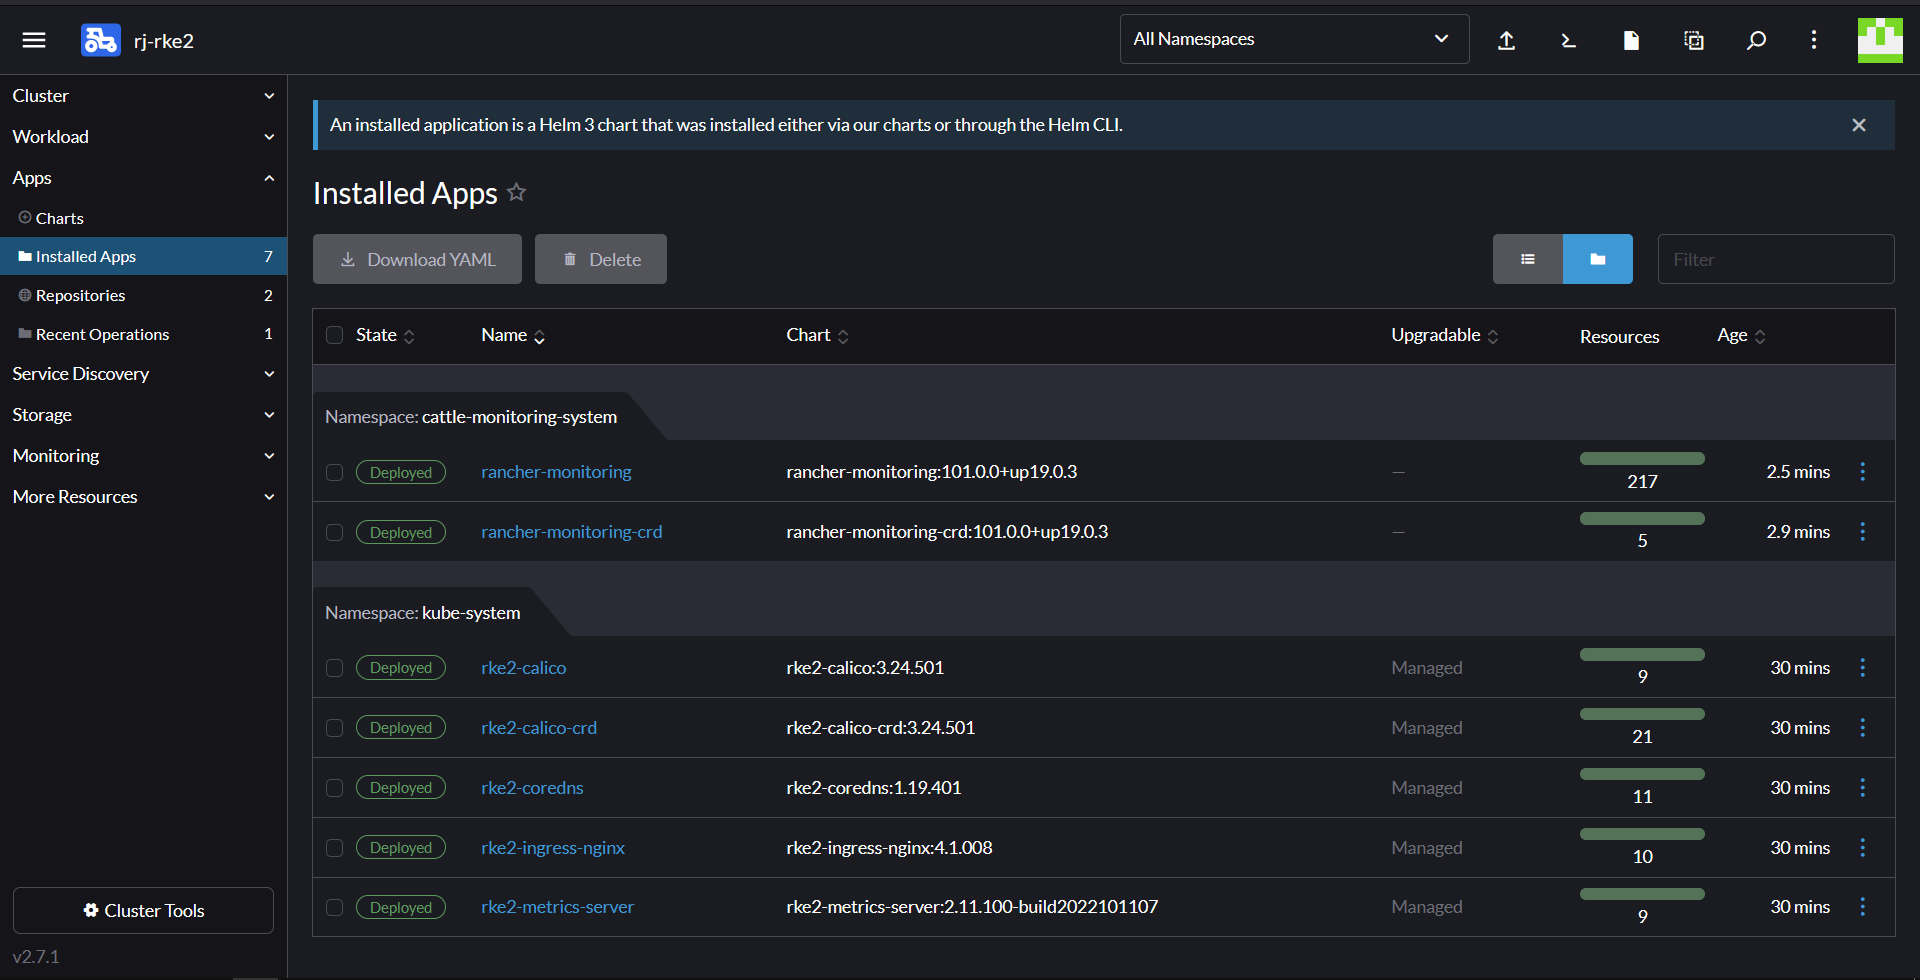
Working with Rancher Monitoring
Once Rancher Monitoring has been deployed, we can view the various components and interact with them.
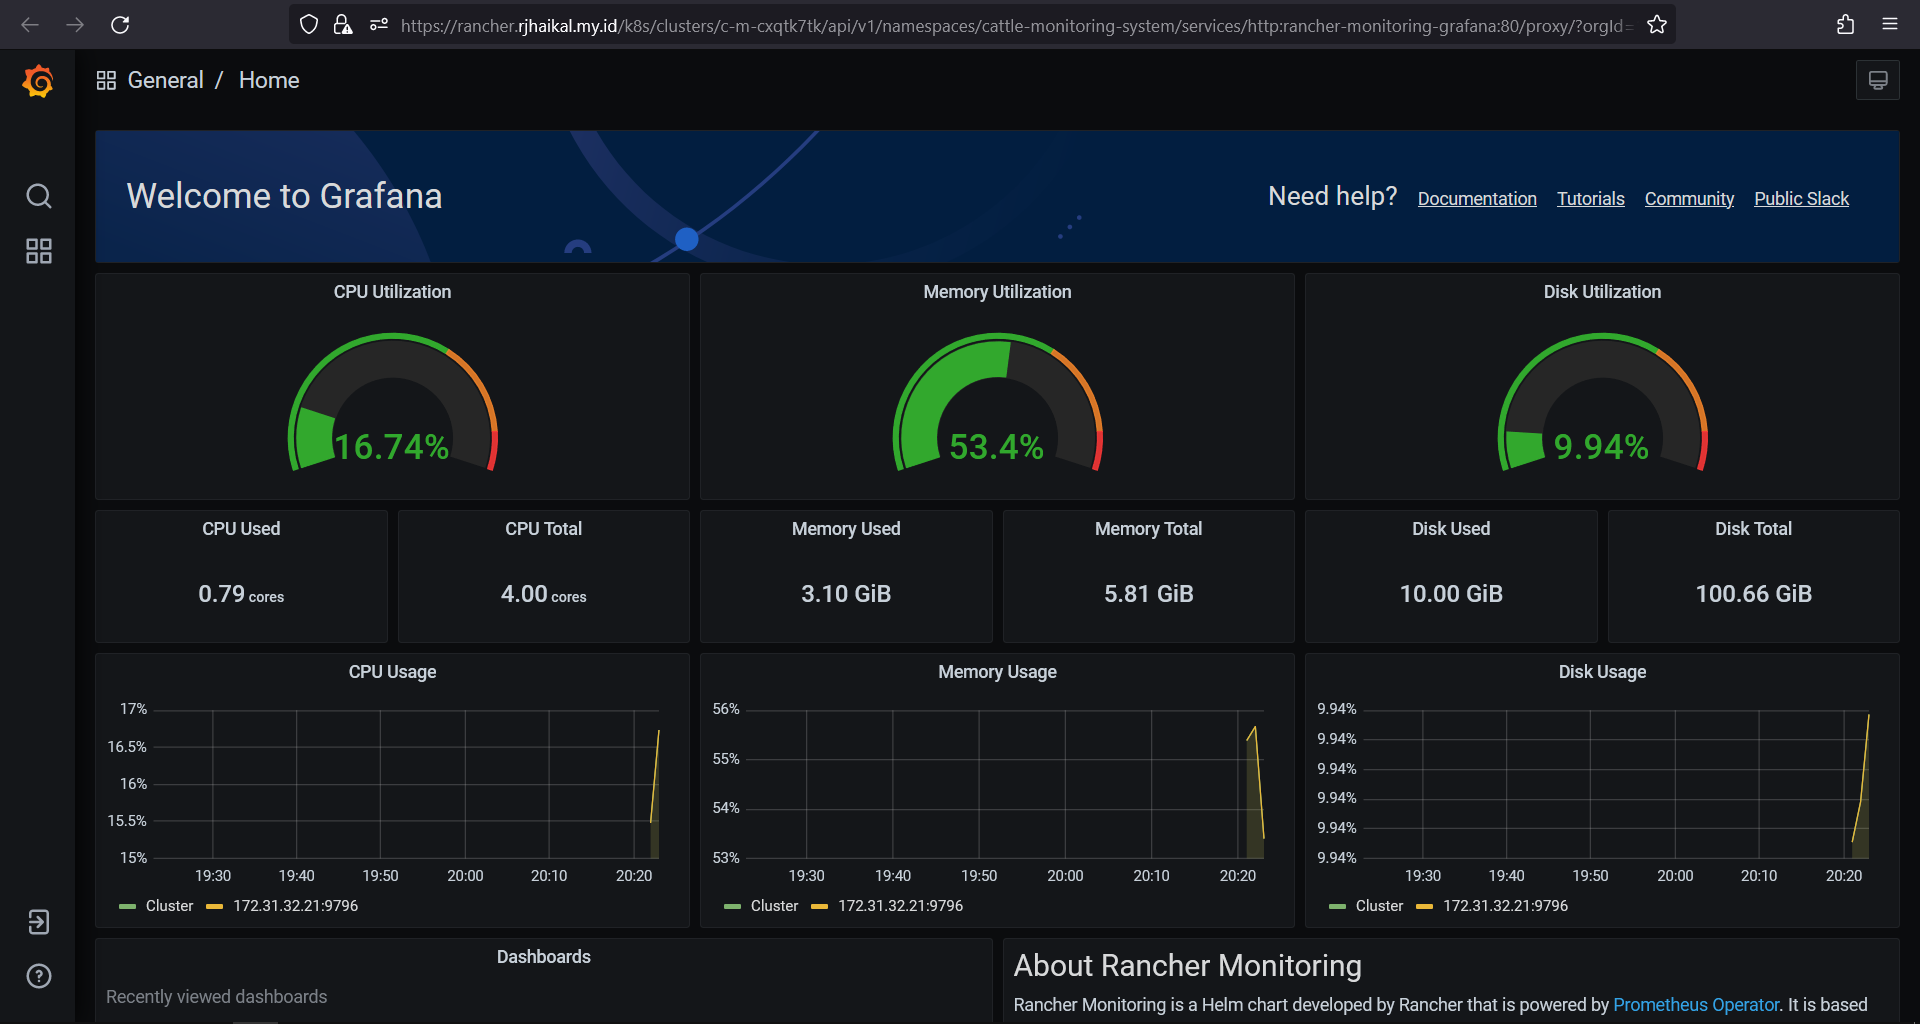
In the left menu of the Cluster Explorer, select "Monitoring"

On the Monitoring Dashboard page, identify the "Grafana" link. Clicking this will proxy you to the installed Grafana server
Create a Deployment And Service
In this step, we will be creating a Kubernetes Deployment and Kubernetes Service for an arbitrary workload. For the purposes of this lab, we will be using the container image rancher/hello-world:latest but you can use your own container image if you have one for testing.
When we deploy our container in a pod, we probably want to make sure it stays running in case of failure or other disruption. Pods by nature will not be replaced when they terminate, so for a web service or something we intend to be always running, we should use a Deployment.
1. Under the Workloads sections in the left menu, go to Deployments and press Create in the top right corner and enter the following criteria:
- Name - helloworld
- Replicas - 2
- Container Image - rancher/hello-world:latest
- Under Ports click Add Port
- Under Service Type choose to create a Node Port service
- Enter 80 for the Private Container Port
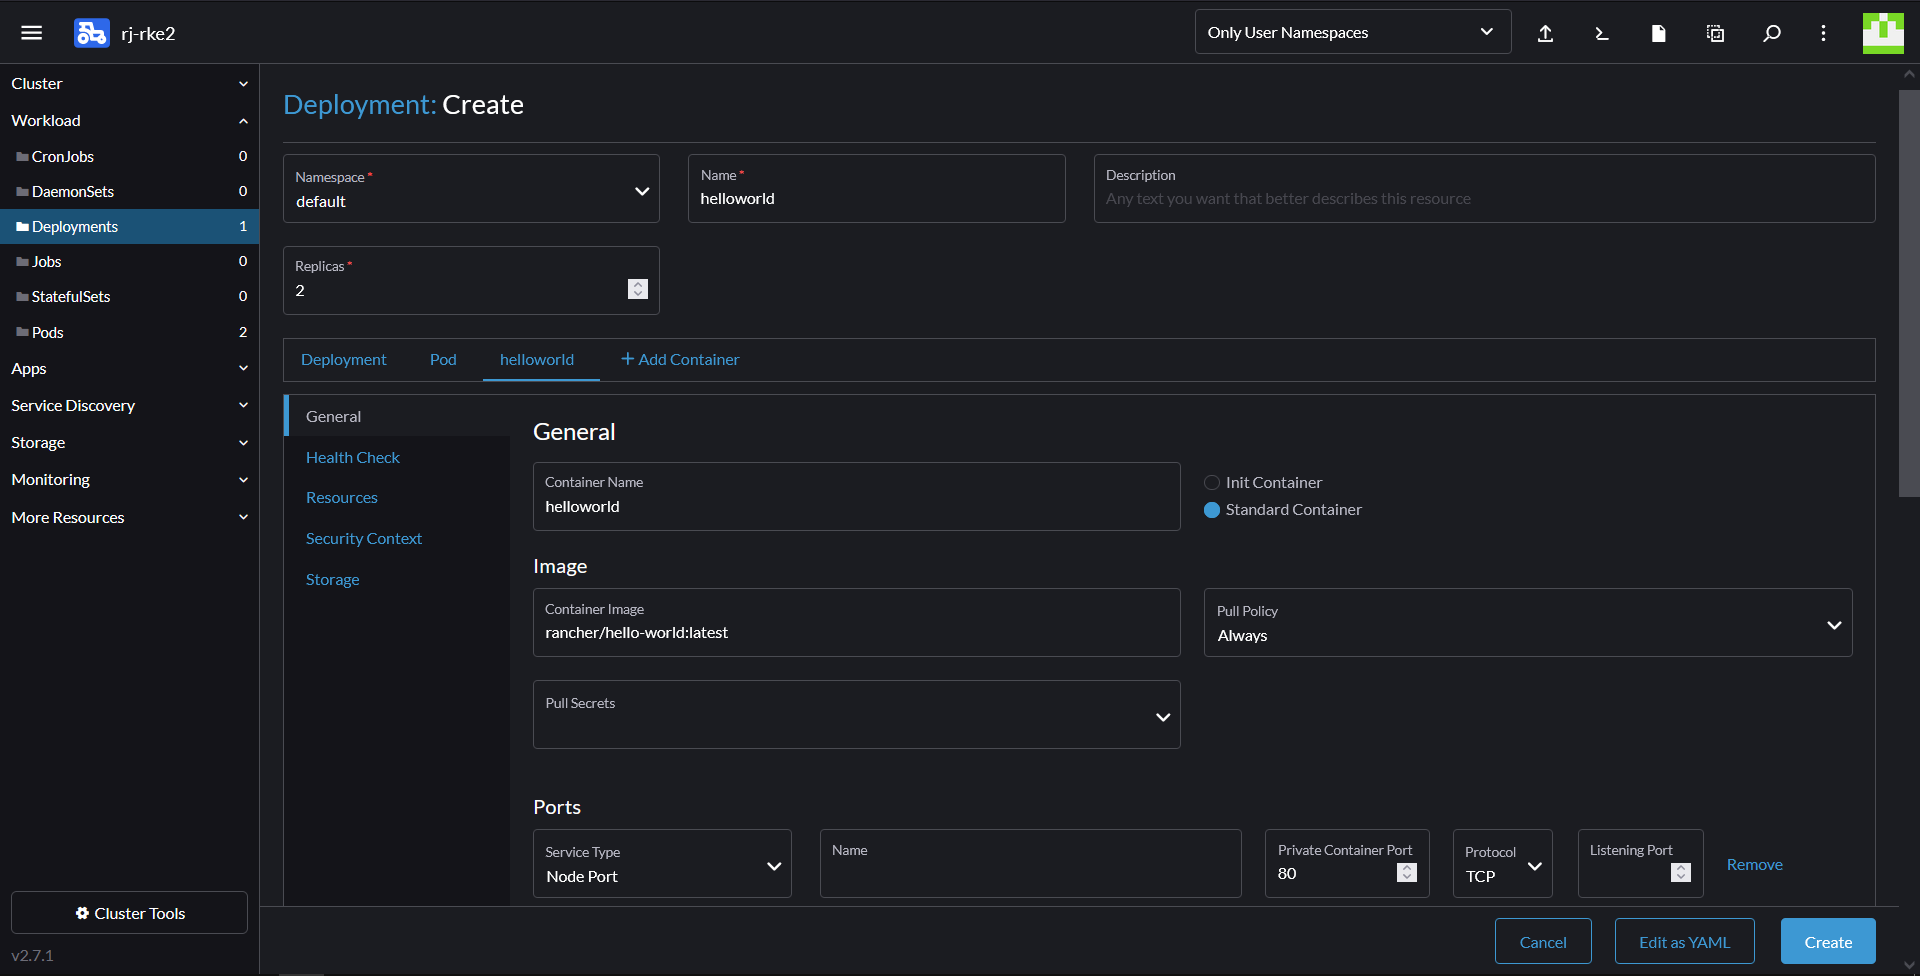
2. Scroll down and click Create
3. You should see a new helloworld deployment. If you click on it, you will see two Pods getting deployed.
4. From here you can click on a Pod, to have a look at the Pod's events. In the three-dots menu on a Pod, you can also access the logs of a Pod or start an interactive shell into the Pod.
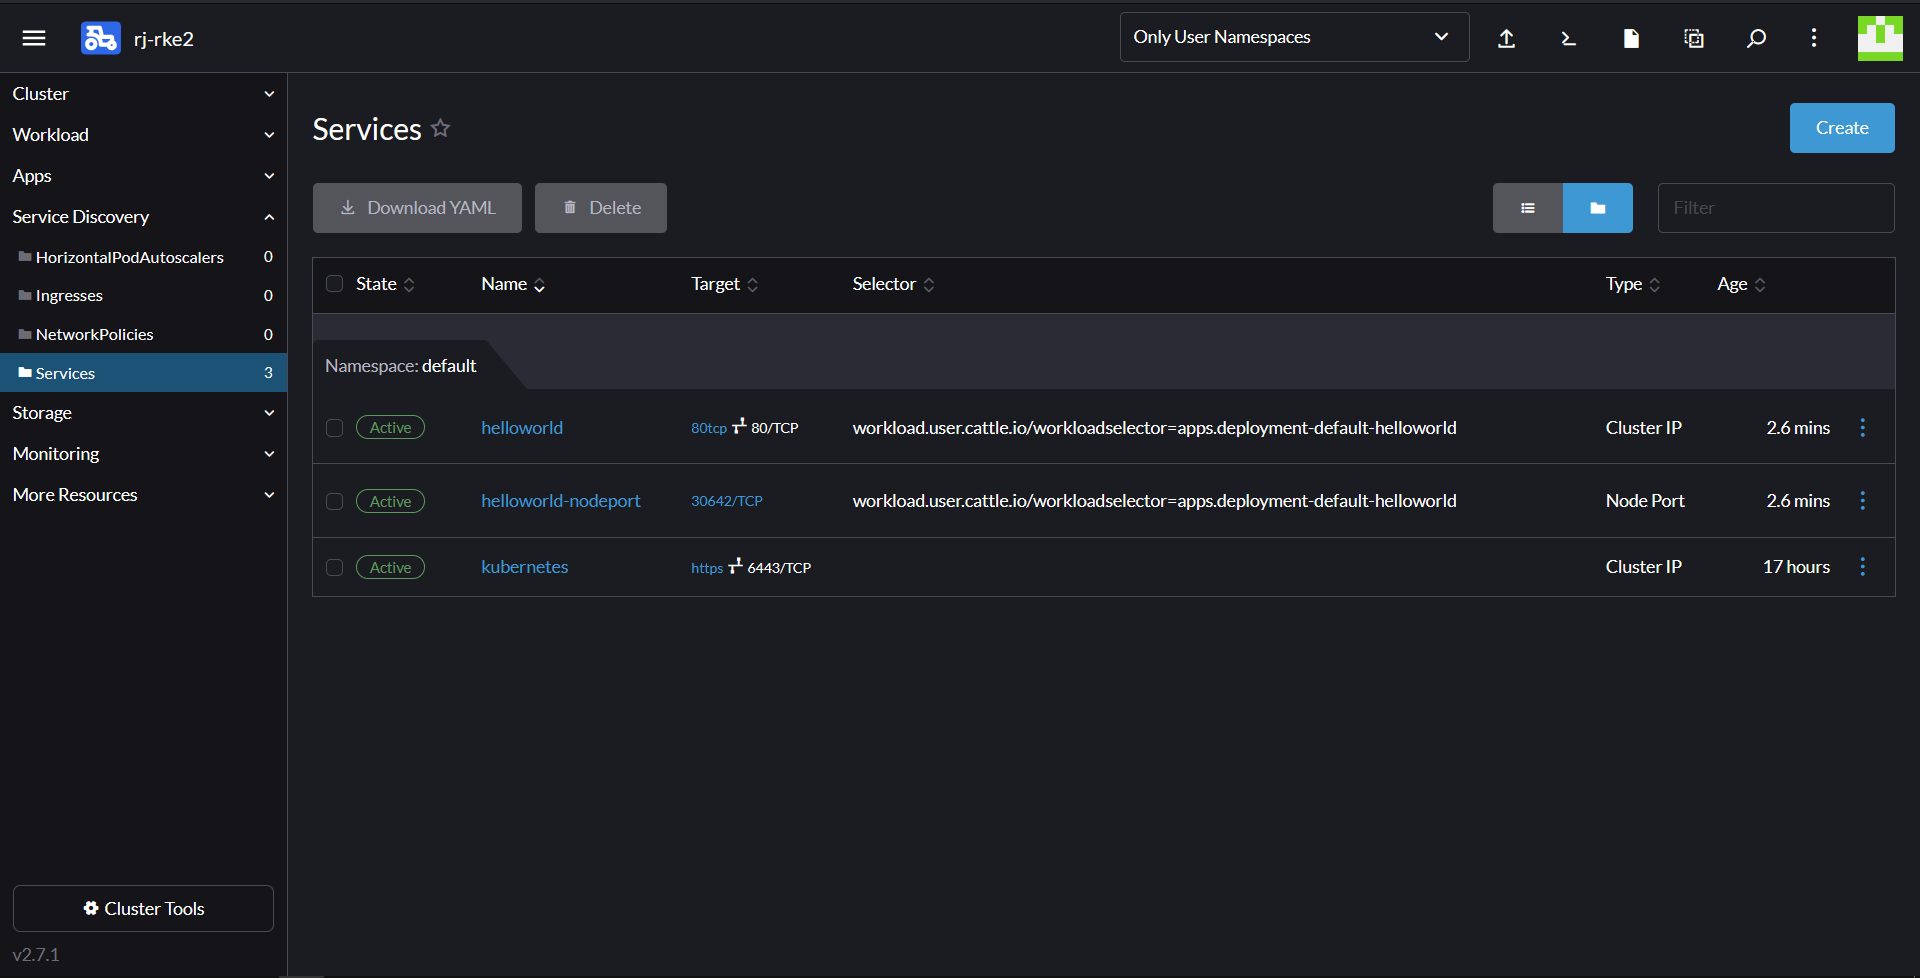
5. In the left menu under Service Discovery > Services, you will find a new Node Port Service which exposes the hello world application publicly on a high port on every worker node. You can click on the linked Port to directly access it.
Create a Kubernetes Ingress
In this step, we will be creating a Layer 7 ingress to access the workload we just deployed in the previous step. For this example, we will be using sslip.io as a way to provide a DNS hostname for our workload. Rancher will automatically generate a corresponding workload IP.
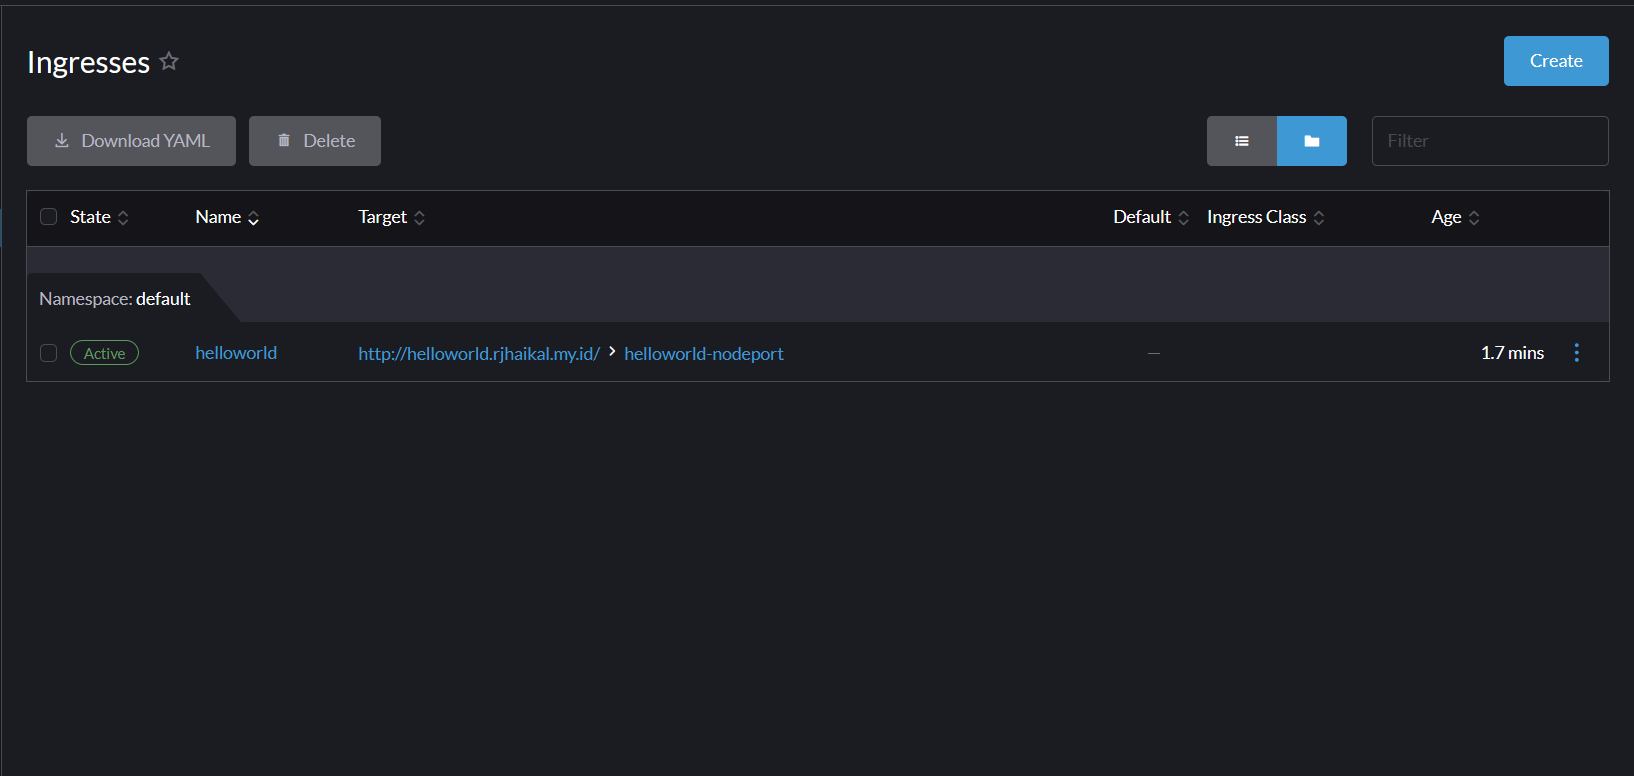
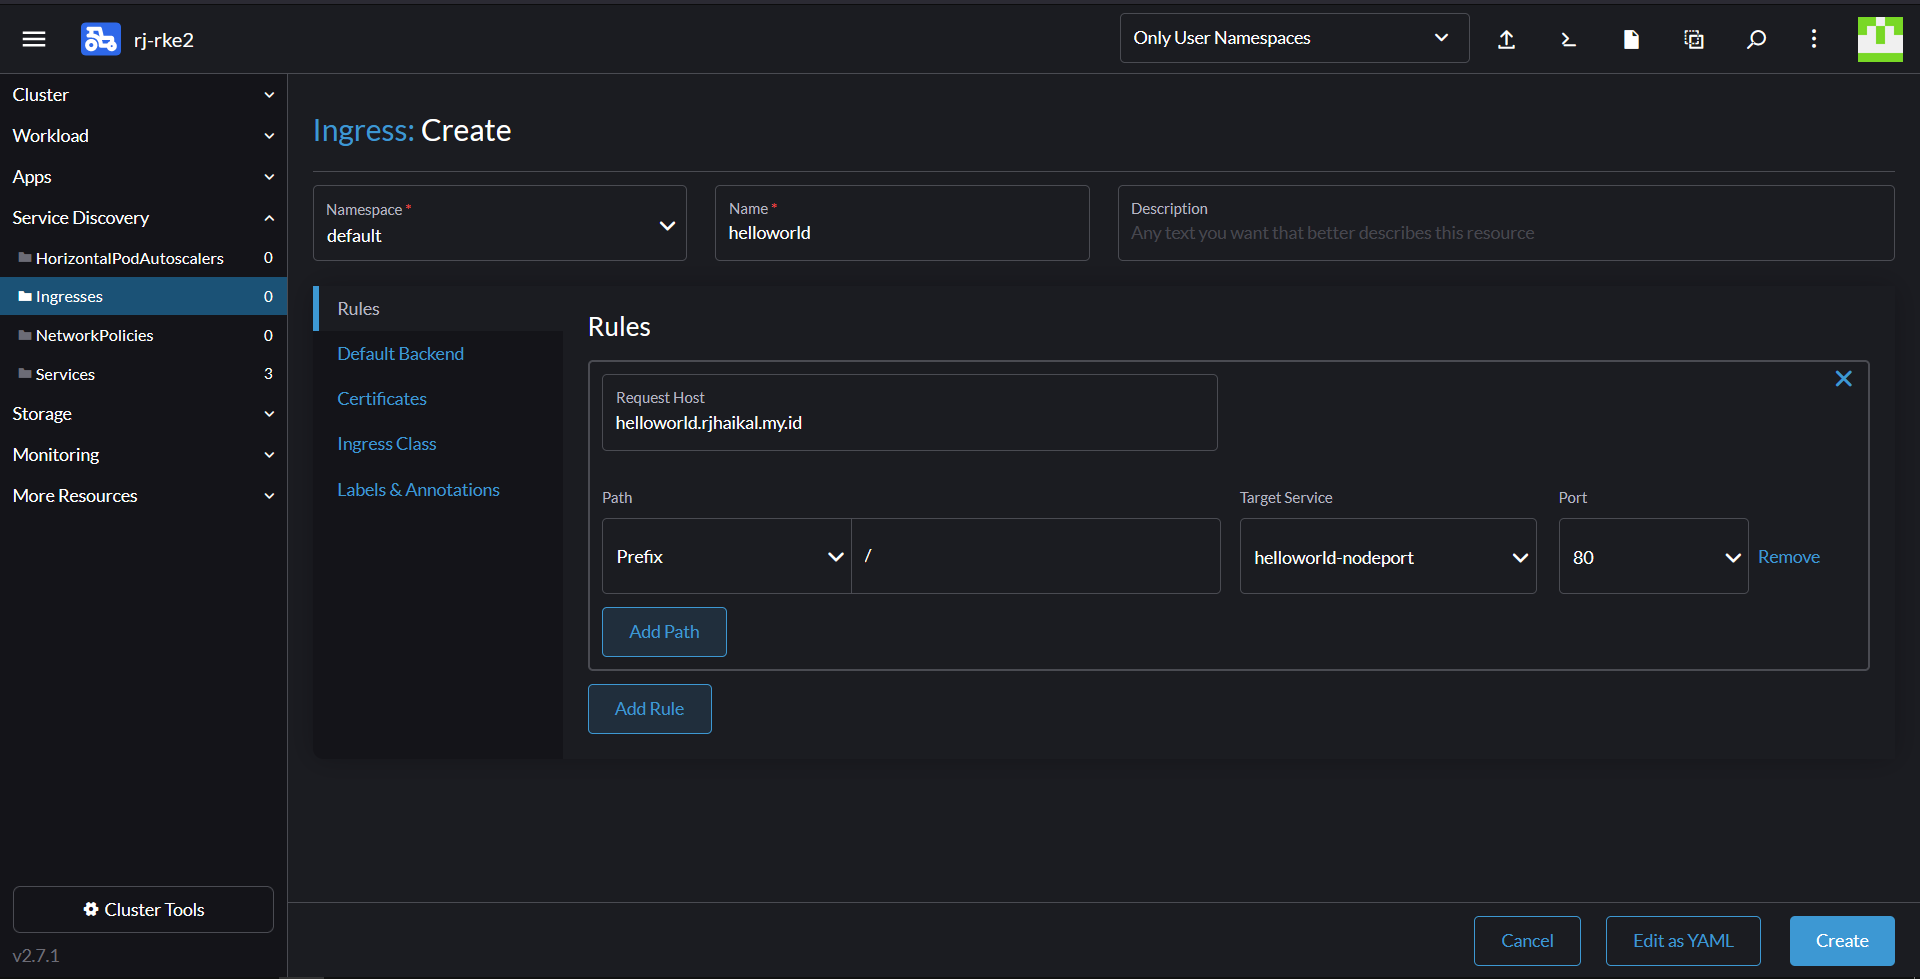
1. In the left menu under Service Discovery go to Ingresses and click on *Create.
2. Enter the following criteria:
- Name - helloworld
- Request Host - helloworld.rjhaikal.my.id
- Path Prefix - /
- Target Service - Choose the helloworld-nodeport service from the dropdown
- Port - Choose port 80 from the dropdown
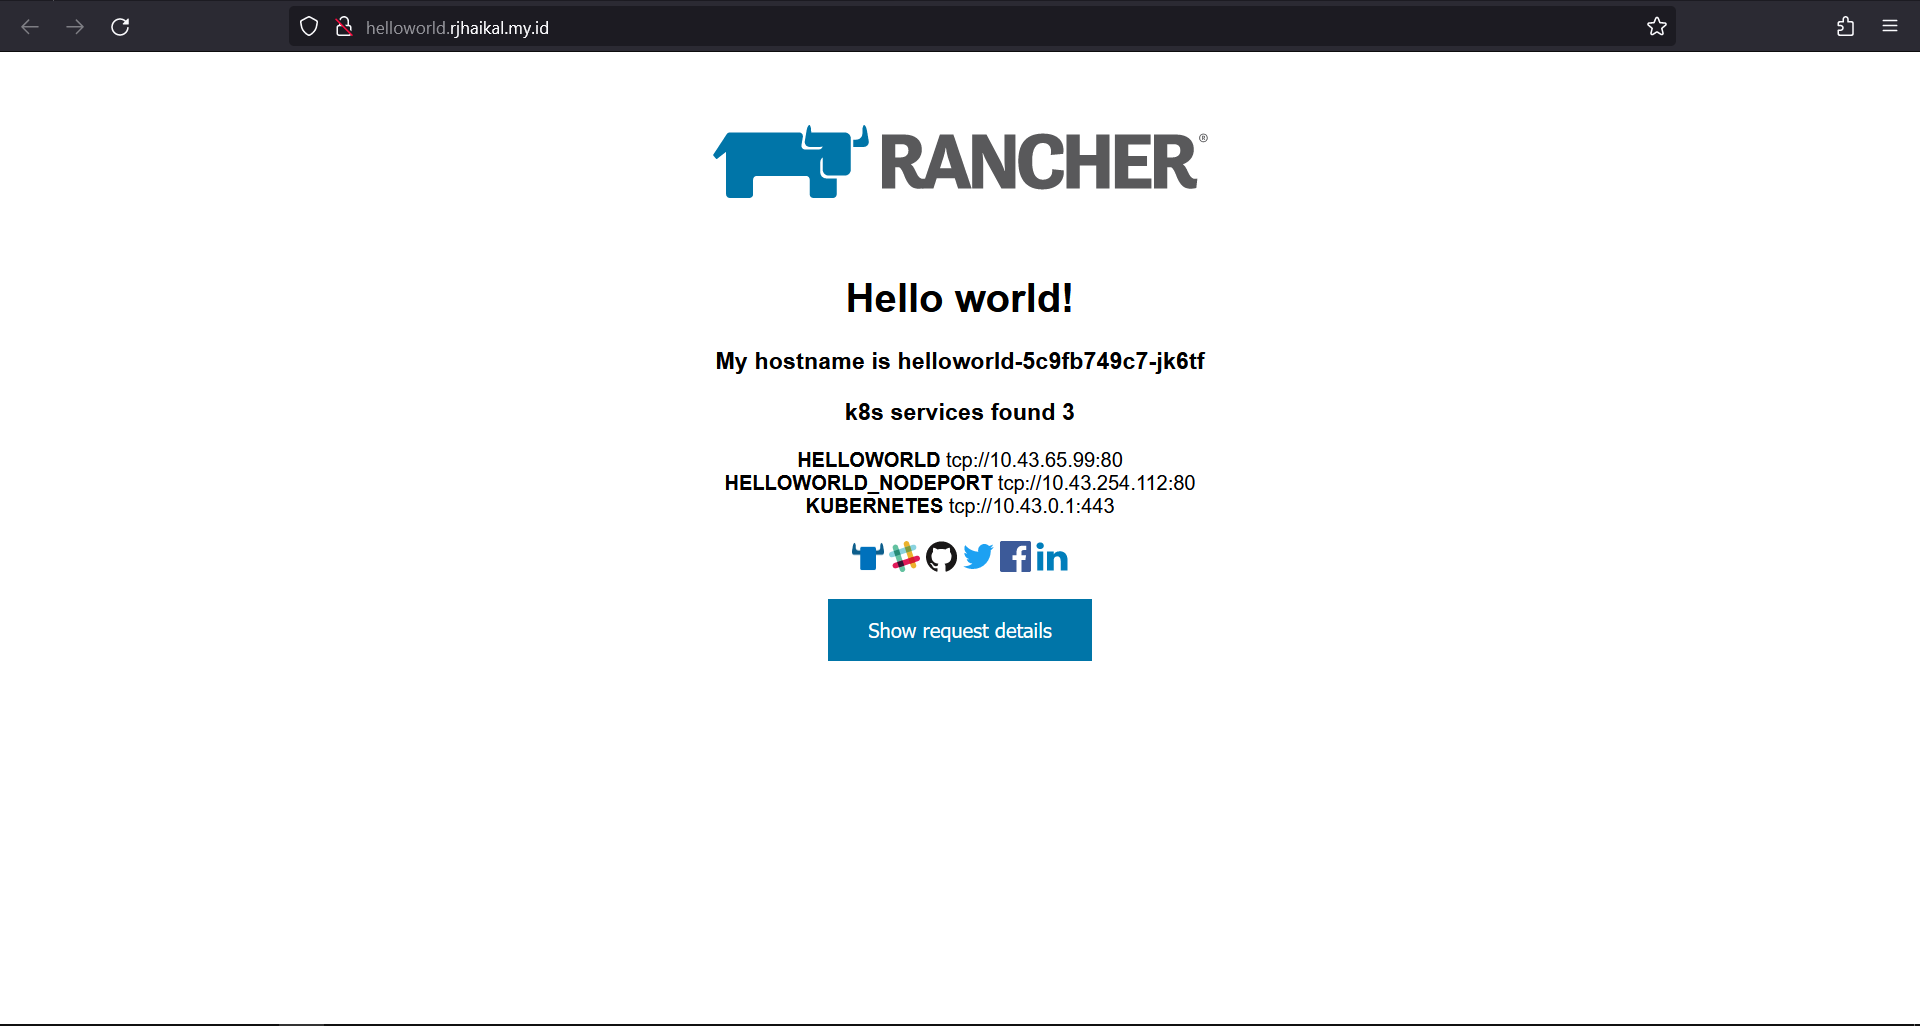
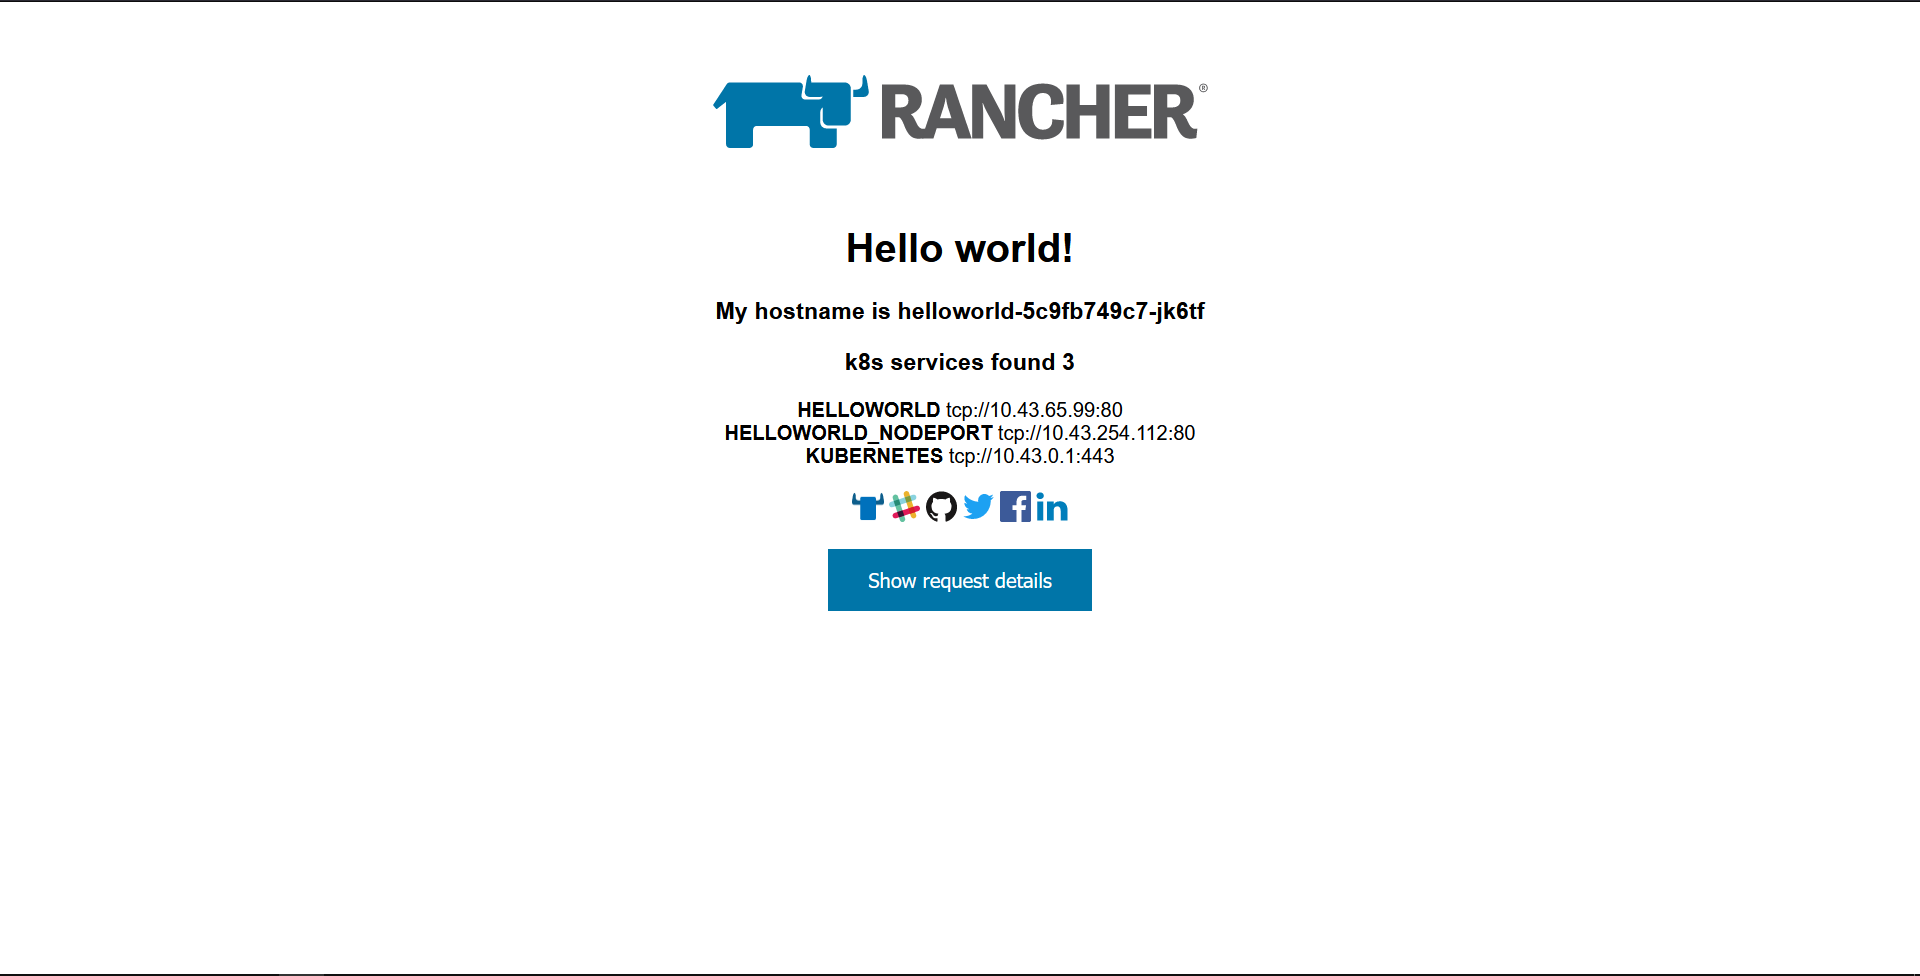
3. Click Create and wait for the helloworld.rjhaikal.my.id hostname to register, you should see the rule become Active within a few minutes.
4. Click on the hostname and browse to the workload.