Bootstrap & Configuring K3s
K3s comes equipped with everything you need to get started with Kubernetes, but it’s also very opinionated. In this article i'll strip K3s down to more resemble upstream Kubernetes and replace the missing bits with Cilium.
To install a bare-bones K3s we disable some parts of the regular installation
curl -sfL https://get.k3s.io | sh -s - \
  --flannel-backend=none \
  --disable-kube-proxy \
  --disable servicelb \
  --disable-network-policy \
  --disable traefik \
  --cluster-init
This will disable the default Flannel Container Network Interface (CNI) as well as the kube-proxy. We’re also ditching the built-in Service Load Balancer and Network Policy Controller. The default Traefik Ingress Controller is also thrown out. Lastly am replacing the SQLite database with an embedded etcd instance for clustering.
This should make my k3s-cluster very similar to a vanilla Kubernetes installation through e.g. kubeadm, but without some extra drivers and extensions that ships with the upstream Kubernetes distribution that we probably don’t need.
Kube-config
K3s saves the kube-config file under /etc/rancher/k3s/k3s.yaml and installs a slightly modified version of kubectl that looks for the config-file at that location instead of the usual $HOME/.kube/config which other tools like Helm and Cilium CLI also use.
This discrepancy can easily be remedied by either changing the permissions of the k3s.yaml file and setting the KUBECONFIG environment variable to point at the K3s-location
sudo chmod 600 /etc/rancher/k3s/k3s.yaml
cat<<EOF >> $HOME/.bashrc
alias k=kubectl
export KUBECONFIG=/etc/rancher/k3s/k3s.yaml
EOF
source $HOME/.bashrc
or by copying the k3s.yaml file to the default kube-config location, changing the owner of the copied file, and setting the KUBECONFIG env-variable to point at that file
mkdir -p $HOME/.kube
sudo cp -i /etc/rancher/k3s/k3s.yaml $HOME/.kube/config
sudo chown $(id -u):$(id -g) $HOME/.kube/config
echo "export KUBECONFIG=$HOME/.kube/config" >> $HOME/.bashrc
source $HOME/.bashrc
Assuming everything went well you should be able to run
kubectl get pods --all-namespacesThe pods should be in either the ContainerCreating or Pending state since we haven’t installed a CNI yet, meaning the different components can’t properly communicate.
NAMESPACE     NAME                                      READY   STATUS    RESTARTS   AGE
kube-system   coredns-576bfc4dc7-2gqjt                  0/1     Pending   0          40s
kube-system   local-path-provisioner-6795b5f9d8-58rqj   0/1     Pending   0          40s
kube-system   metrics-server-557ff575fb-vwwml           0/1     Pending   0          40s
Install Cilium
As the title suggest we’ll use Cilium to replace all the components we previously disabled.
The latest version of Cilium CLI can be installed by running
CILIUM_CLI_VERSION=$(curl -s https://raw.githubusercontent.com/cilium/cilium-cli/main/stable.txt)
CLI_ARCH=amd64
curl -L --fail --remote-name-all https://github.com/cilium/cilium-cli/releases/download/${CILIUM_CLI_VERSION}/cilium-linux-${CLI_ARCH}.tar.gz
sudo tar xzvfC cilium-linux-${CLI_ARCH}.tar.gz /usr/local/bin
rm cilium-linux-${CLI_ARCH}.tar.gz
Next we need to find the Kubernetes API server address Cilium should use to talk to the control plane. When using only one control plane node this will be the same as the IP we found in the ssh-server section. If you plan on running multiple control plane nodes they should be load balanced using e.g. kube-vip or HAProxy.
Knowing the default API server port to be 6443 we install Cilium by running
API_SERVER_IP=10.20.10.201
API_SERVER_PORT=6443
cilium install \
  --set k8sServiceHost=${API_SERVER_IP} \
  --set k8sServicePort=${API_SERVER_PORT} \
  --set kubeProxyReplacement=true
Here we’re also explicitly setting Cilium in kube-proxy replacement mode for tighter integration.
To validate that Cilium has been properly installed, you can run
cilium status --wait
    /¯¯\
 /¯¯\__/¯¯\    Cilium:             OK
 \__/¯¯\__/    Operator:           OK
 /¯¯\__/¯¯\    Envoy DaemonSet:    OK
 \__/¯¯\__/    Hubble Relay:       disabled
    \__/       ClusterMesh:        disabled

DaemonSet              cilium             Desired: 1, Ready: 1/1, Available: 1/1
Deployment             cilium-operator    Desired: 1, Ready: 1/1, Available: 1/1
DaemonSet              cilium-envoy       Desired: 1, Ready: 1/1, Available: 1/1
Containers:            cilium             Running: 1
                       cilium-envoy       Running: 1
                       cilium-operator    Running: 1
Cluster Pods:          3/3 managed by Cilium
Helm chart version:
Image versions         cilium             quay.io/cilium/cilium:v1.16.0@sha256:46ffa4ef3cf6d8885dcc4af5963b0683f7d59daa90d49ed9fb68d3b1627fe058: 1
                       cilium-envoy       quay.io/cilium/cilium-envoy:v1.29.7-39a2a56bbd5b3a591f69dbca51d3e30ef97e0e51@sha256:bd5ff8c66716080028f414ec1cb4f7dc66f40d2fb5a009fff187f4a9b90b566b: 1
                       cilium-operator    quay.io/cilium/operator-generic:v1.16.0@sha256:d6621c11c4e4943bf2998af7febe05be5ed6fdcf812b27ad4388f47022190316: 1
Check pod status, should display them as Running after a short while.
kubectl get po -ANAMESPACE NAME READY STATUS RESTARTS AGE
kube-system cilium-4l6bw 1/1 Running 0 2m30s
kube-system cilium-envoy-vtfkz 1/1 Running 0 2m30s
kube-system cilium-operator-86bb66788d-nk8j9 1/1 Running 0 2m30s
kube-system coredns-576bfc4dc7-2gqjt 1/1 Running 0 3m55s
kube-system local-path-provisioner-6795b5f9d8-58rqj 1/1 Running 0 3m55s
kube-system metrics-server-557ff575fb-vwwml 1/1 Running 0 3m55sGratulerer! You’re now ready to start playing around with your Cilium powered K3s cluster.
Configuring Cilium
Now that we’ve got our cluster up and running we can start configuring Cilium to properly replace all the parts we disabled earlier.
In order to install cilium, I'm leveraging kustomize, a tool integrated into kubectl, along with its Helm chart inflation generator. This approach will help us efficiently customize and deploy Cilium configurations within our Kubernetes environment.
Structure Files:
tree
.
├── announce.yaml
├── ip-pool.yaml
├── kustomization.yaml
└── values.yaml

1 directory, 4 files
Install Helm & Add Cilium Repo
Setup Helm repository
curl -fsSL -o get_helm.sh https://raw.githubusercontent.com/helm/helm/main/scripts/get-helm-3
chmod 700 get_helm.sh
./get_helm.sh
helm repo add cilium https://helm.cilium.io/
helm repo updateLB-IPAM
First we want to create Load Balancer IP Address Management which will make Cilium able to allocate IPs to LoadBalancer Service.
To do this we first need to create a pool of IPs Cilium can hand out that works with our network. In my 10.20.10.1/24 network I want Cilium to only give out some of those IPs, I thus create the following CiliumLoadBalancerIPPool.
# ip-pool.yaml
apiVersion: cilium.io/v2alpha1
kind: CiliumLoadBalancerIPPool
metadata:
  name: "rj-k3s-pool"
spec:
  blocks:
    - start: "10.20.10.170"
      stop: "10.20.10.190"
Basic Cilium Configuration
Next, recreate the same configuration we used to install Cilium in a values.yaml
# values.yaml
k8sServiceHost: "10.20.10.201"
k8sServicePort: "6443"

kubeProxyReplacement: true
L2 Announcements
Assuming the basic configuration still works we can enable L2 announcements to make Cilium respond to Address Resolution Protocol queries.
In the same values.yaml add
# values.yaml
l2announcements:
  enabled: true

externalIPs:
  enabled: true
we should also increase the client rate limit to avoid being request limited due to increased API usage with this feature enabled, to do this append to the same values.yaml file.
# values.yaml
k8sClientRateLimit:
  qps: 50
  burst: 200
To avoid having to manually restart the Cilium pods on config changes you can also append
# values.yaml
operator:
  replicas: 1
  rollOutPods: true

rollOutCiliumPods: true
operator.replicas: 1.Next we create a CiliumL2AnnouncementPolicy to instruct Cilium how to do L2 announcements. A basic such policy is
# announce.yaml
apiVersion: cilium.io/v2alpha1
kind: CiliumL2AnnouncementPolicy
metadata:
  name: default-l2-announcement-policy
  namespace: kube-system
spec:
  externalIPs: true
  loadBalancerIPs: true
This policy announces all IPs on all network interfaces. For more a more fine-grained announcement policy consult the Cilium documentation.
IngressController
We disabled the built-in Traefik IngressController earlier since Cilium can replace this functionality as well. Alternatively you can try out the new Gateway API.
Continue appending the values.yaml with the following to enable the Cilium IngressController
# values.yaml
ingressController:
  enabled: true
  default: true
  loadbalancerMode: shared
  service:
    annotations:
      io.cilium/lb-ipam-ips: 10.20.10.170
Here we’ve enabled the IngressController-functionality of Cilium. To avoid having to explicitly set Spec.ingressClassName: cilium on each Ingress we also set it as the default IngressController. Next we chose to use a shared LoadBalancer Service for each Ingress. This means that you can route all requests to a single IP for reverse proxying. Lastly we annotate the shared IngressController LoadBalancer Service with an available IP from the pool we created earlier.
Hubble
Next we will install Hubble, an observability tool which provides deep visibility into network connections, processes and much more thanks to Cilium and eBPF.
To do this append to the same values.yaml file.
# values.yaml
hubble:
  relay:
    enabled: true
  ui:
    enabled: true
Full values.yaml file
My full values.yaml-file now looks like
# values.yaml
k8sServiceHost: 10.20.10.201
k8sServicePort: 6443

kubeProxyReplacement: true

l2announcements:
  enabled: true

externalIPs:
  enabled: true

k8sClientRateLimit:
  qps: 50
  burst: 200

operator:
  replicas: 1
  rollOutPods: true

rollOutCiliumPods: true

ingressController:
  enabled: true
  default: true
  loadbalancerMode: shared
  service:
    annotations:
      io.cilium/lb-ipam-ips: 10.20.10.170

hubble:
  relay:
    enabled: true
  ui:
    enabled: true
Create kustomize file
# kustomization.yaml
apiVersion: kustomize.config.k8s.io/v1beta1
kind: Kustomization

resources:
  - announce.yaml
  - ip-pool.yaml

helmCharts:
  - name: cilium
    repo: https://helm.cilium.io
    version: 1.16.0
    releaseName: "cilium"
    includeCRDs: true
    namespace: kube-system
    valuesFile: values.yaml
This configuration can then be applied by running
kubectl kustomize --enable-helm . | kubectl apply -f -Check cilium status
cilium status --wait /¯¯\
/¯¯\__/¯¯\ Cilium: OK
\__/¯¯\__/ Operator: OK
/¯¯\__/¯¯\ Envoy DaemonSet: OK
\__/¯¯\__/ Hubble Relay: OK
\__/ ClusterMesh: disabled
DaemonSet cilium Desired: 1, Ready: 1/1, Available: 1/1
Deployment hubble-ui Desired: 1, Ready: 1/1, Available: 1/1
DaemonSet cilium-envoy Desired: 1, Ready: 1/1, Available: 1/1
Deployment cilium-operator Desired: 1, Ready: 1/1, Available: 1/1
Deployment hubble-relay Desired: 1, Ready: 1/1, Available: 1/1
Containers: cilium Running: 1
hubble-ui Running: 1
cilium-envoy Running: 1
hubble-relay Running: 1
cilium-operator Running: 1
Cluster Pods: 11/11 managed by Cilium
Helm chart version:
Image versions cilium quay.io/cilium/cilium:v1.16.0@sha256:46ffa4ef3cf6d8885dcc4af5963b0683f7d59daa90d49ed9fb68d3b1627fe058: 1
hubble-ui quay.io/cilium/hubble-ui:v0.13.1@sha256:e2e9313eb7caf64b0061d9da0efbdad59c6c461f6ca1752768942bfeda0796c6: 1
hubble-ui quay.io/cilium/hubble-ui-backend:v0.13.1@sha256:0e0eed917653441fded4e7cdb096b7be6a3bddded5a2dd10812a27b1fc6ed95b: 1
cilium-envoy quay.io/cilium/cilium-envoy:v1.29.7-39a2a56bbd5b3a591f69dbca51d3e30ef97e0e51@sha256:bd5ff8c66716080028f414ec1cb4f7dc66f40d2fb5a009fff187f4a9b90b566b: 1
hubble-relay quay.io/cilium/hubble-relay:v1.16.0@sha256:33fca7776fc3d7b2abe08873319353806dc1c5e07e12011d7da4da05f836ce8d: 1
cilium-operator quay.io/cilium/operator-generic:v1.16.0@sha256:d6621c11c4e4943bf2998af7febe05be5ed6fdcf812b27ad4388f47022190316: 1Cilium Verification
If everything went well you should now see a cilium-ingress LoadBalancer Service with an external-IP equal to the one you requested.
kubectl get services --all-namespaces
NAMESPACE     NAME             TYPE           CLUSTER-IP      EXTERNAL-IP    PORT(S)                      AGE
default       kubernetes       ClusterIP      10.43.0.1       <none>         443/TCP                      12m
kube-system   cilium-ingress   LoadBalancer   10.43.136.71    10.20.10.170   80:30407/TCP,443:30219/TCP   4m53s
kube-system   hubble-peer      ClusterIP      10.43.234.191   <none>         443/TCP                      11m
kube-system   hubble-relay     ClusterIP      10.43.169.125   <none>         80/TCP                       4m53s
kube-system   hubble-ui        ClusterIP      10.43.212.137   <none>         80/TCP                       4m53s
kube-system   kube-dns         ClusterIP      10.43.0.10      <none>         53/UDP,53/TCP,9153/TCP       12m
kube-system   metrics-server   ClusterIP      10.43.128.123   <none>         443/TCP                      12m
To check the status of all created IP-pools run
kubectl get ippools
This should display 20 available IPs and no conflicts if you created a similar IP pool as above
NAME          DISABLED   CONFLICTING   IPS AVAILABLE   AGE
rj-k3s-pool   false      False         20              5m10s
The Cilium-CLI comes with a build-in connectivity tester if you experience any issues you think might be caused Cilium, to run the test suite simply run
cilium connectivity testℹ️ Monitor aggregation detected, will skip some flow validation steps
✨ [default] Creating namespace cilium-test-1 for connectivity check...
✨ [default] Deploying echo-same-node service...
✨ [default] Deploying DNS test server configmap...
✨ [default] Deploying same-node deployment...
✨ [default] Deploying client deployment...
✨ [default] Deploying client2 deployment...
✨ [default] Deploying Ingress resource...
⌛ [default] Waiting for deployment cilium-test-1/client to become ready...
⌛ [default] Waiting for deployment cilium-test-1/client2 to become ready...
⌛ [default] Waiting for deployment cilium-test-1/echo-same-node to become ready...
⌛ [default] Waiting for pod cilium-test-1/client-974f6c69d-fhklc to reach DNS server on cilium-test-1/echo-same-node-c549568d9-4g7kb pod...
⌛ [default] Waiting for pod cilium-test-1/client2-57cf4468f-9xlqn to reach DNS server on cilium-test-1/echo-same-node-c549568d9-4g7kb pod...
⌛ [default] Waiting for pod cilium-test-1/client2-57cf4468f-9xlqn to reach default/kubernetes service...
⌛ [default] Waiting for pod cilium-test-1/client-974f6c69d-fhklc to reach default/kubernetes service...
⌛ [default] Waiting for Service cilium-test-1/echo-same-node to become ready...
⌛ [default] Waiting for Service cilium-test-1/echo-same-node to be synchronized by Cilium pod kube-system/cilium-6xwc6
⌛ [default] Retrieving service cilium-test-1/cilium-ingress-same-node ...
⌛ [default] Waiting for NodePort 10.20.10.201:30551 (cilium-test-1/echo-same-node) to become ready...
ℹ️ Skipping IPCache check
🔭 Enabling Hubble telescope...
⚠️ Unable to contact Hubble Relay, disabling Hubble telescope and flow validation: rpc error: code = Unavailable desc = connection error: desc = "transport: Error while dialing: dial tcp 127.0.0.1:4245: connect: connection refused"
ℹ️ Expose Relay locally with:
cilium hubble enable
cilium hubble port-forward&
ℹ️ Cilium version: 1.16.0
🏃[cilium-test-1] Running 102 tests ...
[=] [cilium-test-1] Test [no-unexpected-packet-drops] [1/102]
.
[=] [cilium-test-1] Test [no-policies] [2/102]
....................
[=] [cilium-test-1] Skipping test [no-policies-from-outside] [3/102] (skipped by condition)
[=] [cilium-test-1] Test [no-policies-extra] [4/102]
..
[=] [cilium-test-1] Test [allow-all-except-world] [5/102]
........
[=] [cilium-test-1] Test [client-ingress] [6/102]
..
[=] [cilium-test-1] Test [client-ingress-knp] [7/102]
..
[=] [cilium-test-1] Test [allow-all-with-metrics-check] [8/102]
..
[=] [cilium-test-1] Test [all-ingress-deny] [9/102]
......
[=] [cilium-test-1] Skipping test [all-ingress-deny-from-outside] [10/102] (skipped by condition)
...
[Output Omitted]
...
[=] [cilium-test-1] Skipping test [host-firewall-egress] [101/102] (skipped by condition)
[=] [cilium-test-1] Test [check-log-errors] [102/102]
............
✅ [cilium-test-1] All 61 tests (244 actions) successful, 41 tests skipped, 0 scenarios skipped.Smoke Test
To make sure everything works we can deploy a smoke-test.
# rj-moon.yaml
apiVersion: v1
kind: Namespace
metadata:
name: rj-moon
---
apiVersion: v1
kind: Service
metadata:
name: moon-service
namespace: rj-moon
spec:
type: LoadBalancer
ports:
- port: 80
targetPort: 8080
protocol: TCP
name: http
selector:
app: moon
---
apiVersion: apps/v1
kind: Deployment
metadata:
name: moon-deployment
namespace: rj-moon
spec:
replicas: 3
selector:
matchLabels:
app: moon
template:
metadata:
labels:
app: moon
spec:
containers:
- name: moon
image: rjhaikal/moon:non-root
imagePullPolicy: Always
# resources:
# limits:
# cpu: "1"
# memory: "200Mi"
# requests:
# cpu: "0.5"
# memory: "100Mi"
ports:
- containerPort: 8080
---
apiVersion: networking.k8s.io/v1
kind: Ingress
metadata:
name: moon-ingress
namespace: rj-moon
spec:
rules:
- host: moon.local
http:
paths:
- path: /
pathType: Prefix
backend:
service:
name: moon-service
port:
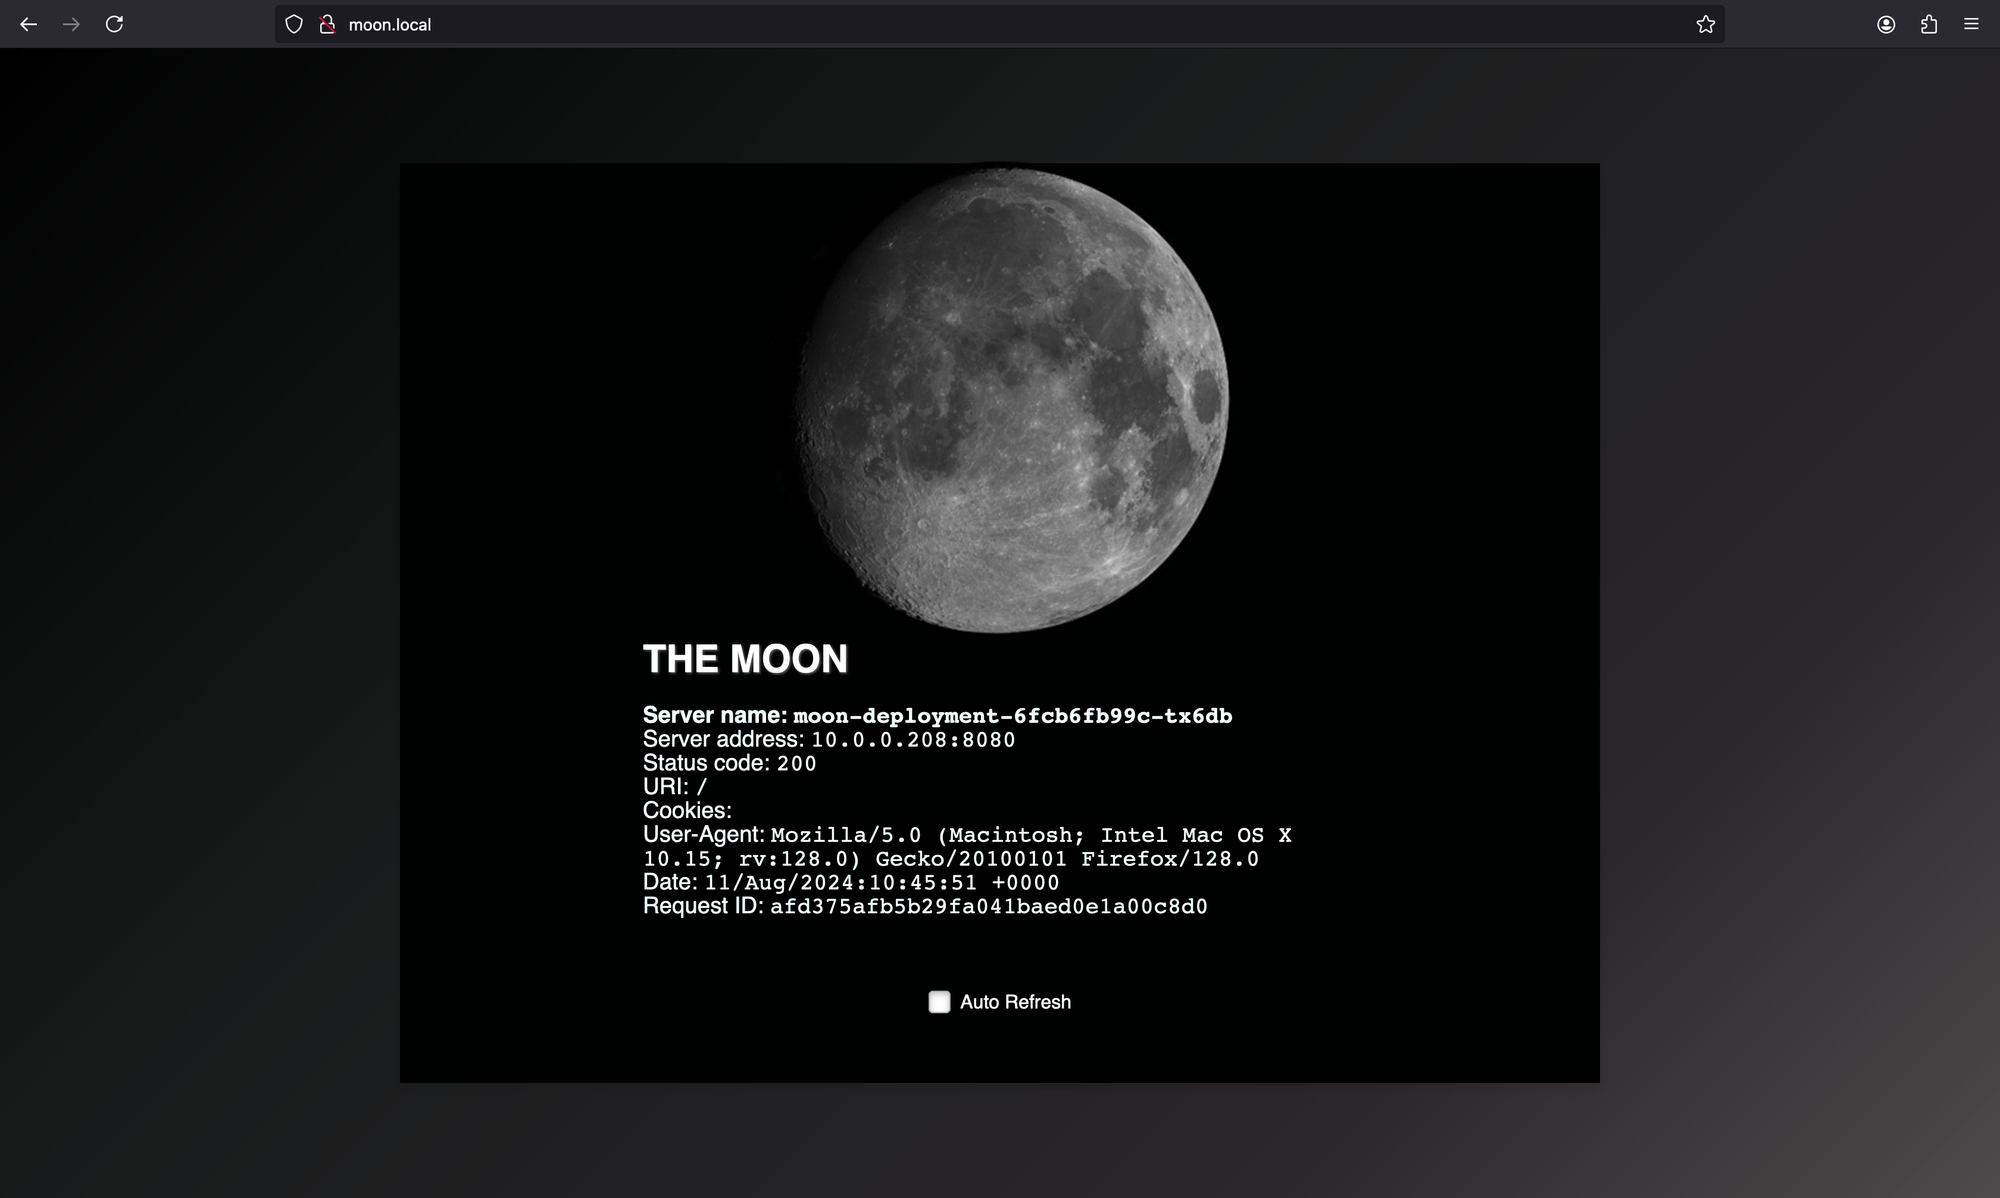
number: 80kubectl create -f rj-moon.yamlThis will deploy moon — a webserver that print OS information and HTTP requests, together with a LoadBalancer Service and an Ingress.
First we check that the LoadBalancer Service has been assigned an external-IP
kubectl get service -n rj-moonNAME TYPE CLUSTER-IP EXTERNAL-IP PORT(S) AGE
moon-service LoadBalancer 10.43.196.198 10.20.10.171 80:32146/TCP 15sIf the service has no external-IP then there’s probably something wrong with the LB-IPAM. Maybe the configured IP-pool is invalid?
Next try to access the Service from web browser

The last test is to check if the IngressController responds as expected. Find the external-IP of the shared IngressController service
kubectl get service -n kube-system cilium-ingress
This should be a different IP than the moon Service we tested earlier.
NAME             TYPE           CLUSTER-IP     EXTERNAL-IP    PORT(S)                      AGE
cilium-ingress   LoadBalancer   10.43.136.71   10.20.10.170   80:30407/TCP,443:30219/TCP   18m
To make the hostname resolving also work in your browser of choice you can edit the /etc/hosts file to point to the Cilium IngressController LoadBalancer Service IP.
Append the following line to your /etc/hosts file
# /etc/hosts
10.20.10.170 moon.local
Navigating to http://moon.local in your browser
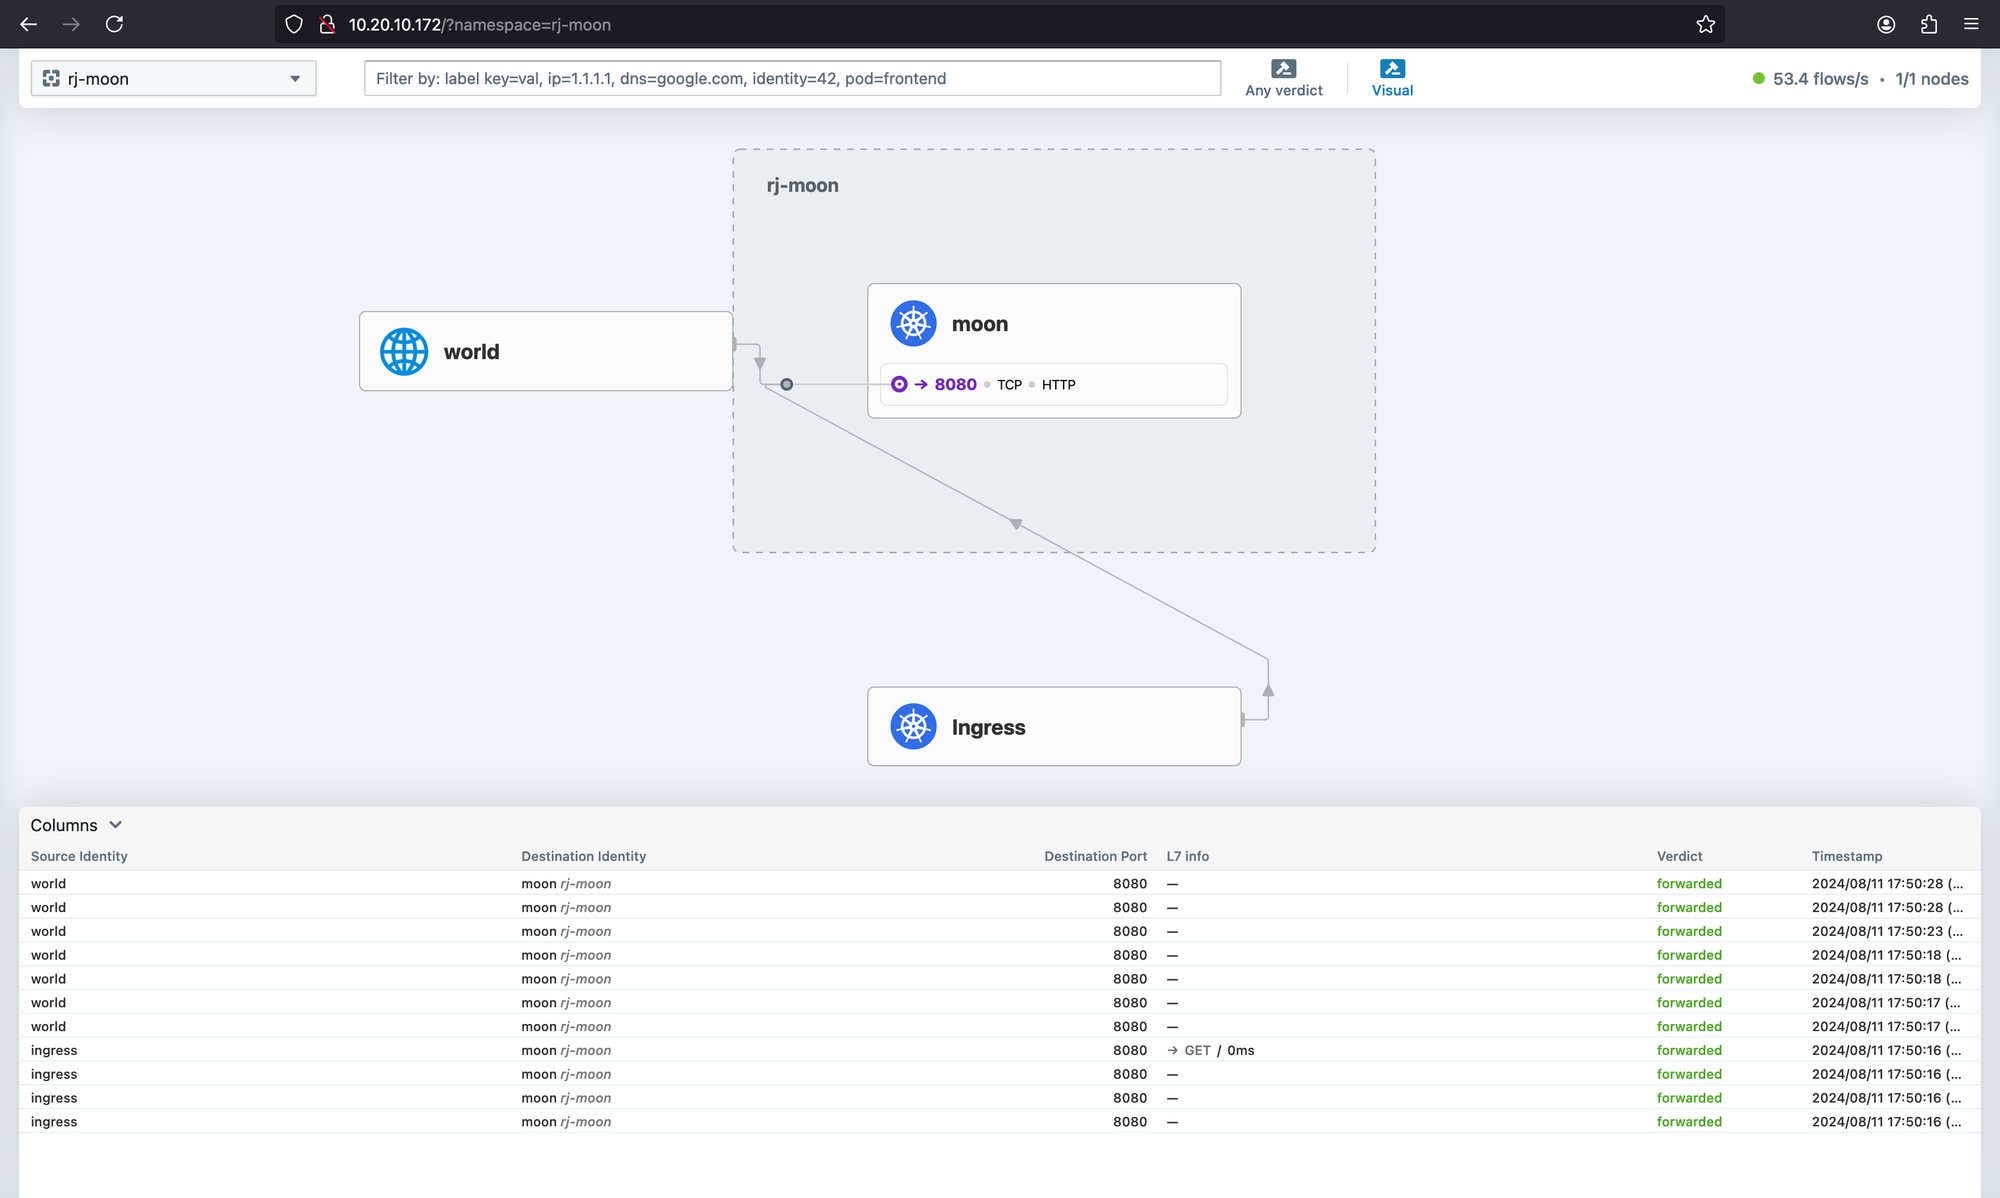
Hubble UI
We installed Hubble while we were installing Cilium. So we only need to change service type again for connecting Hubble UI.
Change the service type to LoadBalancer
kubectl edit svc hubble-ui -n kube-systemGet the assigned LoadBalancer IP
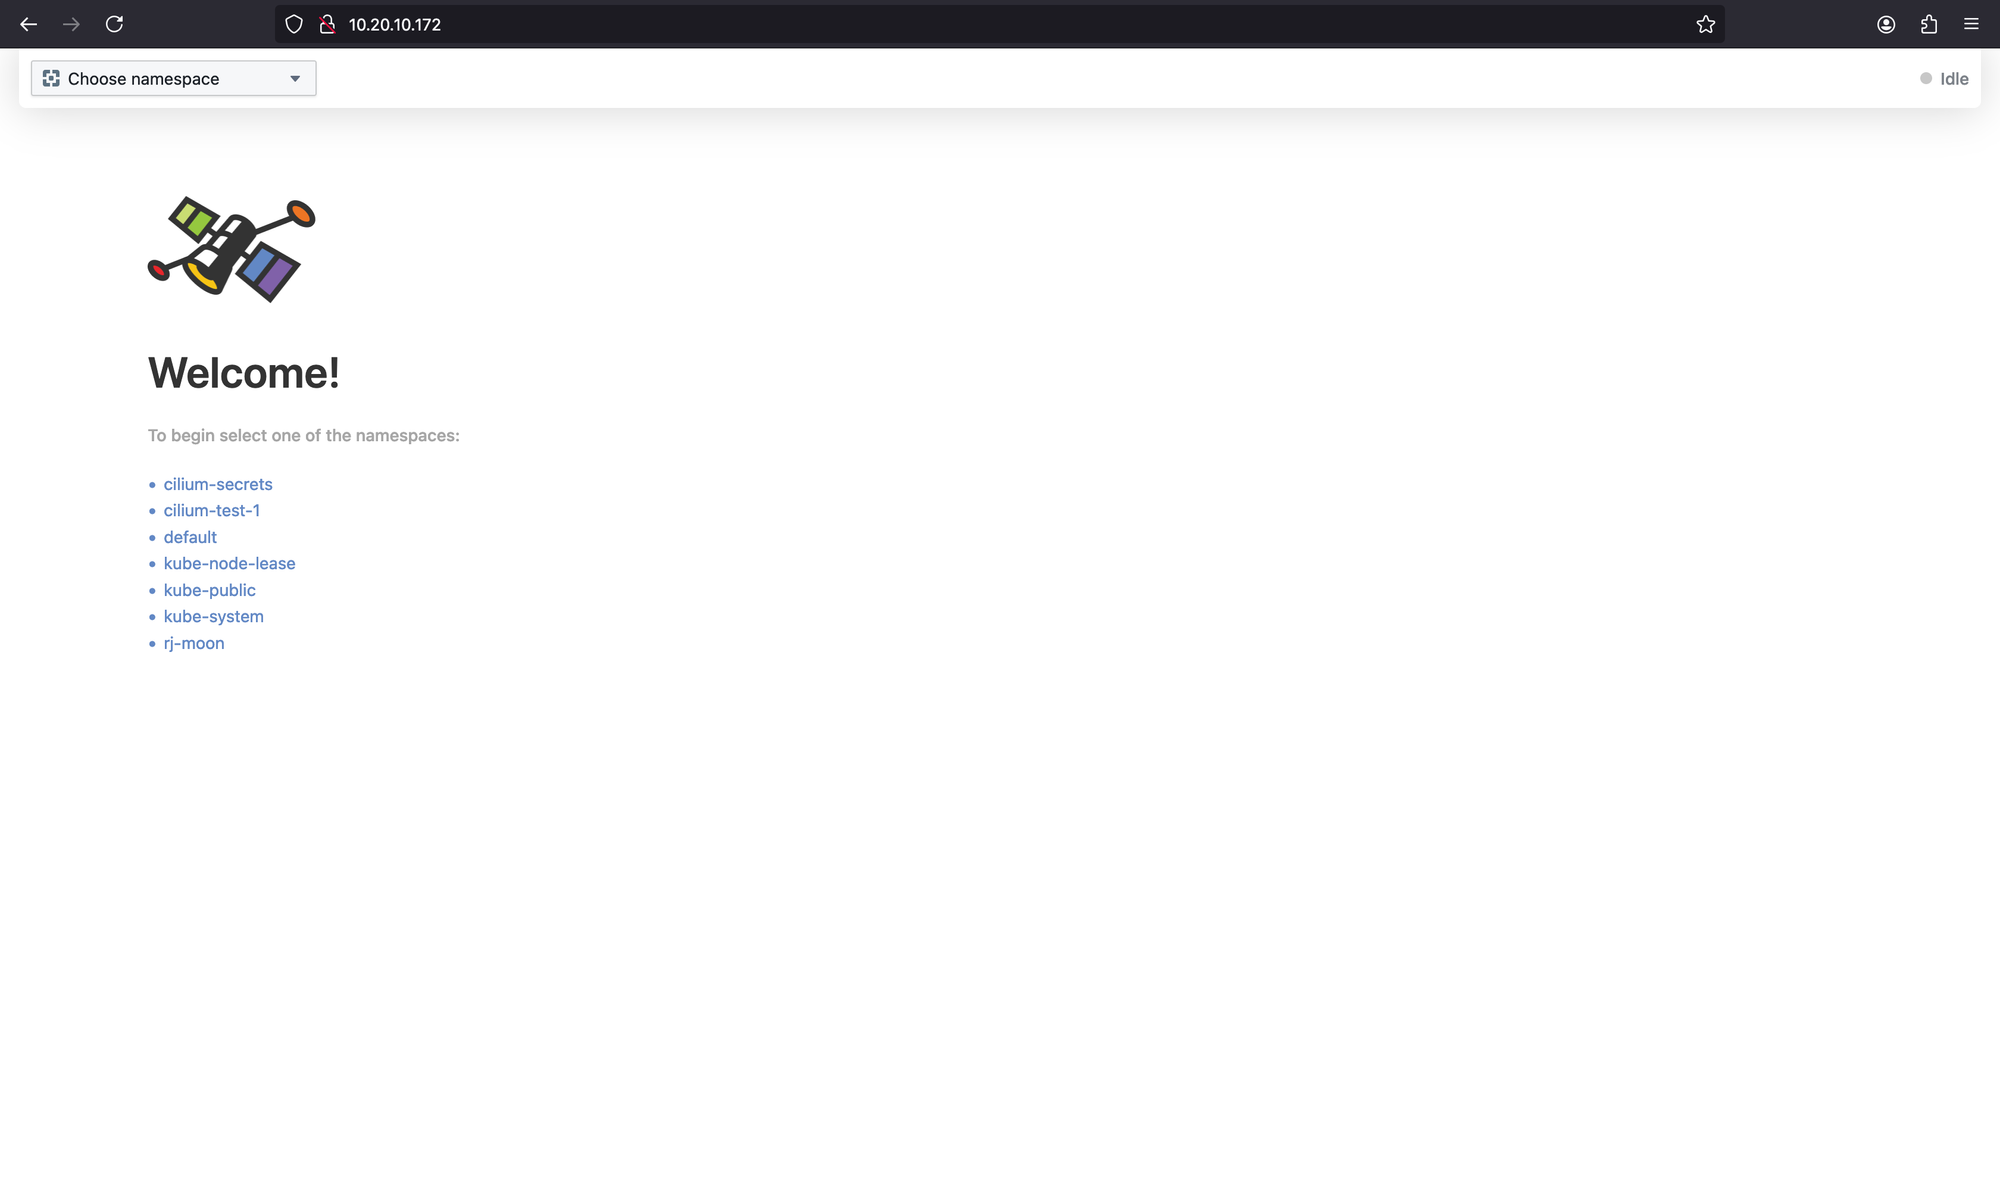
kubectl get svc hubble-ui -n kube-systemNAME TYPE CLUSTER-IP EXTERNAL-IP PORT(S) AGE
hubble-ui LoadBalancer 10.43.212.137 10.20.10.172 80:32088/TCP 24mNow you can connect to Hubble via http://10.20.10.172/